Import / Export data
Exchange data with another Vault product.
- Import / Export Data Overview
- Import Data
- Data Import Errors
- Export Unencrypted Vault
- Export Encrypted Vault
- Reimport Encrypted Export
Import / Export Data Overview
Data can be imported into or exported from either an Individual Vault or a Shared Vault.
In this way, data can be exported from one vault and the data reimported into another Vault.
- Import Data: Data can be imported into a Vault using a variety of file formats. Data is encrypted locally before being sent to the server for storage.
- Data Import Errors : If the data does not conform with the WALLIX Enterprise Vault data requirements, a data import error message is displayed. The data can be corrected before being imported.
- Export Unencrypted Vault: A Vault can be exported and downloaded to your computer without first being encrypted. This is possible for Individual and Shared Vaults.
- Export Encrypted Vault: A Vault can be encrypted using one of two methods (Account restricted or Password protected) before being exported.
- Reimport Encrypted Export: When data is exported using the Account Restricted method, it can be reimported into the same vault.
Import Data
This procedure applies to Individual Vaults and Shared Vaults.
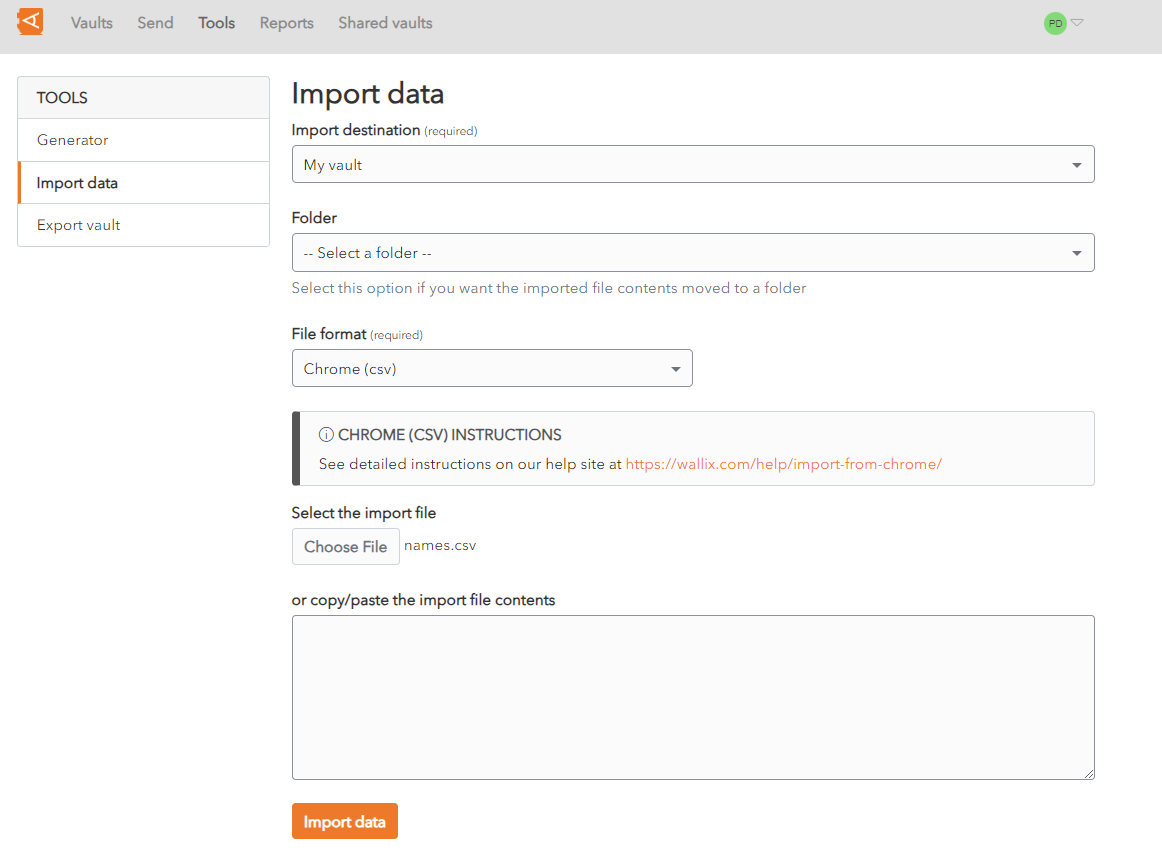
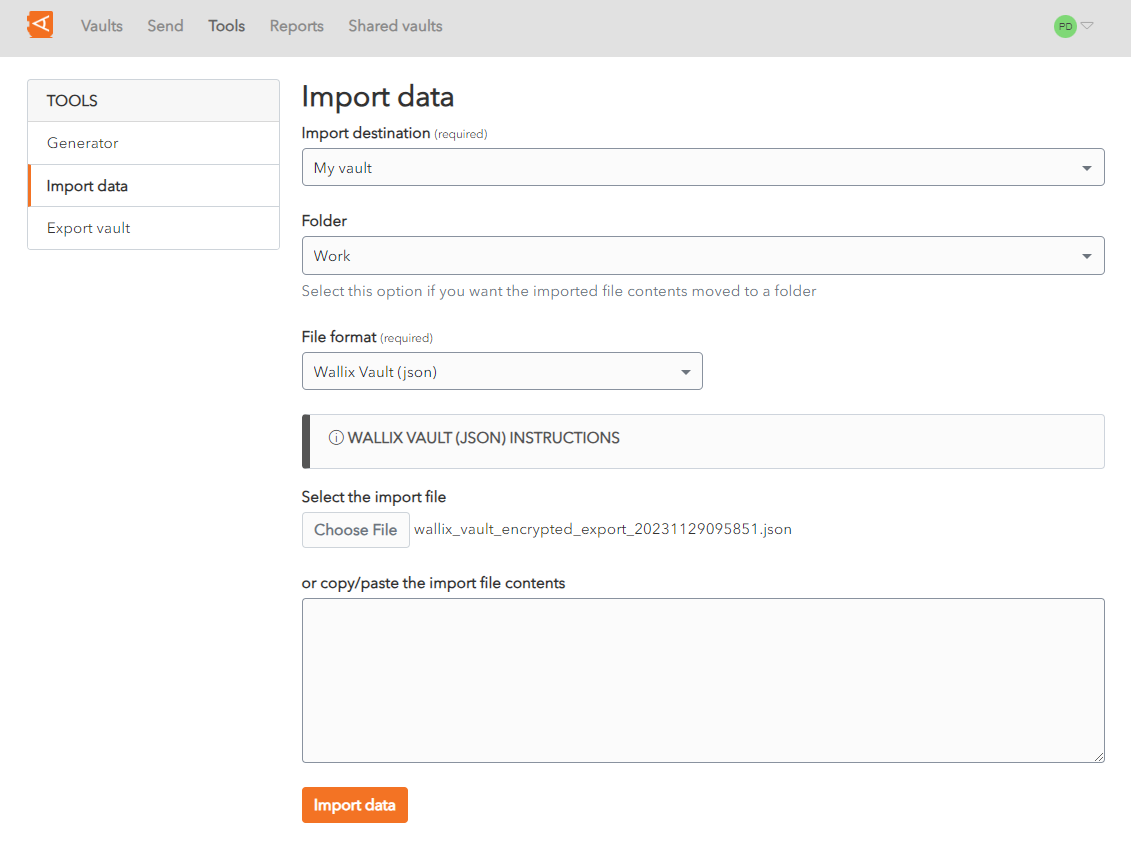
From the Import Destination dropdown, choose a Vault into which to import the data. This field is mandatory.
From the Folder dropdown, choose the folder into which to import the data. This field is optional.
From the File format dropdown, choose the file format of the file to import. Instructions are displayed relative to the file format chosen. This field is mandatory.
From the Select the import file field, locate and choose the file to import.
Alternatively, copy/paste the import file contents to the large text field provided.
Click Import data to start the import. The data is imported.
If the import file is password protected, you will be prompted to enter the Password before the import can start.
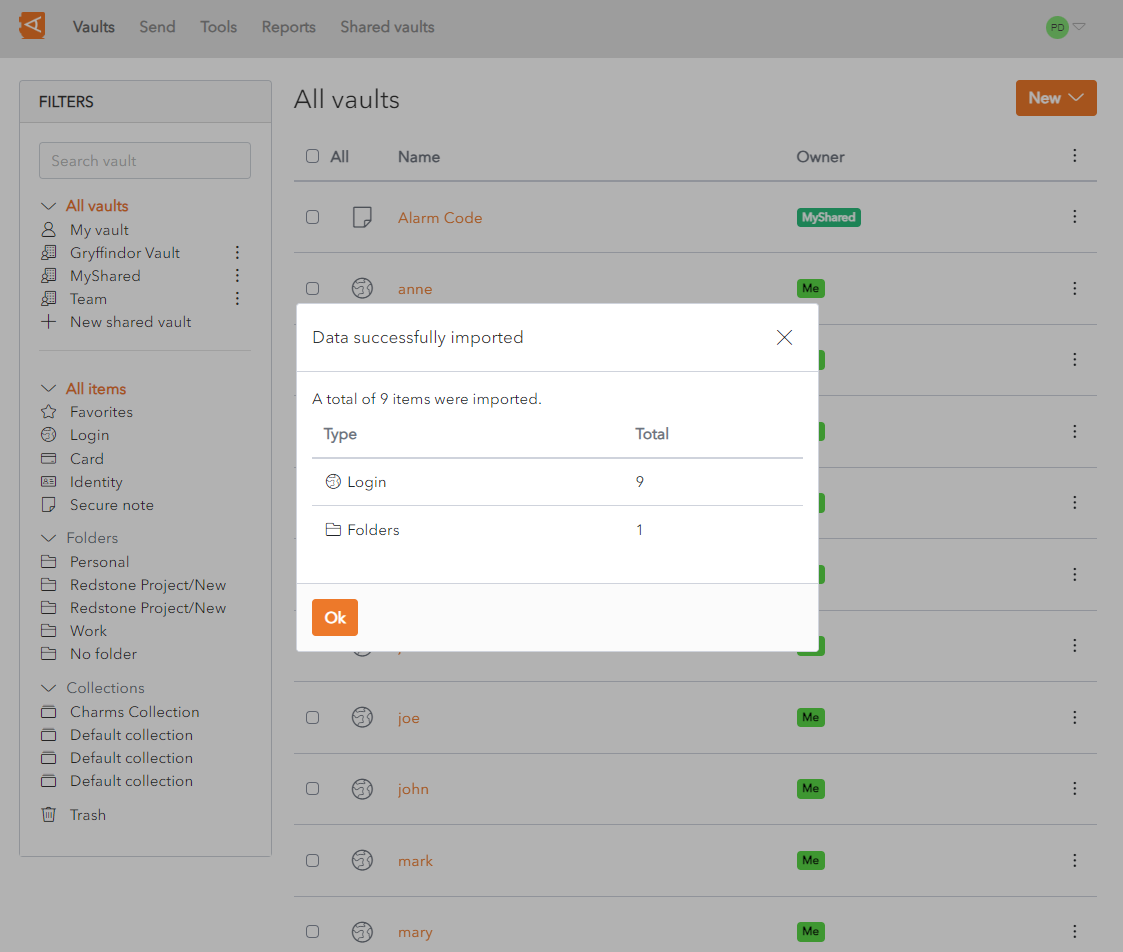
A Confirmation Screen is displayed, summarizing the data imported.
Click Ok to return to the Item List Screen.
Attachments, Password History, Sends and Trash cannot be imported using this feature. They need to be entered manually.
The Data Import feature does not verify if items imported are already in your vault. If an Item is imported and already exists in the Vault, a duplicate item is created.
When the import has finished, it is recommended that you delete the import file from your computer, for security reasons.
Data Import Errors
WALLIX Enterprise Vault imposes character counts on different fields types. If an import file contains data that exceeds the encrypted character limit for the field type, the file will not be imported.
When the data is encrypted those character counts grow between 30-50%. Therefore, a field that was within the required character limit before the encryption may exceed the character limit after encryption.
The following is an example Import Error message that could be displayed when an import fails:
[1][Login] "BestBank": The fields Notes exceeds the maximum encrypted value length of 10000 characters.
-
[1] denotes the index number of the item in question. This would typically be the row number in a CSV file, for example.
-
[Login] indicates that the item type is Login.
-
"BestBank" denotes the name of the item in question.
-
Notes denotes the name of the field where the character limit is exceeded.
-
10000 denotes the allowed character limit for that field.
Export Unencrypted Vault
Export from Individual Vault
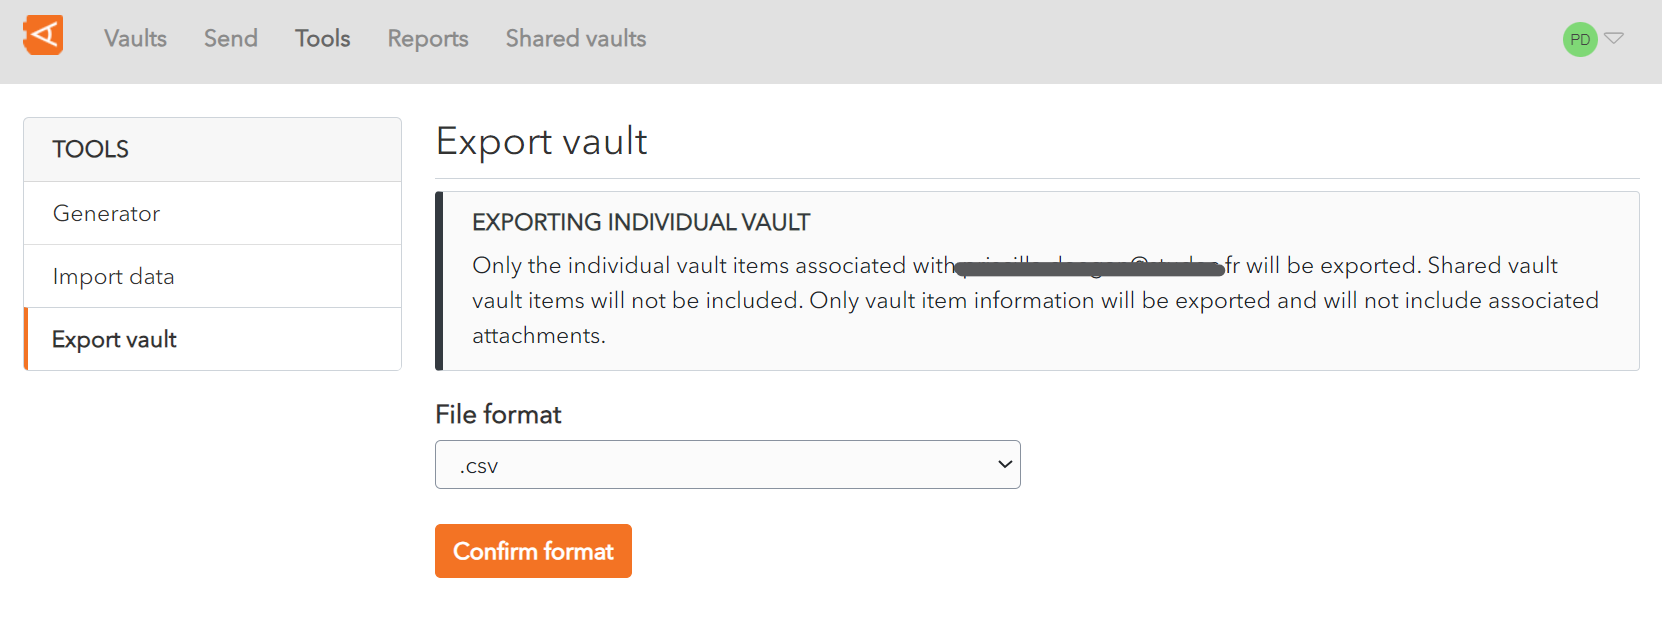
From the file format dropdown, choose the export file format.
Click Confirm format.
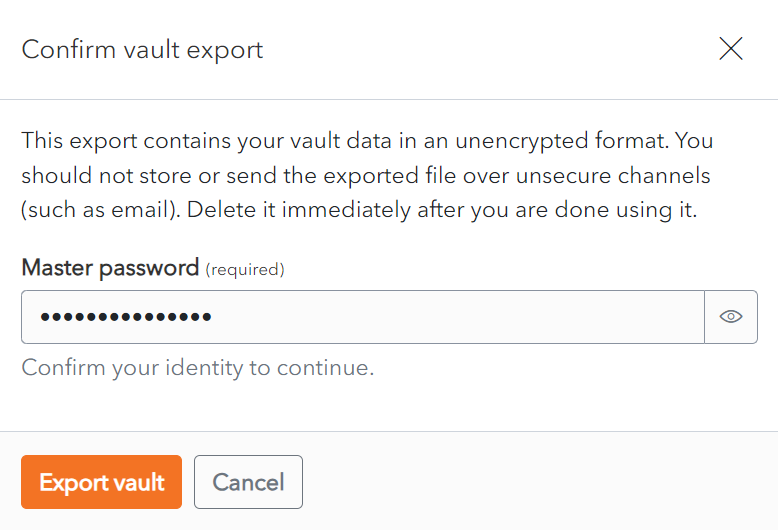
A Confirm vault export screen is displayed.
Enter your Master Password in the Master Password field.
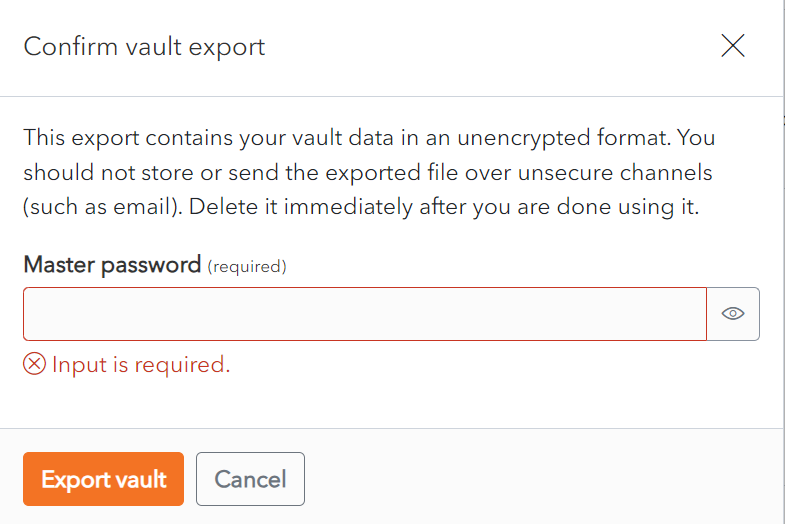
Click Export Vault to export the vault.The data is exported to the Downloads Folder on your computer.
Alternatively, click Cancel to cancel the operation.
Note on data included in export:
Only the individual vault items associated with your account are exported.
Only vault item information will be exported and will not include associated attachments.
Export from Shared Vault
From the Settings Screen of the Shared Vault chosen, click on the Export vault link. The Export Vault Screen is displayed.

From the file format dropdown, choose the export file format.
Click Confirm format.
Click Export Vault to export the vault. The data is exported to the Downloads Folder on your computer.
Alternatively, click Cancel to cancel the operation.
Note on data included in export:
Only the items associated with the Shared Vault selected are exported.
Items in individual vaults or other shared vaults will not be included.
Export Encrypted Vault
Export from Individual Vault
From the file format dropdown, choose the .json (Encrypted).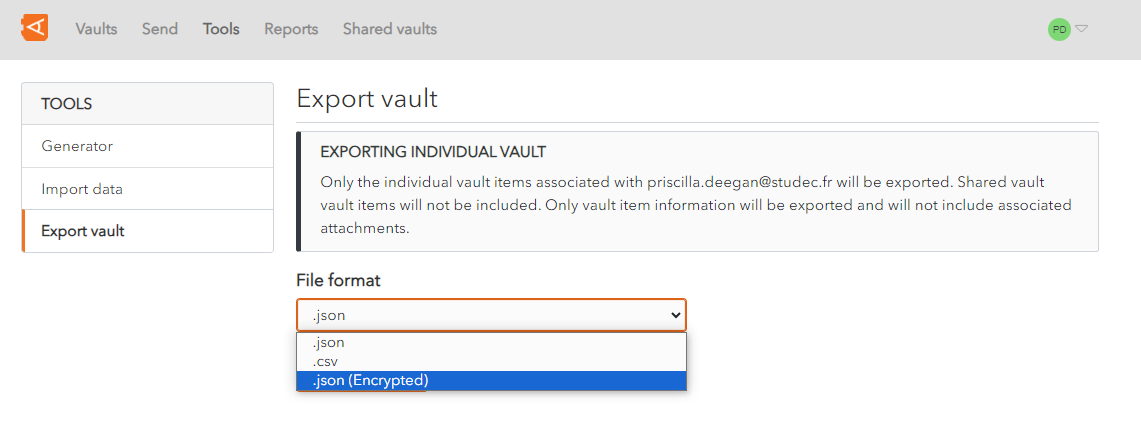
An Export type option appears, with 2 options to choose from:
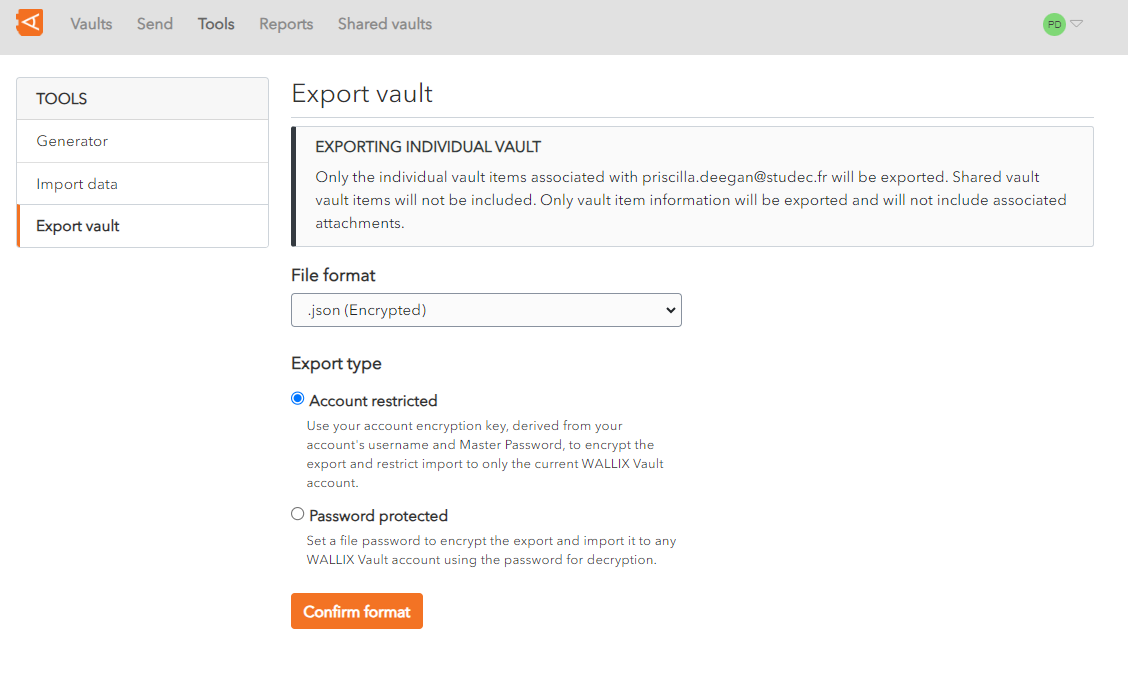
1. Export as Account restricted Vault
Use your account encryption key, derived from your account's username and Master Password, to encrypt the export.
The data can only be reimported into the same vault.
Choose the Account restricted option.
Click Confirm format.
A Confirm vault export screen is displayed.
Enter your Master Password in the Master Password field.
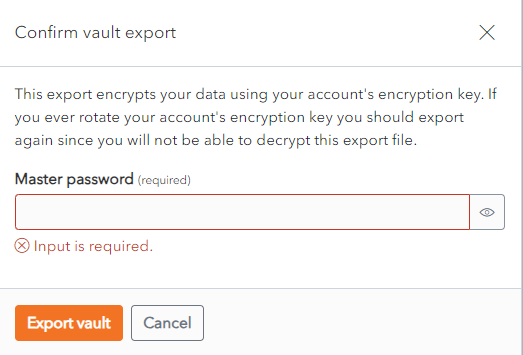
Click Export Vault to export the encrypted vault.The data is exported to the Downloads Folder on your computer in Wallix JSON format.
This data can only be reimported into the same vault.
Alternatively, click Cancel to cancel the operation.
2. Export as Password protected Vault
Password Protected: Use a password of your choosing to encrypt the export. The data can be imported into any WALLIX Enterprise Vault.
Choose the Password protected option.
2 new fields appear - File Password and Confirm file password.
Choose a password to encrypt your export with.
Enter your chosen password into these fields.
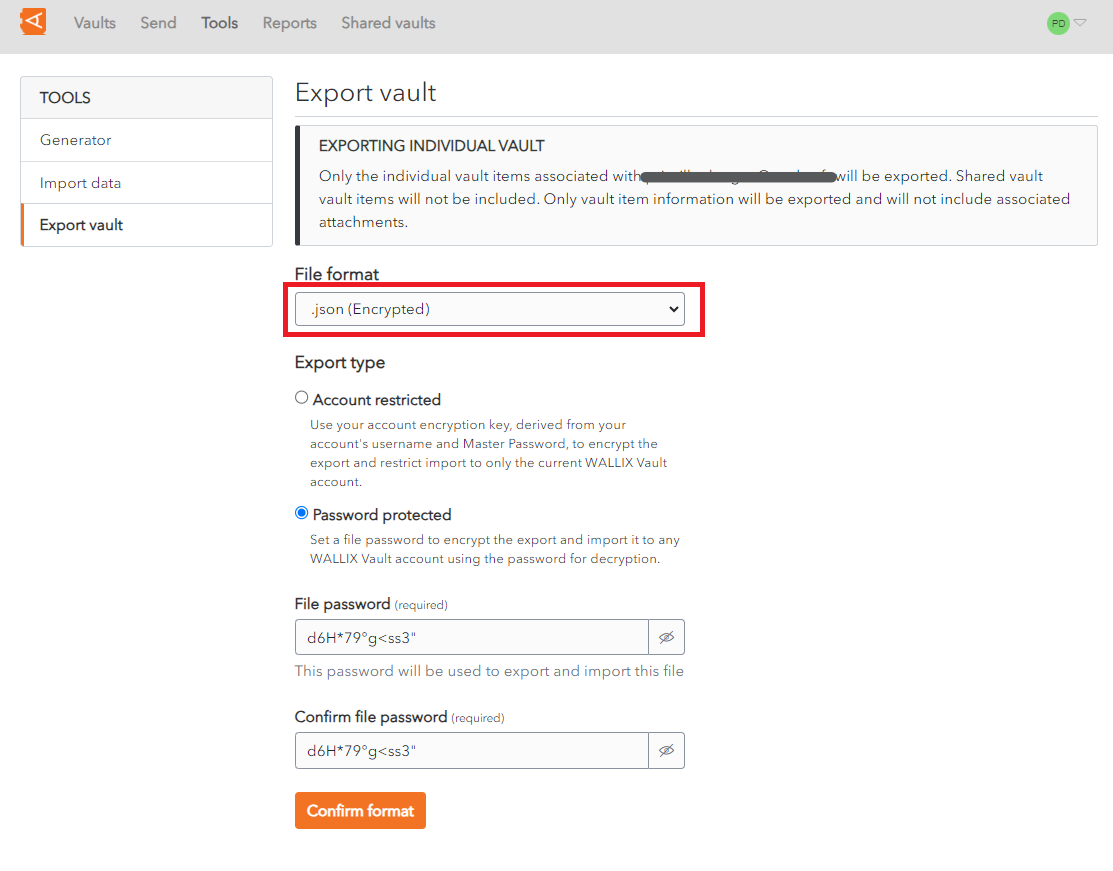
Click Confirm format.
A Confirm vault export screen is displayed.
Enter your Master Password in the Master Password field.
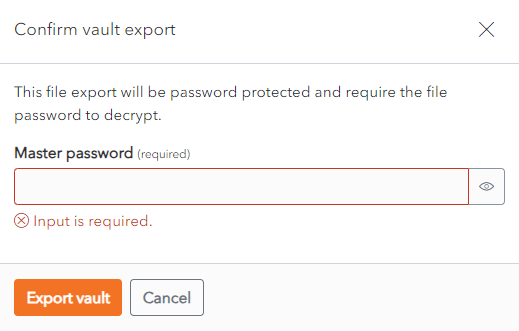
Click Export Vault to export the encrypted vault.The data is exported to the Downloads Folder on your computer.
Alternatively, click Cancel to cancel the operation.
Note on data included in export:
Only the individual vault items associated with your account are exported.
Only vault item information will be exported and will not include associated attachments.
Export from Shared Vault
From the Settings Screen of the Shared Vault chosen, click on the Export vault link. The Export Vault Screen is displayed.
The rest of the procedure is the same as for exporting encrypted individual vault data.
Note on data included in export:
Only the items associated with the Shared Vault selected are exported.
Items in individual vaults or other shared vaults will not be included.
Reimport Encrypted Export
It is possible to reimport an Exported Encrypted Vault.
From Tools > Import Data, the Import Data screen appears.
From the Import destination dropdown, choose the Vault to import the data to. This is a required field.
Encrypted vaults can only be reimported into the Vault they were exported from.
From the Folder dropdown, choose the Folder to save the Vault data to.
From the File Format dropdown, choose Wallix Vault (json) format. This is the file format that the Encrypted Exported Vault.
From Select the import file, choose the encrypted vault to reimport.
Click the Import Data button to reimport the Encypted Exported Vault. The Vault data is reimported to the specified vault and folder.
Alternatively, click Cancel to cancel the operation.