*For **Shared Vaults**, the **Collection dropdown** is displayed **instead** of the Folder dropdown.*
From the **File format dropdown**, choose the file format of the file to import. **Instructions** are displayed relative to the file format chosen. This field is **mandatory**. From the **Select the import file field**, locate and choose the file to import. Alternatively, **copy/paste the import file contents** to the large text field provided. Click **Import data** to start the import. The data is imported. If the **import file** is **password protected**, you will be prompted to **enter the Password** before the import can start. A **Confirmation Screen** is displayed, **summarizing** the **data imported**. Click **Ok** to return to the **Item List Screen**. [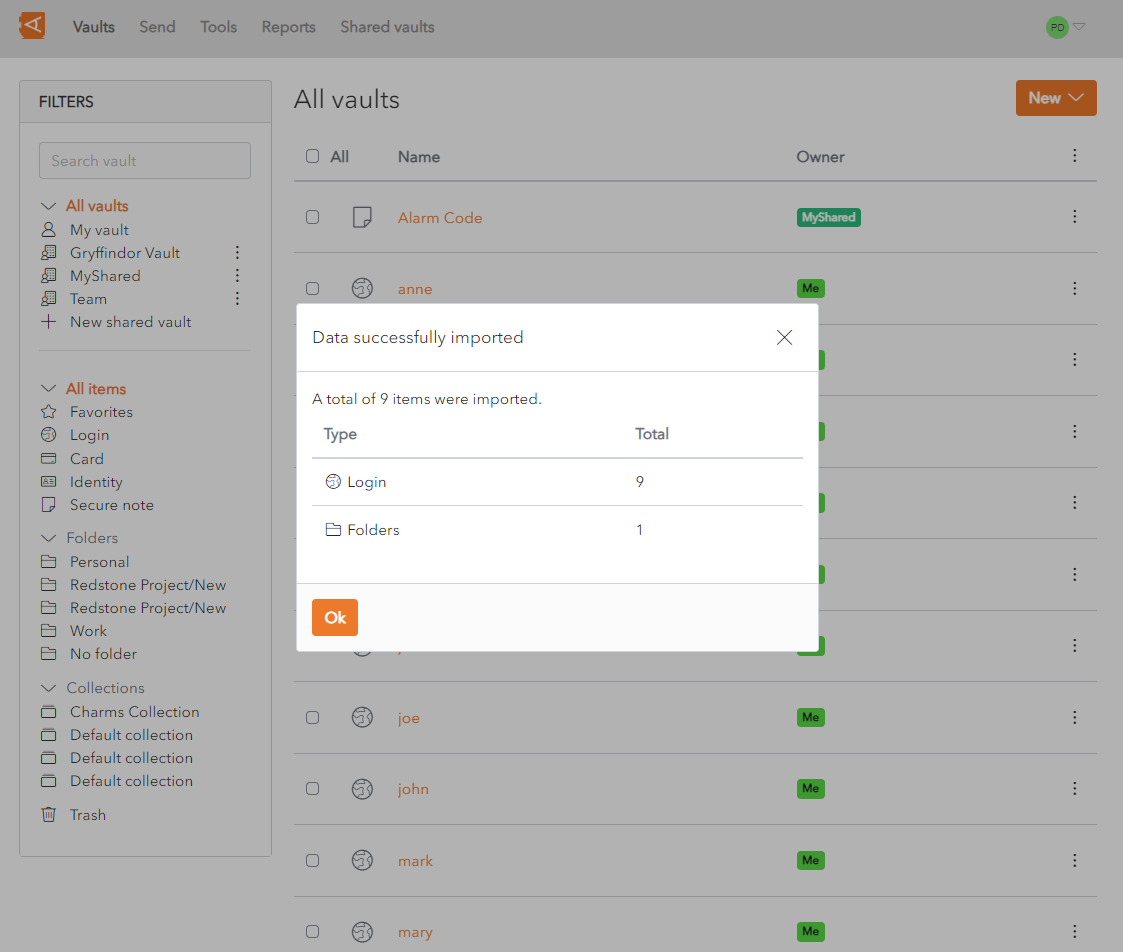](https://vault-doc.wallix.com/uploads/images/gallery/2023-11/data-imported.png)Attachments, Password History, Sends and Trash **cannot be imported** using this feature. They need to be entered manually.
*The Data Import feature **does not verify** if **items** imported are **already in your vault**. If an Item is imported and already exists in the Vault, a **duplicate** item is created.*
*When the import has finished, it is recommended that you **delete the import file** from your **computer**, for security reasons.*
# Data Import Errors WALLIX Enterprise Vault **imposes character counts** on different fields types. If an import file contains data that **exceeds** the **encrypted character limit** for the field type, the **file** will **not** be **imported**. When the **data** is **encrypted** those character counts grow between **30-50%**. Therefore, a field that was within the required character limit before the encryption **may exceed** the **character limit after encryption**. The following is an example **Import Error message** that could be **displayed** when an **import fails**:*\[1\]\[Login\] "BestBank": The fields Notes exceeds the maximum encrypted value length of 10000 characters.*
- \[1\] denotes the **index number** of the item in question. This would typically be the row number in a CSV file, for example. - \[Login\] indicates that the **item type** is Login. - "BestBank" denotes the **name** of the **item** in question. - Notes denotes the **name** of the **field** where the character limit is exceeded. - 10000 denotes the **allowed character limit** for that **field.** # Export Unencrypted Vault ### Export from Individual Vault From the **Tools Menu,** click **Export vault link.** The **Export vault screen** is displayed. From the **file format dropdown**, choose the export file format. Click **Confirm format.** [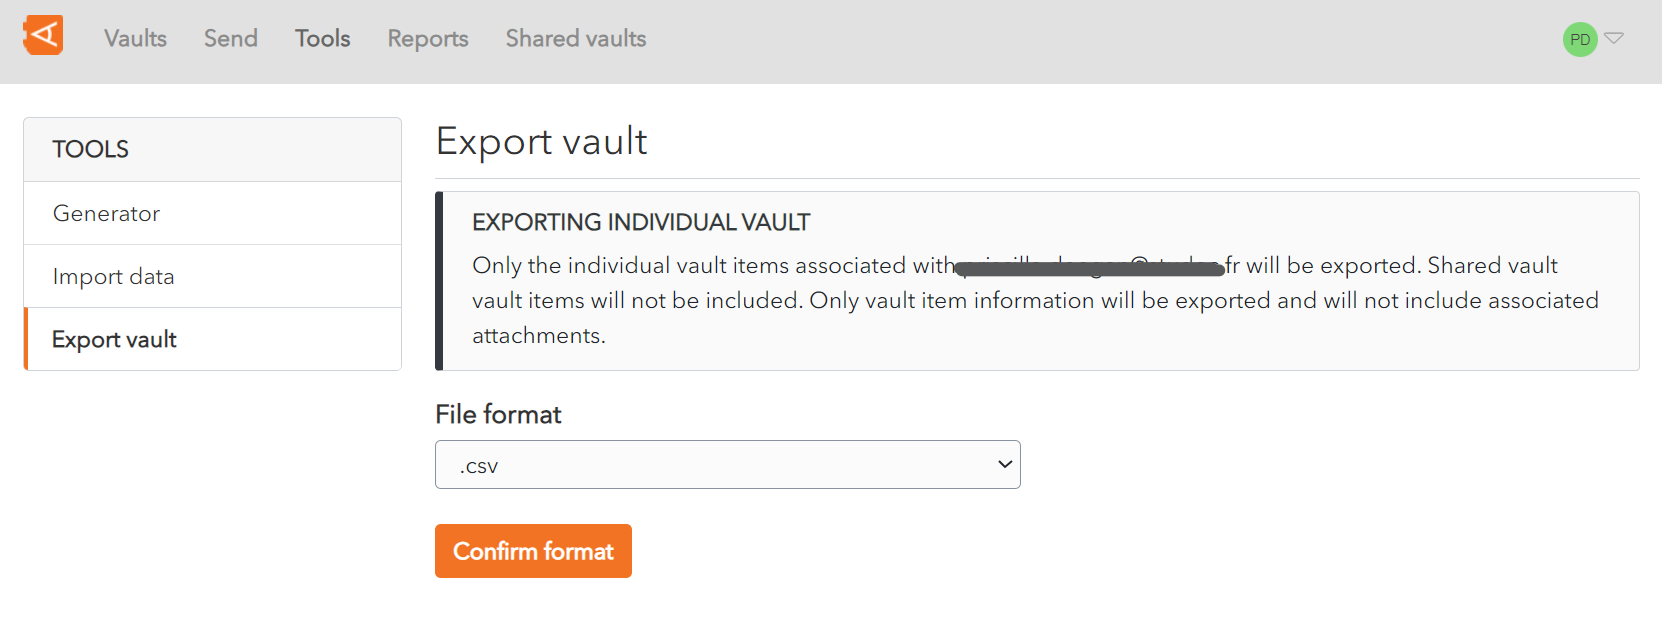](https://vault-doc.wallix.com/uploads/images/gallery/2023-11/capture-decran-2023-11-28-145753.png) A **Confirm vault export screen** is displayed. Enter your **Master Password** in the Master Password field. [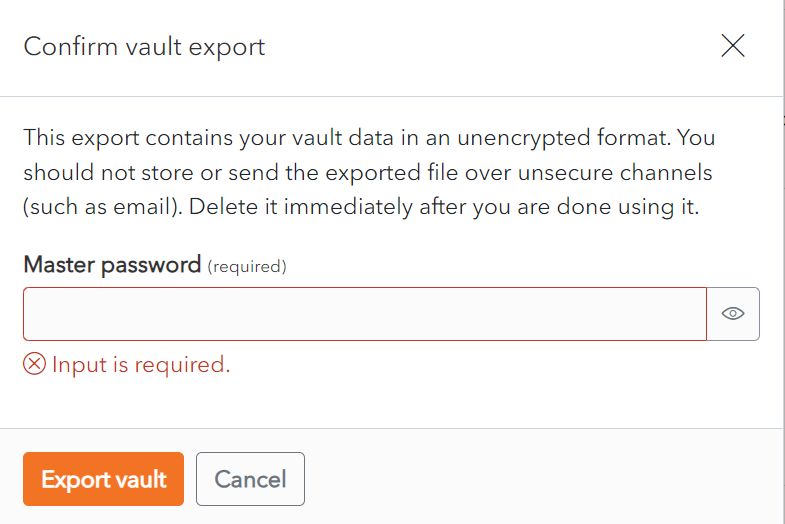](https://vault-doc.wallix.com/uploads/images/gallery/2023-11/confirm-vault-export.png) Click **Export Vault** to export the vault.The data is **exported** to the **Downloads Folder** on your computer. Alternatively, click **Cancel** to cancel the operation.***Note on data included in export:***
*Only the individual vault **items associated with your account** are exported.*
***Shared vault** **items** will **not** be **included**.*
*Only vault item information will be exported and will **not include associated** **attachments**.*
### Export from Shared Vault From the **Settings Screen** of the **Shared Vault chosen**, click on the **Export vault** link. The **Export Vault Screen** is displayed. [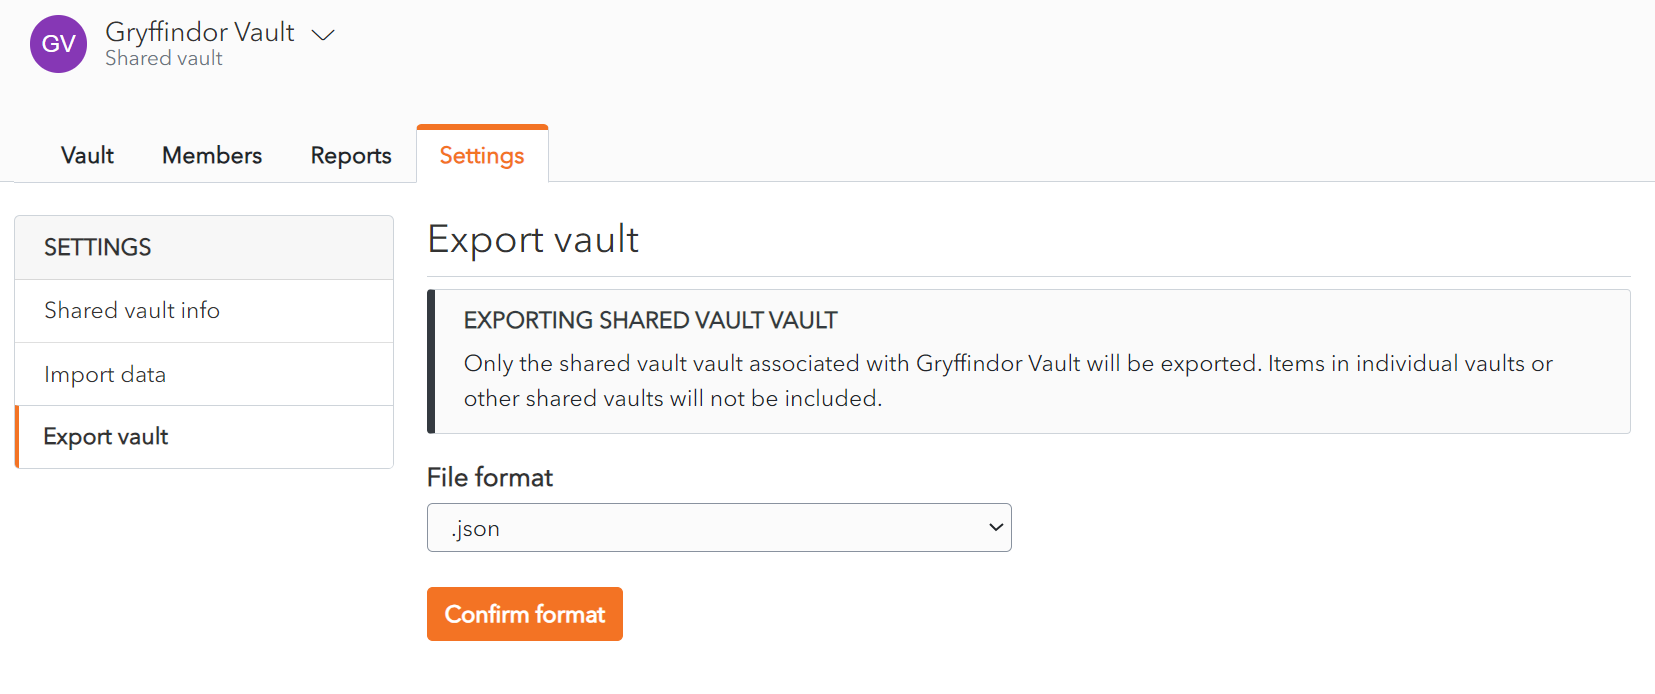](https://vault-doc.wallix.com/uploads/images/gallery/2023-11/shared-vault-export-screen.png) From the **file format dropdown**, choose the export file format. Click **Confirm format.** [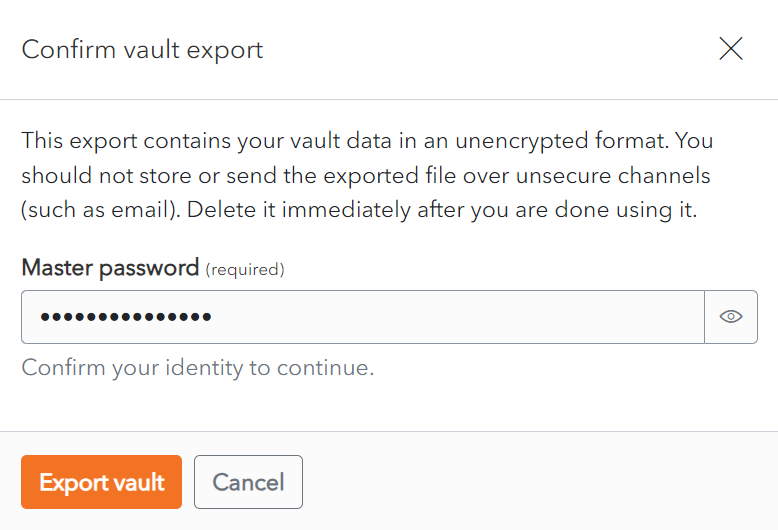](https://vault-doc.wallix.com/uploads/images/gallery/2023-11/confirm-shared-vault-export.png) Click **Export Vault** to export the vault. The data is **exported** to the **Downloads Folder** on your computer. Alternatively, click **Cancel** to cancel the operation.***Note on data included in export:***
***Only** the **items** associated with the **Shared Vault selected** are **exported**.*
***Items** in individual vaults or **other** shared **vaults** will **not** be **included**.*
# Export Encrypted Vault ### Export from Individual Vault From the **Tools Menu,** click **Export vault link.** The **Export vault screen** is displayed. From the **file format dropdown**, choose the **.json (Encrypted)**.[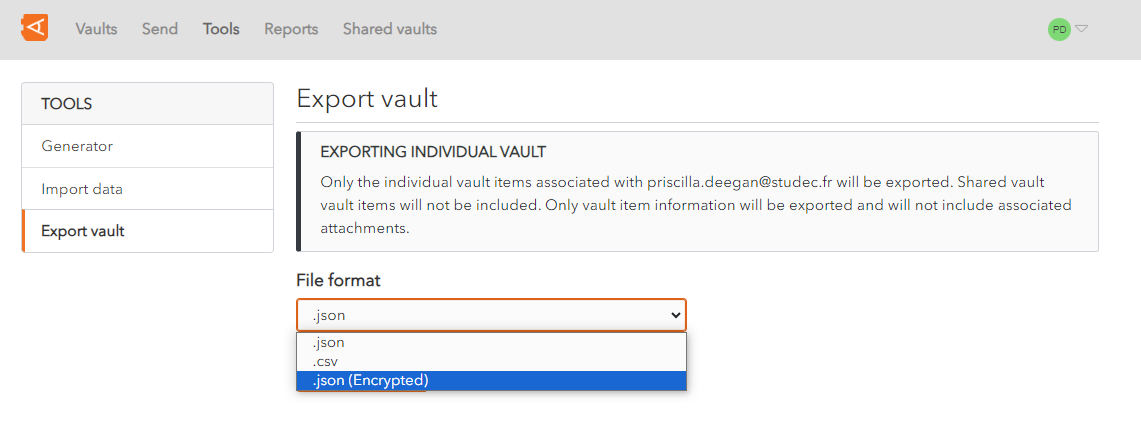](https://vault-doc.wallix.com/uploads/images/gallery/2023-11/create-encrypted-export.png) An **Export type option** appears, with **2 options** to choose from: [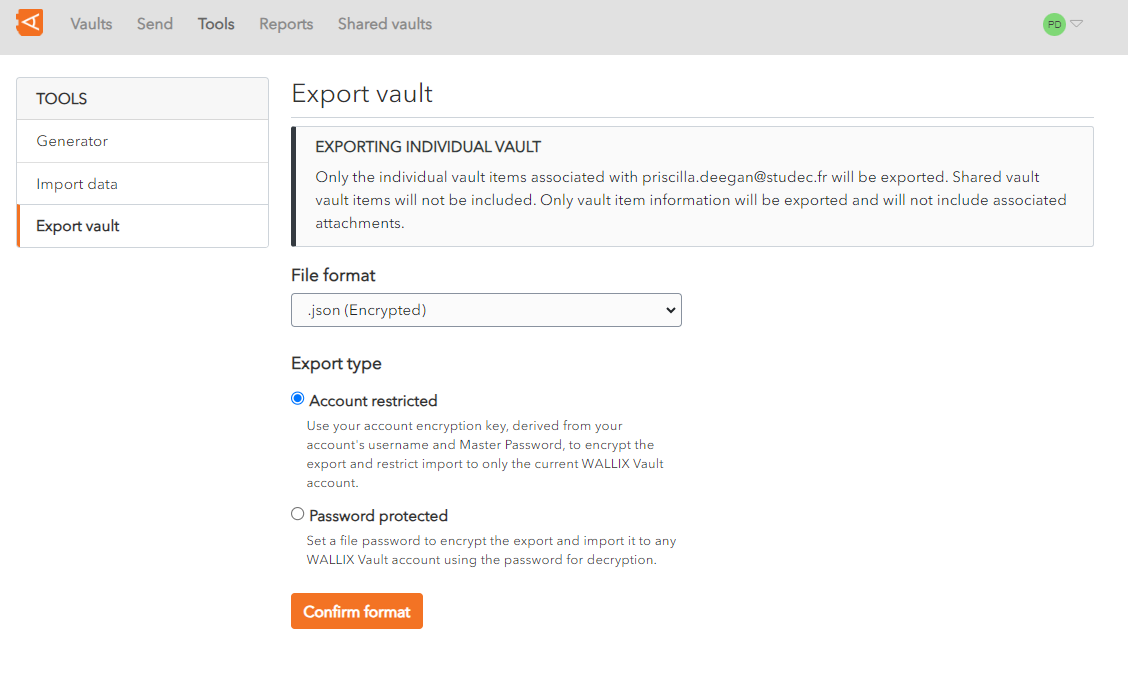](https://vault-doc.wallix.com/uploads/images/gallery/2023-11/create-encrypted-export-choose-export-type.png) ##### 1. Export as Account restricted Vault Use your **account encryption key**, derived from your account's username and Master Password, to encrypt the export. The data can only be **reimported** into the **same vault.** Choose the **Account restricted** option. Click **Confirm format.** A **Confirm vault export screen** is displayed. Enter your **Master Password** in the Master Password field. [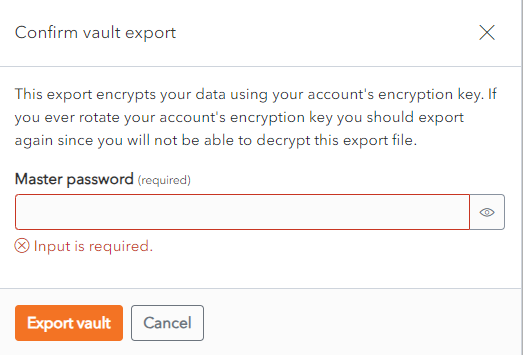](https://vault-doc.wallix.com/uploads/images/gallery/2023-11/confirm-vault-export-encrypted-vault.png) Click **Export Vault** to export the encrypted vault.The data is **exported** to the **Downloads Folder** on your computer in **Wallix JSON format**.This data can **only** be **reimported** into the **same** **vault**.
Alternatively, click **Cancel** to cancel the operation. ##### 2. Export as Password protected Vault **Password Protected:** Use a **password** of your choosing to encrypt the export. The data can be **imported** into **any** WALLIX Enterprise **Vault**. Choose the **Password protected** option. 2 new fields appear - **File Password** and **Confirm file password**. **Choose** a **password** to encrypt your export with. Enter your chosen password into these fields. [](https://vault-doc.wallix.com/uploads/images/gallery/2023-11/export-password-protected-vault-2.png) Click **Confirm format.** A **Confirm vault export screen** is displayed. Enter your **Master Password** in the Master Password field. [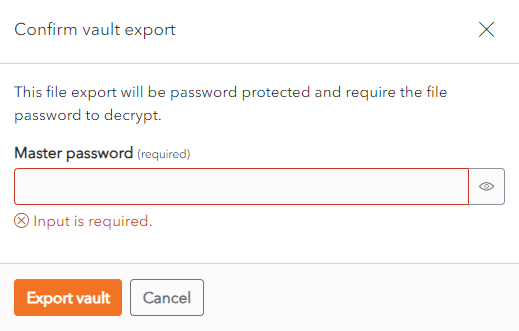](https://vault-doc.wallix.com/uploads/images/gallery/2023-11/confirm-vault-export-encrypted-vault-password-protected.png) Click **Export Vault** to export the encrypted vault.The data is **exported** to the **Downloads Folder** on your computer. Alternatively, click **Cancel** to cancel the operation.***Note on data included in export:***
*Only the individual vault **items associated with your account** are exported.*
***Shared vault** **items** will **not** be **included**.*
*Only vault item information will be exported and will **not include associated** **attachments**.*
### Export from Shared Vault From the **Settings Screen** of the **Shared Vault chosen**, click on the **Export vault** link. The **Export Vault Screen** is displayed. [](https://vault-doc.wallix.com/uploads/images/gallery/2023-11/shared-vault-export-screen.png) The **rest** of the procedure is the **same** as for [exporting encrypted individual vault data](https://vault-doc.wallix.com/link/81#bkmrk-%C2%A0).***Note on data included in export:***
***Only** the **items** associated with the **Shared Vault selected** are **exported**.*
***Items** in individual vaults or **other** shared **vaults** will **not** be **included**.*
Encrypted vaults can **only** be **reimported into** the **Vault** they were **exported from**.
From the **Folder dropdown**, choose the Folder to save the Vault data to. From the **File Format dropdown**, choose **Wallix Vault (json) format**. This is the file format that the Encrypted Exported Vault. From **Select the import file**, choose the encrypted vault to reimport. Click the **Import Data button** to reimport the Encypted Exported Vault. The Vault data is **reimported** to the **specified vault and folder**. [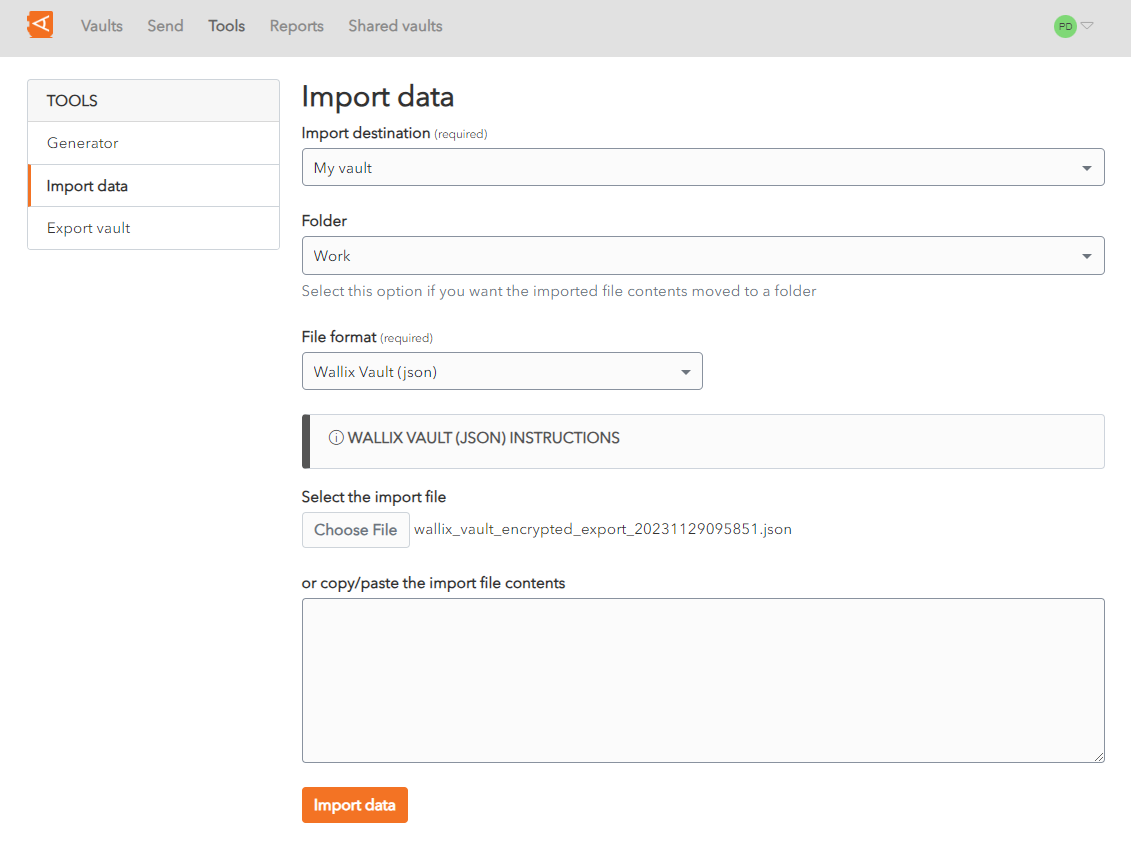](https://vault-doc.wallix.com/uploads/images/gallery/2023-12/capture-decran-2023-12-07-114015.png) Alternatively, click **Cancel** to cancel the operation.