Manage collections
Create collections to organize your shared items.
- Collections Overview
- Create Collection
- Edit Collection Information
- Manage Member Access to Collection
- Delete Collection
- Nested Collections
- Add, Edit or Delete Items
- Assign or Remove Items
- Unassigned Items
Collections Overview
A Collection is a way of managing access to items in a Shared Vault. Collections are only available in Shared Vaults.
Create a Collection within your Shared Vault to share items with members of the vault. You can Edit Collection Information after creation.
Add Member Access to the Collection and assign them permissions to limit what they can and cannot do. Edit Member Access or Remove Member Access from a collection.
Add Items to a Collection that you wish to share with other members of the collection.
Remove Items from a Collection if you no longer wish to share them with other members of the collection.
Use Nested Collections to organize your Collections.
Delete a Collection if it is no longer needed. Items within the Collection will not be deleted.
If an item is no longer assigned to any Collections, it is added to the Unassigned Collection.
Create Collection
Click on the Collection link.
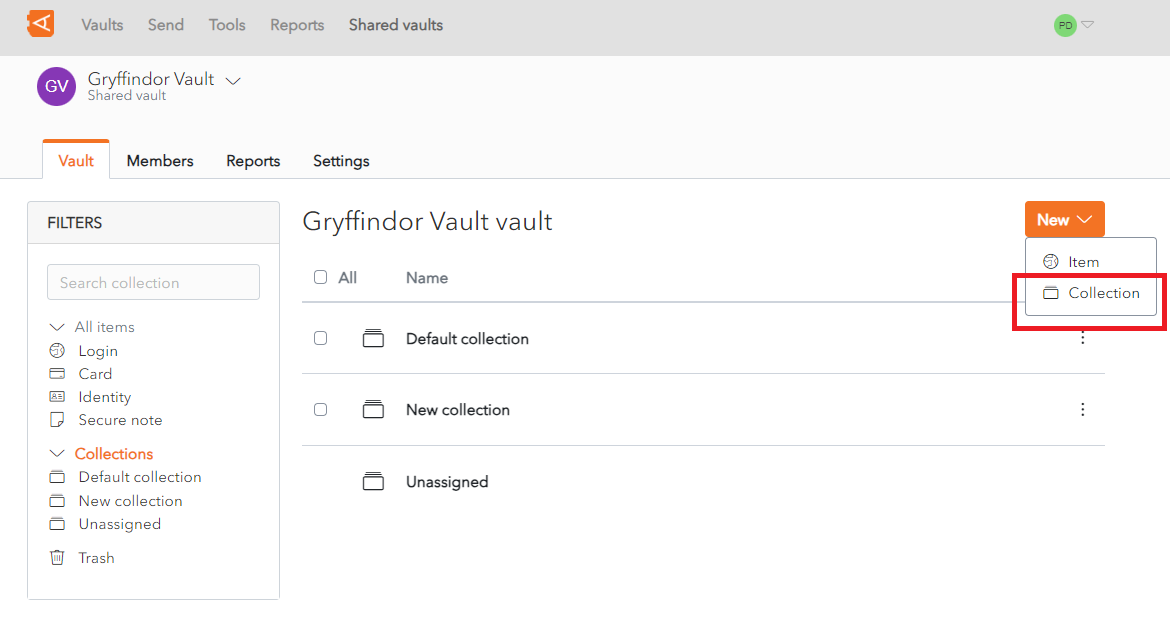
A New Collection Screen appears.
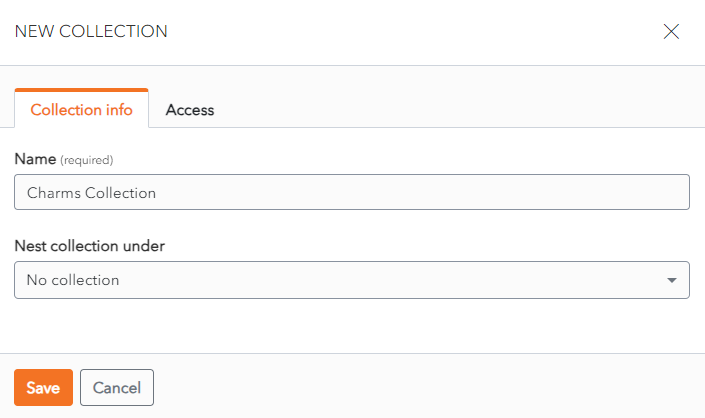
Enter a Collection Name in the Name Field.
If you wish to nest this Collection under an existing Collection, choose the Collection from the Nest collection under dropdown.
Click Save to create the Collection.
Alternatively, click Cancel to cancel the operation.
Edit Collection Information
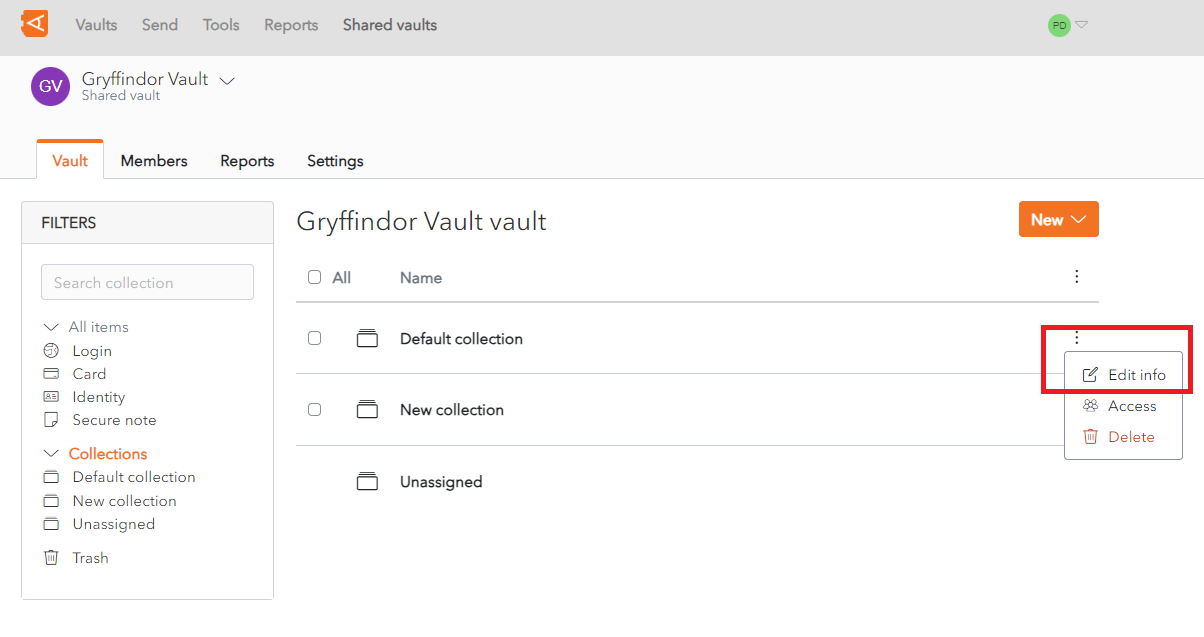
Click the ![]() More button beside a Collection. A context menu is displayed.
More button beside a Collection. A context menu is displayed.
Click the Edit info link.
Alternatively, the Edit Collection Screen can also be accessed from the Collection Screen.
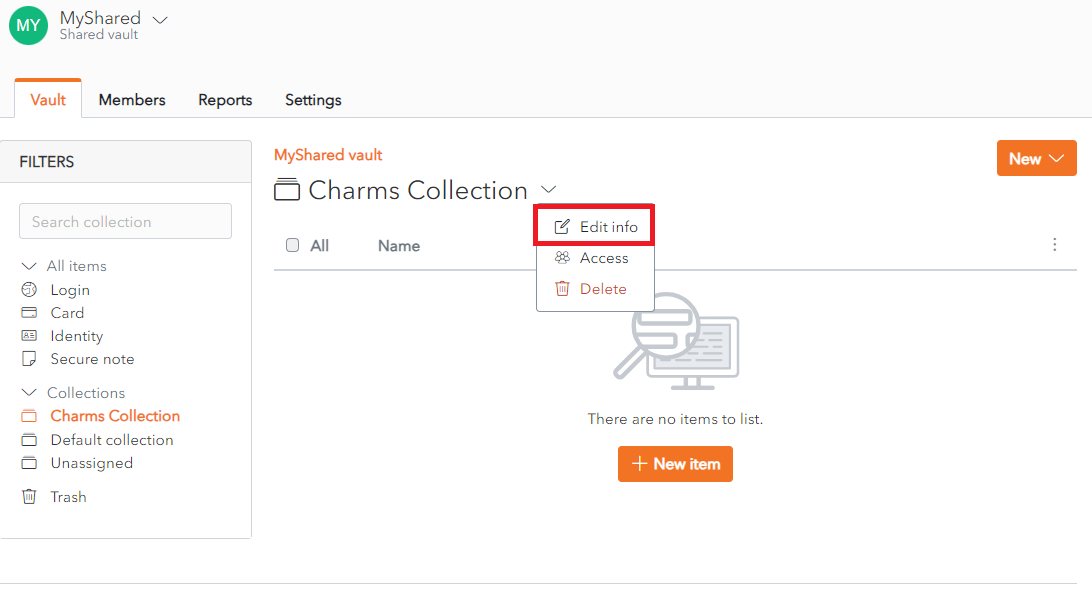
Click on a Collection in Collection List.
Click on the ![]() More button beside the Collection Name. A context menu displays.
More button beside the Collection Name. A context menu displays.
Click Edit info.
The Edit Collection Screen displays.
From the Collection Info Tab, change the Name and the Nest collection under fields.
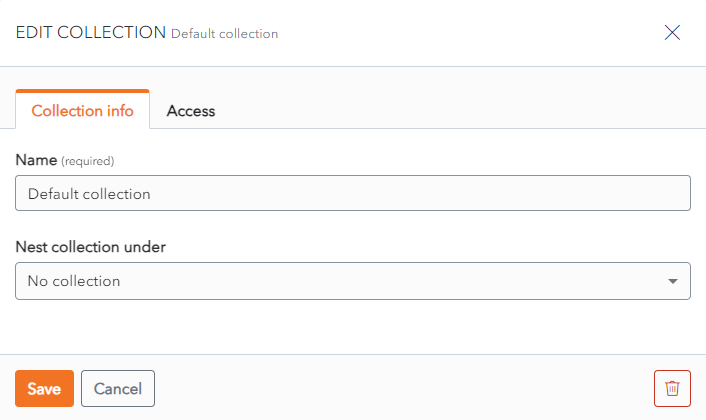
Click Save to save changes.
Alternatively, click Cancel to cancel the operation.
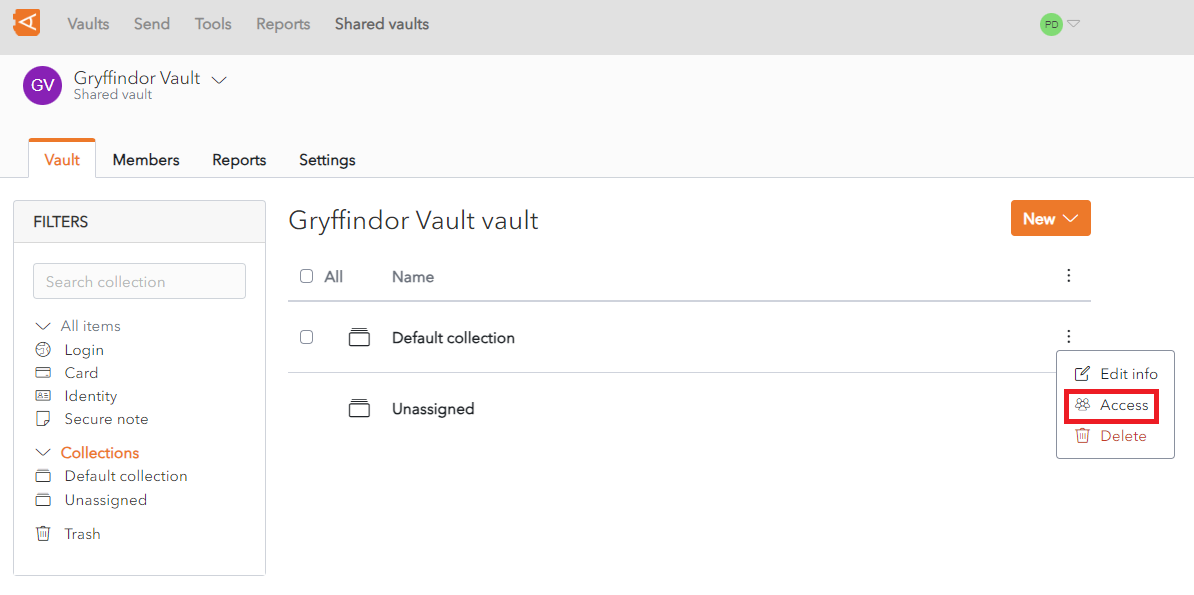
Manage Member Access to Collection
Click the ![]() More button beside a Collection. A context menu is displayed.
More button beside a Collection. A context menu is displayed.
Click the Access link.
Alternatively, the Edit Collection Screen can also be accessed from the Collection Screen by clicking the ![]() More button beside the Collection Name, then clicking the Access link in the context menu.
More button beside the Collection Name, then clicking the Access link in the context menu.
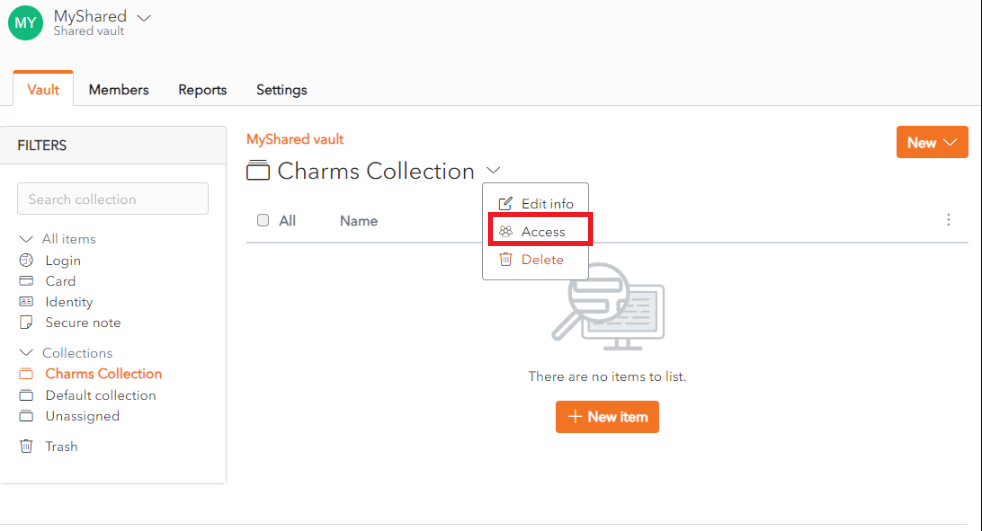
The Edit Collection Screen displays with the Access tab open.
Grant Member Access
To Grant a Shared Vault Member Access to a Collection, select the Permission and Select members.
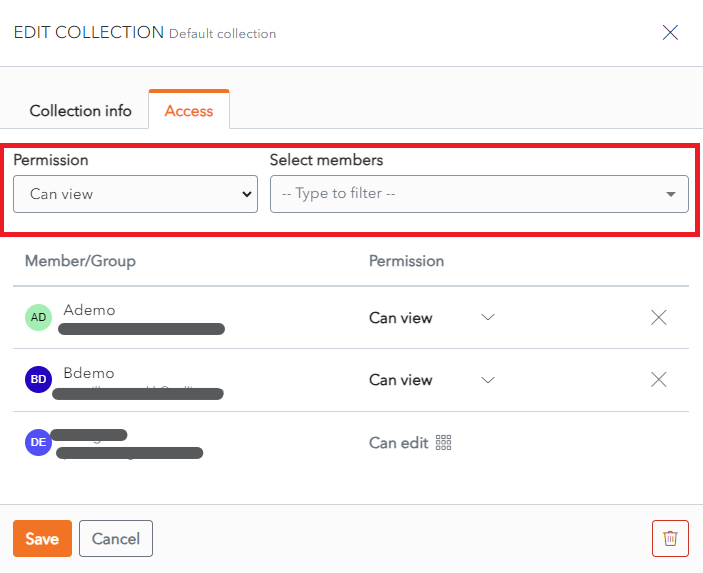
Click the Enter button. The Member is added with the permission selected.
Click Save to save changes.
Alternatively, click Cancel to cancel the operation.
Remove Member Access
To remove access to a Collection, click the X button beside the Member in the Member List.
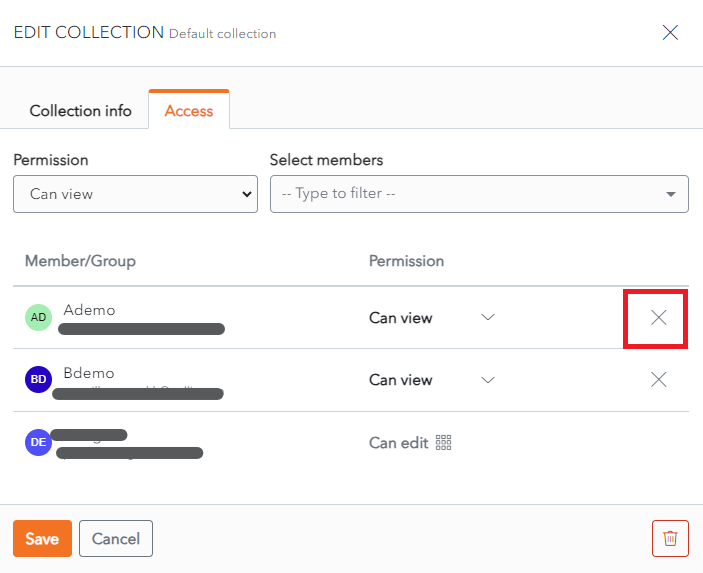
The Member is removed from the Collection.
Click Save to save changes.
Alternatively, click Cancel to cancel the operation.
Edit Member Access
To Edit a Member Access to a Collection, change the Permission in the Permission dropdown.
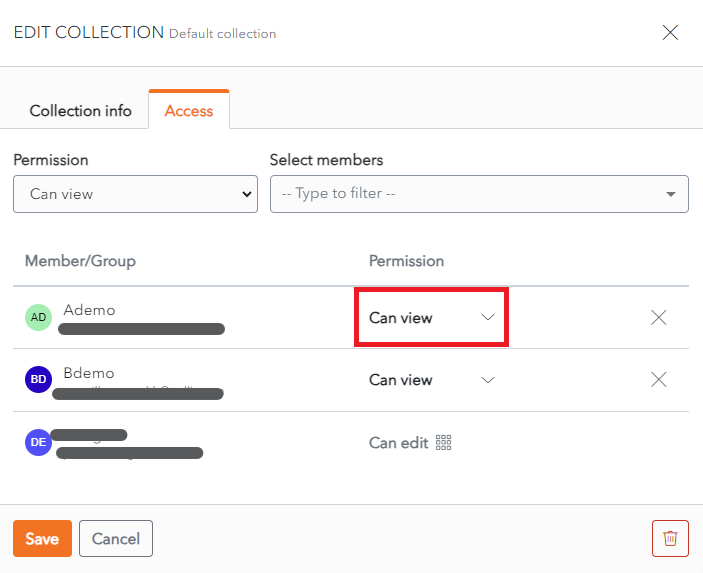
Click Save to save changes.
Alternatively, click Cancel to cancel the operation.
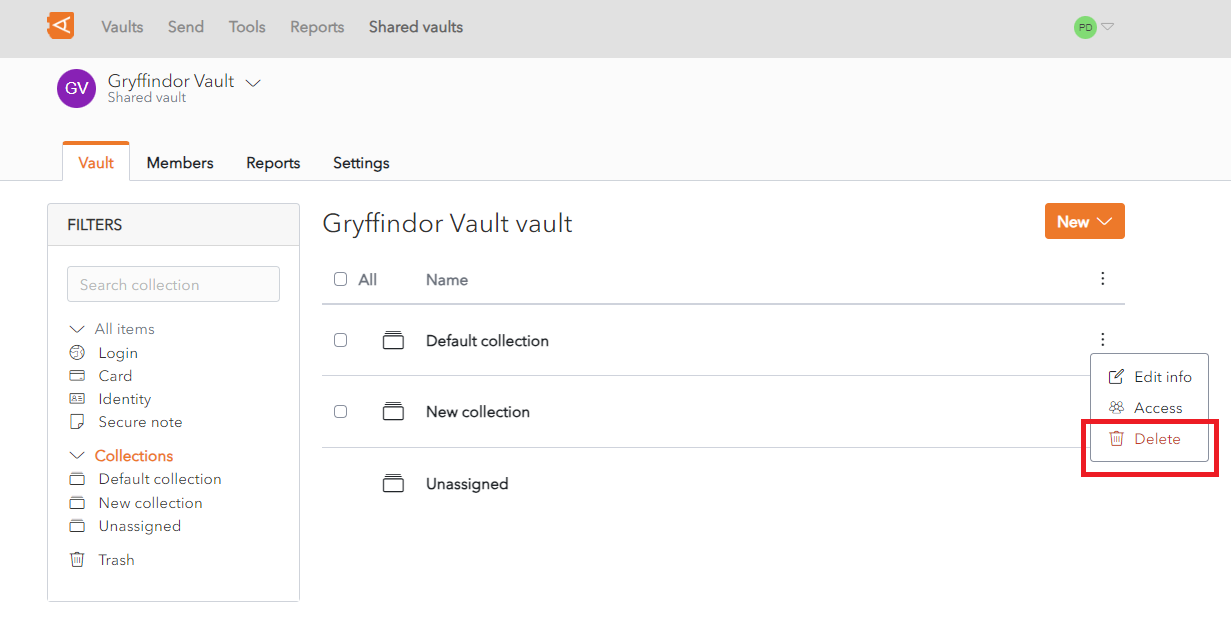
Delete Collection
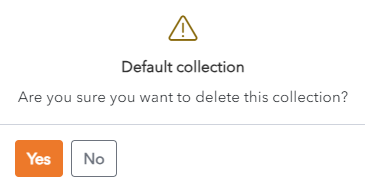
A Collection can be deleted from the Collection List Screen or from the Collection Screen. Items within the Collection will not be deleted. If an item is no longer assigned to any Collections, it is marked as an Unassigned Item.
From the Collection List Screen, click the ![]() More button. A context menu is displayed.
More button. A context menu is displayed.
Click the ![]() Delete link.
Delete link.
Alternatively, the Delete link can be accessed from the Collection Screen, click the ![]() More button. A context menu is displayed.
More button. A context menu is displayed.
Click the ![]() Delete link.
Delete link.
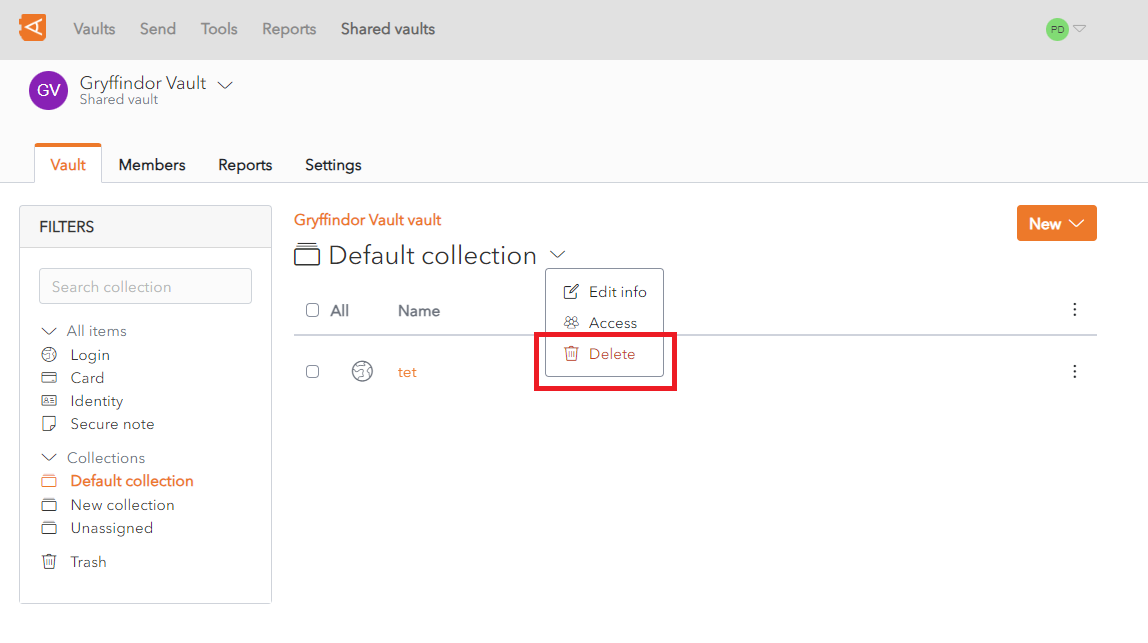
A Delete Collection Confirmation Popup is displayed.
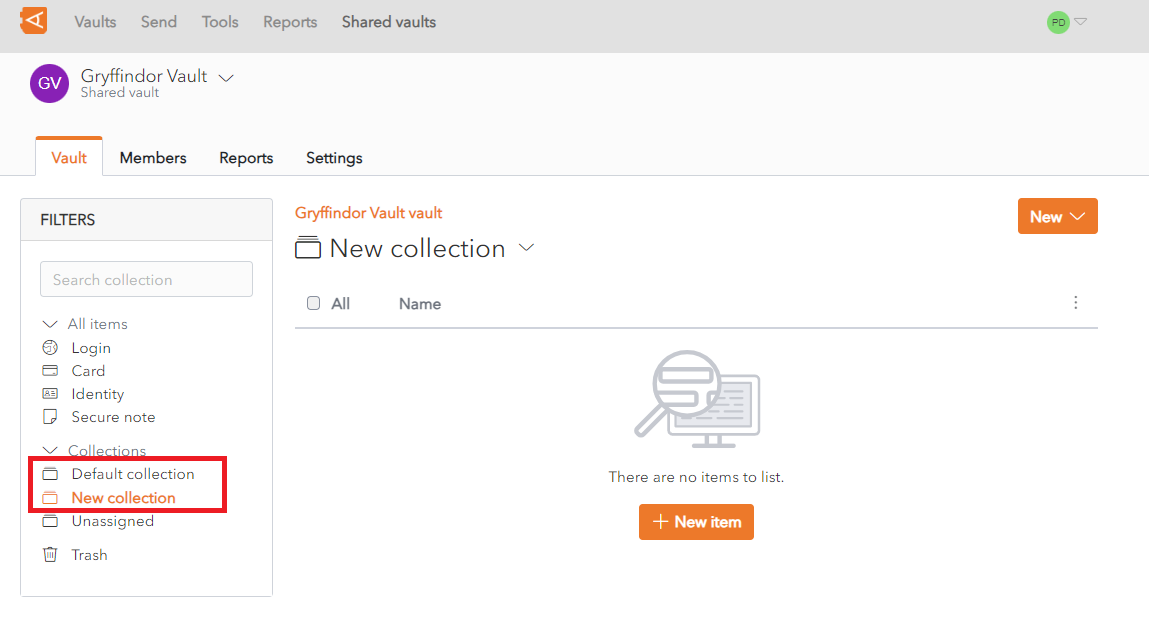
Nested Collections
Collections can be nested inside one another. This can be done when you Create a Collection or when you Edit a Collection.
For example, there are currently two Collections, Default Collection and New Collection which are at the same level.
From the Edit Collection Screen for the New Collection, select Default Collection from the Nest collection under field.
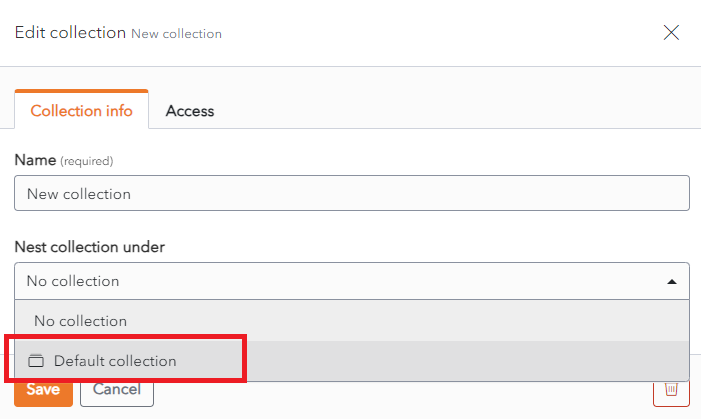
Click Save to save the changes. New Collection is now at a level below Default Collection.

Add, Edit or Delete Items
Create a Shared Vault Item
Follow the normal procedure for creating an Item, with one additional step.
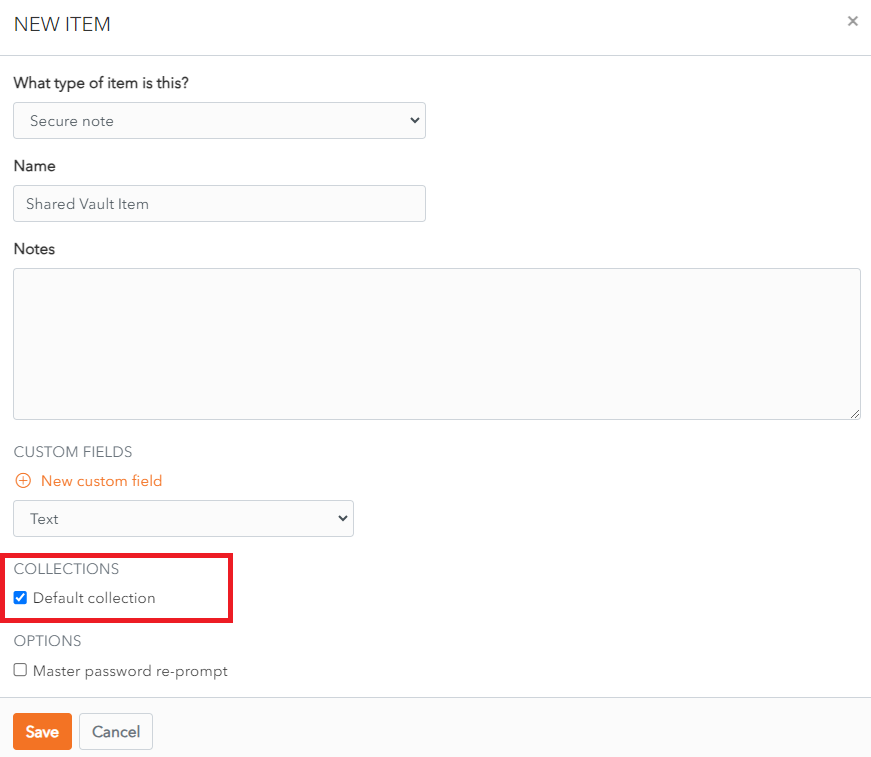
Items created in a Shared Vault have one extra field - the Collections Field, which is mandatory. A Shared Vault Item must be added to at least one Collection.
In the Collections Section of the New Item Screen, check the checkbox beside a Collection that you wish to add the Item to.
Then Click Save to create the Item.
Manage Shared Vault Items
The procedure to Edit an Item and Delete an Item are the same as for personal Vaults as are the Item Types.
Assign or Remove Items
The Item List for the Shared Vault is displayed.
Assign Item to Collections
Click the ![]() More button beside an Item. A context menu is displayed.
More button beside an Item. A context menu is displayed.
Click the Collections link to modify the List of Collections to which the Item is assigned.
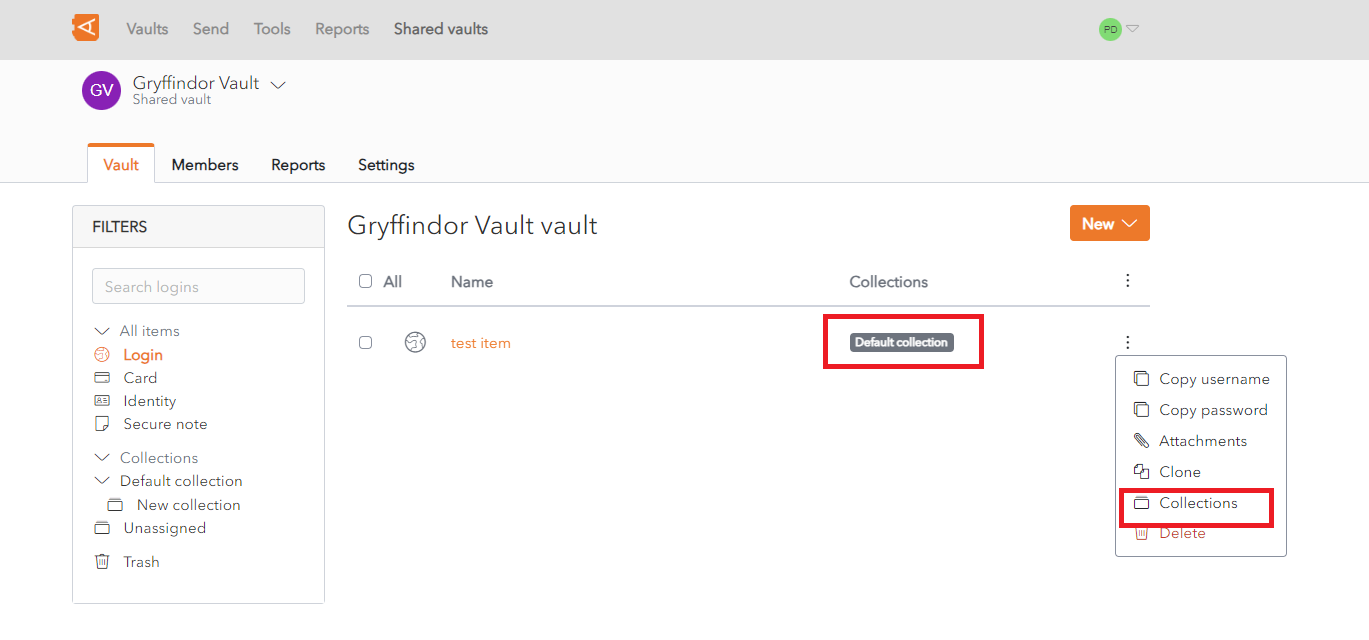
The Collections Screen for the Item is displayed.
Check one or more Collections.
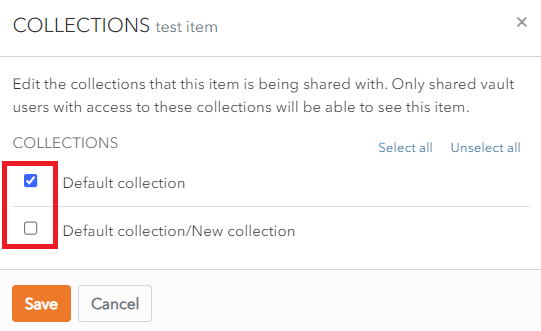
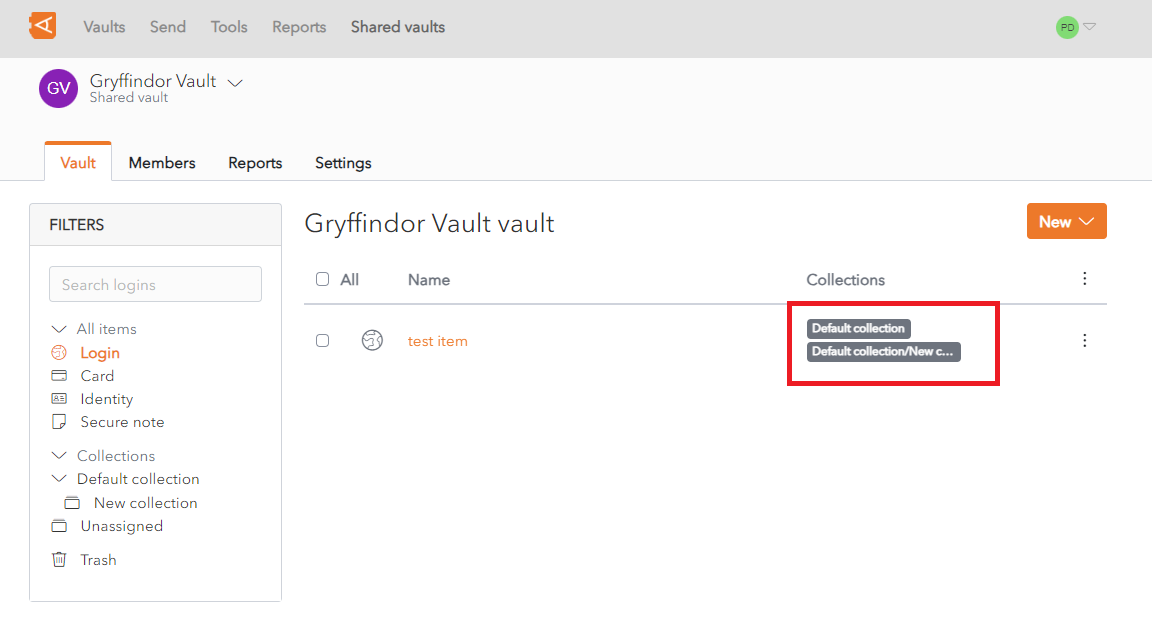
Click Save to save changes. The Item List for the Shared Vault is displayed.
The Item is assigned the Collections chosen.
Remove Item from Collections
From the Collections Screen for an Item, click Unselect all.
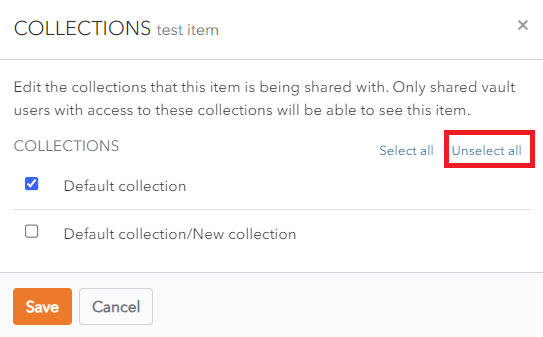
Click Save. The Item is now unassigned to collections.
Unassigned Items
The Collection field is mandatory to create an Item in a Shared Vault. However, an Item can be removed from a Collection after it is created.
If an item is no longer assigned to any Collections, it is marked as an Unassigned Item. This will happen if all collections, that an item is assigned to, are unselected or deleted.
This will happen if an Item is Removed from all Collections or if the Collections to which it is assigned are deleted.
Only members with owner or admin roles can see Unassigned Items, and can decide how to treat them.