Manage items
Create different types of items: login, identity card and note.
- Items Overview
- Create Item
- Edit Item
- Search an item
- Add Logins to Vault
- Delete Item
- Identity Items
- Login Items
- Card Items
- Secure Note Items
- Password Fields for Login Items
- Password Protected Items
- TOTP Authentication
- Item Context Menu
- Move Item to Shared Vault
- Clone Item
- Favorites
Items Overview
You can create four types of item in your WALLIX Enterprise Vault :
- A Login item can be used to store login information for an account.
- A Identity item can be used to store identity information about a person.
- A Card item can be used to store a credit or payment card information.
- A Secure Note item can use used to store other private information.
Items can be Edited or Deleted.
The Item Context Menu contains some options related to an Item, depending on the Item Type and if it is in a Shared Vault or not.
Items can be Password Protected, Cloned, Moved from an Individual Vault to a Shared Vault, or Added to Favorites.
Specific options are available for Login Items:
- Password Fields such as Password Generation, Checking Password Integrity, Show / Hide Character Count, Copy Password and Show / Hide Password.
- TOTP Generation
- Copy Username
- Copy Password
- Launch URI
Create Item
Click on the New Item button to add a new Item.
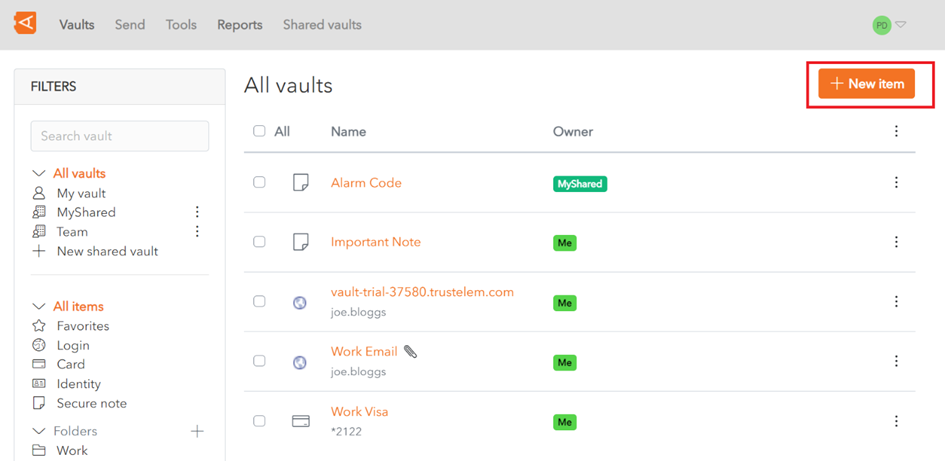
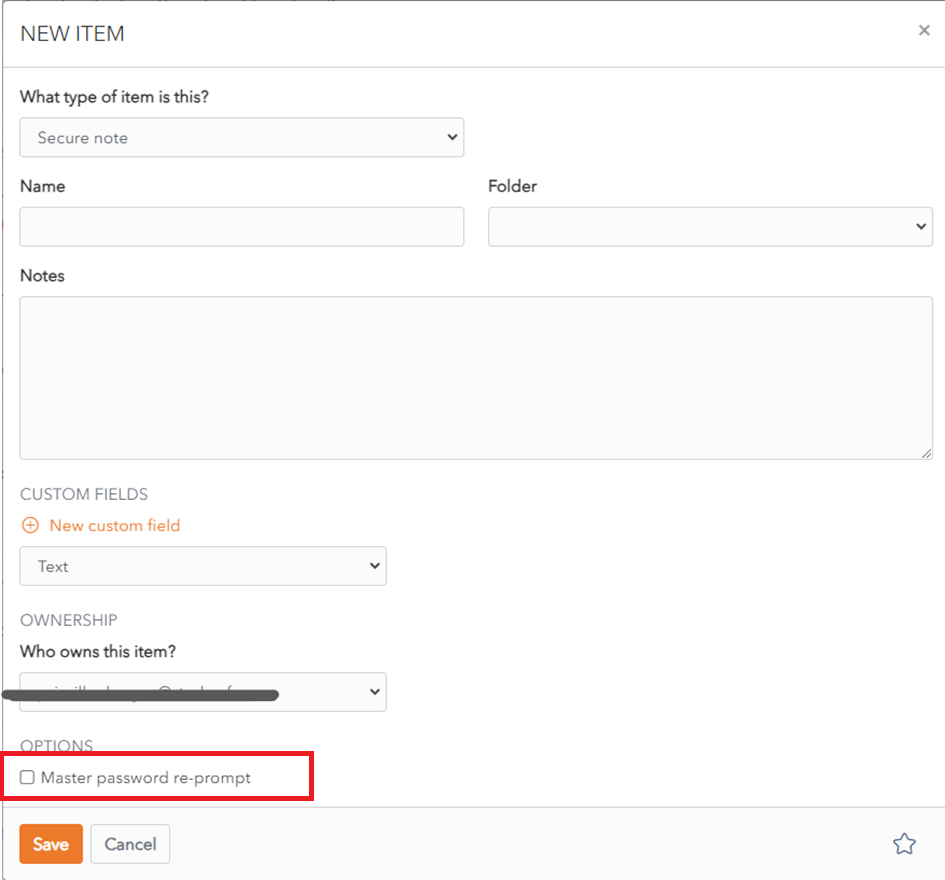
The New Item pop up screen is displayed.
Choose the type of item – Login, Card, Identity or Secure Note. Each item type has it’s own unique set of fields.
Here we will choose Login.
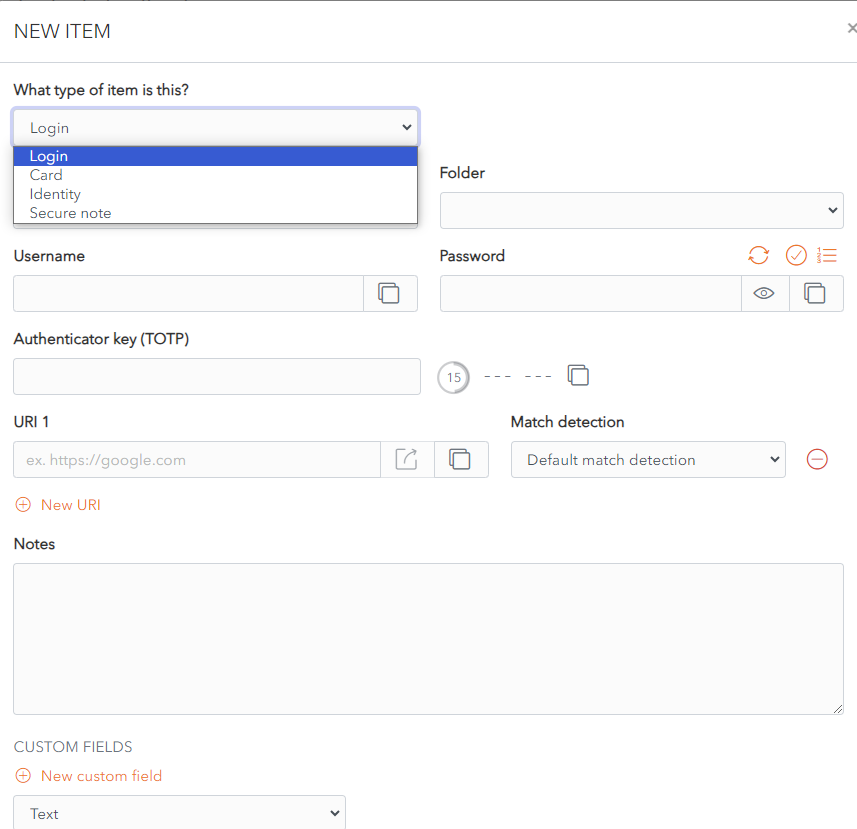
Add the details that you wish to save for new Login Item. The only mandatory field is Name.
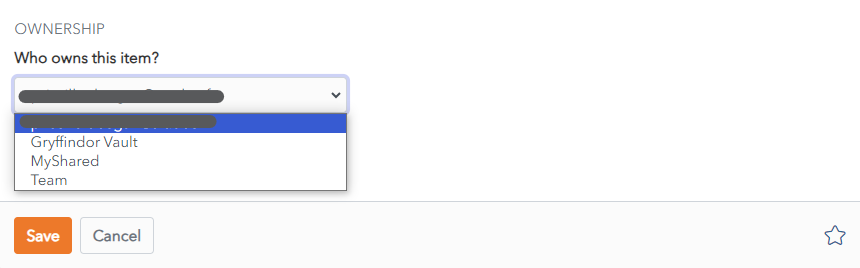
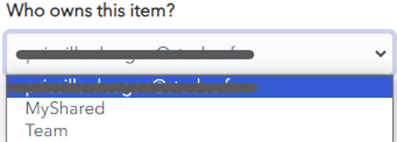
The Item is added to your personal vault by default. To add the Item to a Shared Vault, choose a Shared Vault from the Who Owns this Item? dropdown.
Click the Save button to save the new Item.
It is then displayed in your Items List.
Alternatively, click Cancel to cancel the operation.
Edit Item
Click on an item in your Vault List.
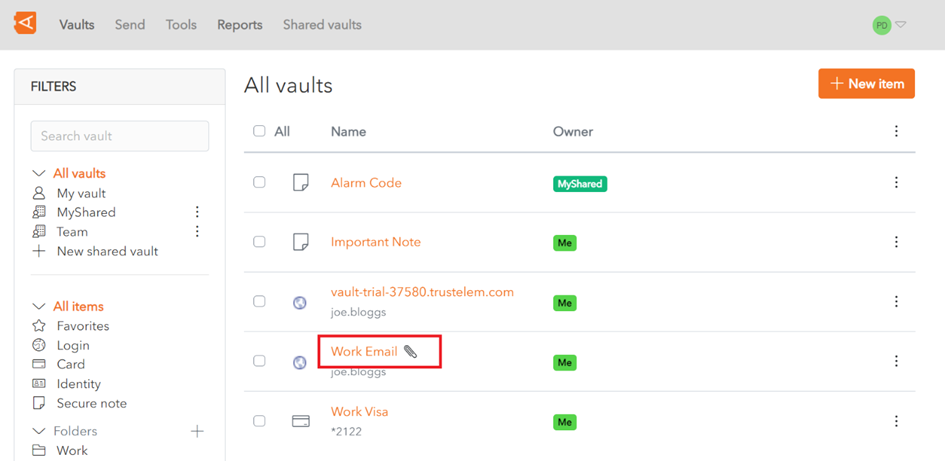
This opens the item in the Edit Screen.

Make changes to your item and click the Save button to save your changes.
If you decide not to save your changes, click the Cancel button to close the Edit Screen.
Search an item
Search and Filters can be combined to refine the search result.
Only Item Types and Filters cannot be combined.
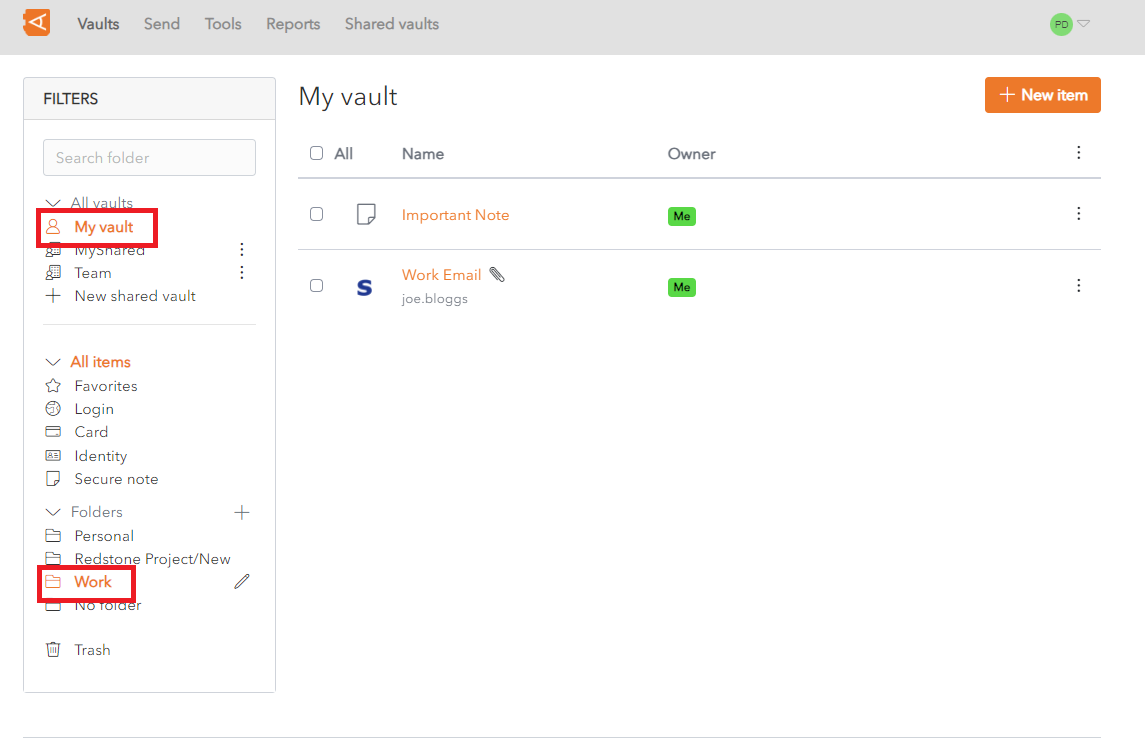
Filter Menu
You can also filter by Vault, Item Type or Folder from Filters Menu.
In the following example, click on the vault My vault and item type Login to return items of type Login in the folder My vault.

In the following example, click on the vault My vault and the folder Work to return all items in the folder Work and also in the vault My vault.
Basic Search
This is available in Mobile Apps.
You can search on the following indexed fields in your items:
- All Items: name
- Logins: username, URI
- Cards: brand, last 4 digits of the card number
- Identities: name
Leading and Trailing Wildcards are included in Searches. For example, searching for googl will return items where the search fields contain google, googling or googlemail.
In this example, enter 21 in the Search Field to return all items where one of the fields being searched contains 21, in this case a Card item with 21 in the last 4 digits of the card number.

Search results are sorted based on a scoring algorithm, based on the number of fields that a search term appears in.
Full-Text Search
This is available in the Web Vault and Browser Extension.
You can search on the following indexed fields in your items:
-
shortid: This is the 1st 8 characters of the Item ID
-
sharedvaultid: This is the Shared Vault ID, for Items in a Shared Vault
-
name: Item Name
-
subtitle: This depends on the Item Type. It can be Username, Login, Last 4 digits of Card Number, Card Brand or Identity Name.
-
notes: Notes field of an Item. Matches on full words only unless wildcards are used.
-
fields: This is the Name or Value in Custom Fields. It is only available for Custom Fields of type Text
-
attachments: This is the Name of a File that is attached to an Item.
-
login.username: This is the Username of a Login Item
-
login.uris: This is the URI Hostname of a Login Item
In this example, enter 21 in the Search Field to return all items where one of the fields being searched contains 21, in this case a Card item with 21 in the last 4 digits of the card number.
Search results are sorted based on a scoring algorithm, based on the number of fields that a search term appears in.
If no results are found using a Full-Text Search, WALLIX Vault will use Basic Search.
Special Search Parameters
Various wildcards and parameters can be used to make the search more specific:
- Leading and Trailing Wildcards
- Other Wildcards:
- >fieldname searches only on that field name
- >-fieldname searches on all fields except that field name
- * searches everything
- >fieldname:search term searches for that search term in that fieldname
- Search parameters available in Lunr js, like Term Presence or Fuzzy Matching.
- + prefix indicates that what follows must be contained in the search results
- - prefix indicates that what follows must not be contained in the search results
- ~ prefix is used for Fuzzy Matching.
Some examples include
- >googl returns all items that start with googl
- >name:Google will return all Items where name equals Google
- >-name:Google will return all Items where name does not equal Google
- >-login.username:*@hotmail.com will return all Items where of type Login where the Username starts with @hotmail.com
Add Logins to Vault
There are 2 ways to auto-fill a Login to the Vault.
This function is available for Logins, Cards and Identities.
Add to Vault using Automatic Prompt
If this login is not already saved in WALLIX Enterprise Vault, a prompt displays offering to save the Login details for this Website.
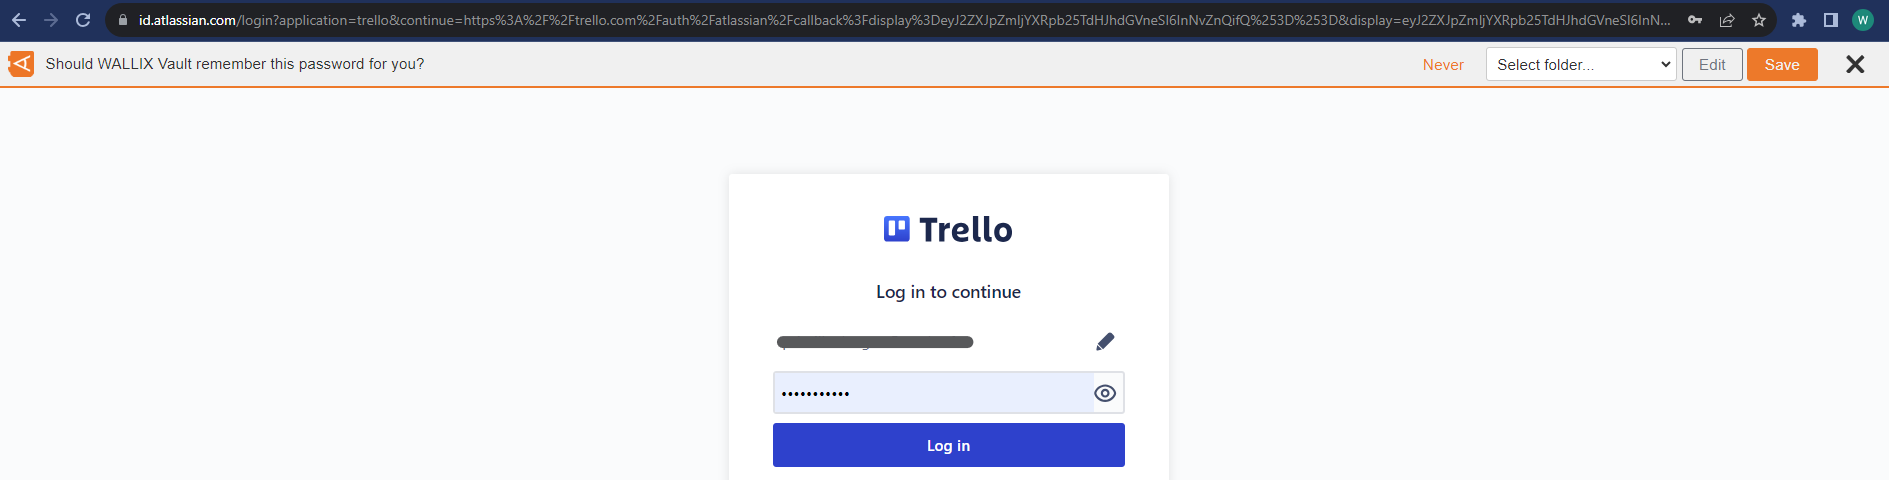
Choose a Folder to add the Login to this Folder in the Vault. This field is optional.
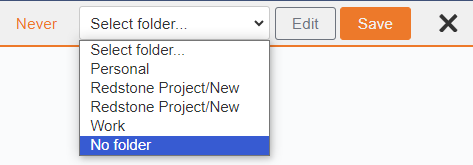
Items are added to the User's Individual Vault and not a Shared Vault.
Click the Save button.
The Add Item Screen displays with the fields prepopulated with the Login details.
Modify fields, if required.
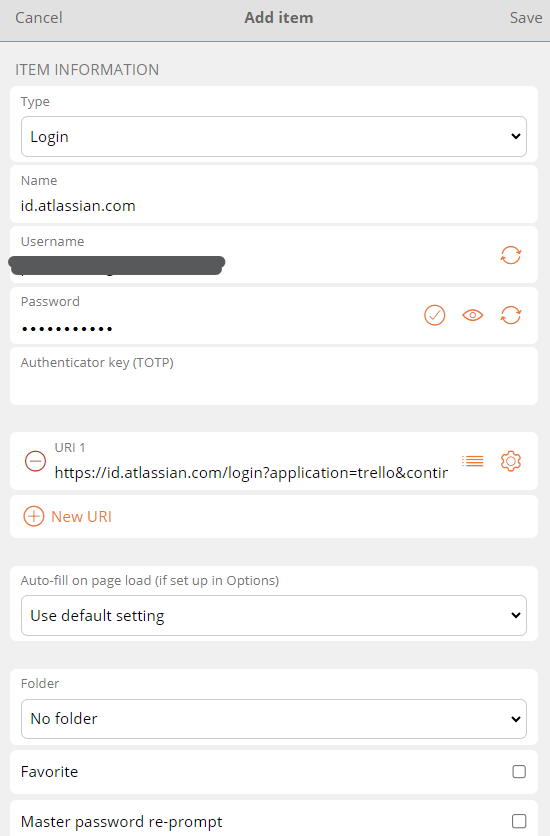
Click Save to Save Item to Vault.
Alternatively, click Cancel to cancel the operation.
Add to Vault Manually
From the Vault Screen of the Browser Extension, click Add a login.
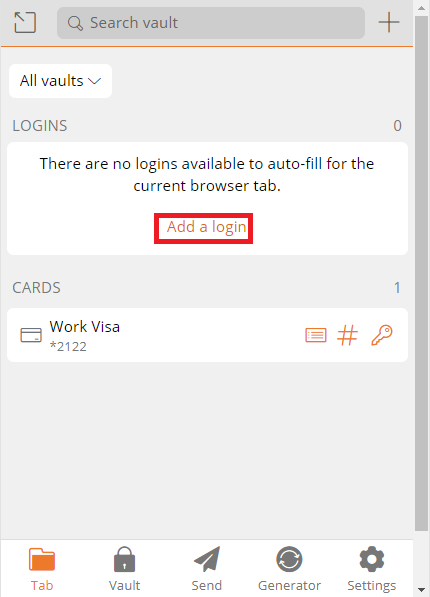
The Add Item Screen opens.
The elements that the Browser Extension could recuperate from the browser are prepopulated.
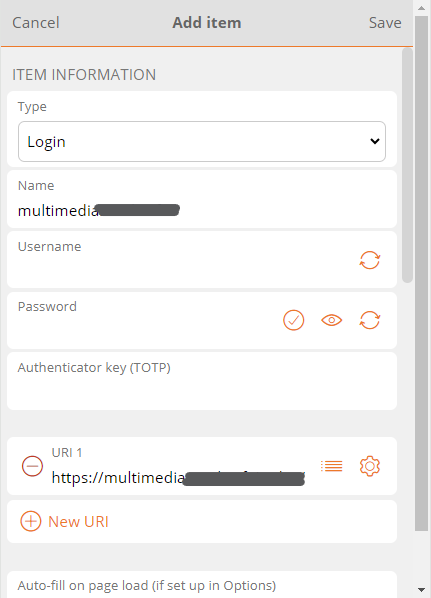
Enter the remaining fields. Click Save to create Login.
Alternatively, click Cancel to cancel the operation.
Delete Item
There are 2 ways to delete an item, from the Item List or from the Edit Item Screen.
Delete Item from Item List
From the Item List, click on the ![]() Context Menu link beside an Item. The context menu for that item opens.
Context Menu link beside an Item. The context menu for that item opens.
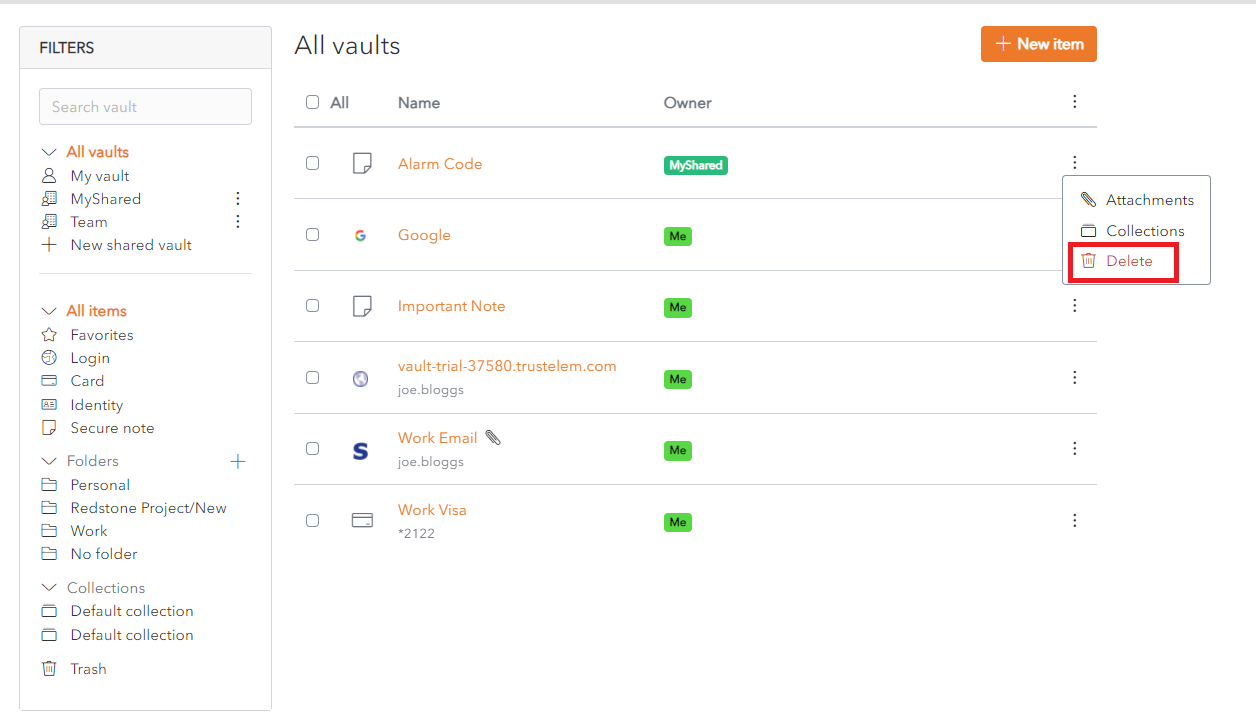
Click the ![]() Delete link. A Delete Item Confirmation pop up is displayed.
Delete link. A Delete Item Confirmation pop up is displayed.
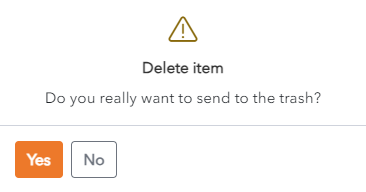
Click Yes to delete the Item.
Click No to cancel the operation.
Delete Item from Edit Item Screen
Click on the Item to be deleted. The Edit Screen opens.
Click the ![]() Delete button. A Delete Item Confirmation pop up is displayed.
Delete button. A Delete Item Confirmation pop up is displayed.
Click Yes to delete the Item.
Click No to cancel the operation.
Identity Items
You can use a Identity Item to store information about a person’s identity.


The following fields are available. Only the name field is mandatory.
- Type: Identity, for Identity Item.
- Name: Choose a name that easily identifies the item.
- Folder: This dropdown allows you to choose the folder you want to add the login to.
- Title: Use dropdown to choose from common titles.
- First name: You can add a first name.
- Middle name: You can add a middle name.
- Last name: You can add a last name.
- Username: You can add a username.
- Company: You can add a company
- Social Security Number: You can add a social security number.
- Passport number: You can add a passport number.
- License number: You can add a driver’s license number.
- Email: You can add an email.
- Phone: You can add a telephone number.
- Address 1: You can add the first line of the address.
- Address 2: You can add the second line of the address.
- Address 3: You can add the third line of the address.
- City / Town: You can add the city or town.
- State/Province: You can add the state or province
- Zip/Postal Code: You can add the zip code or postal code.
- Country: You can add the country.
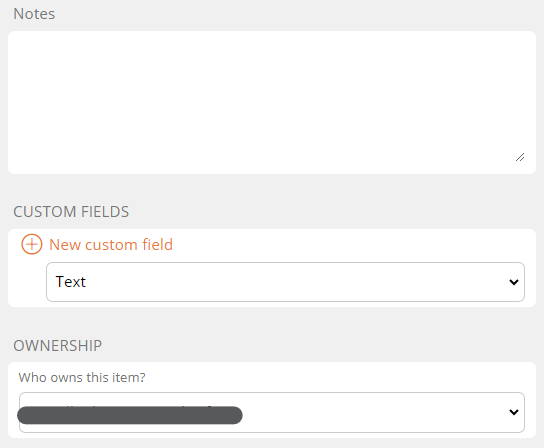
- Notes: You can add notes about this identity.
- Custom Fields: You can add one or more custom fields. Learn more about Custom Fields.
- Master Password re-prompt: Check this box to be prompted to enter your Master Password to access this login.
- Ownership: Choose which Vault owns this item from the dropdown menu. By default it is owned by your Vault unless you choose otherwise.

Click the ![]() Favourites button to add this item to your favourites.
Favourites button to add this item to your favourites.
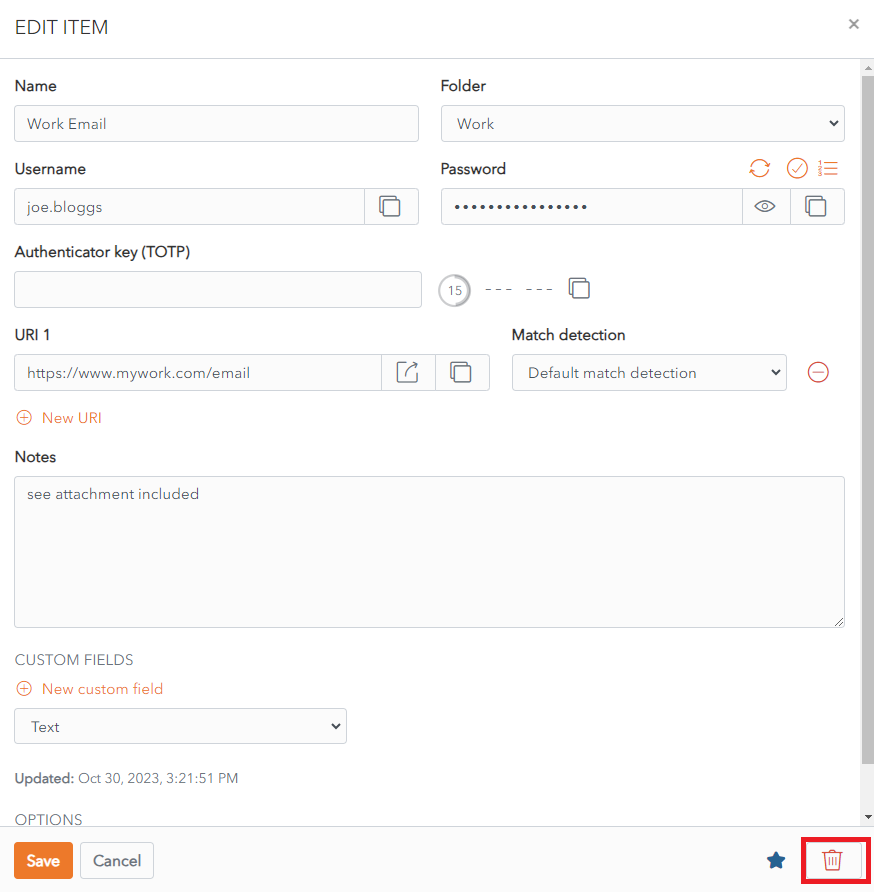
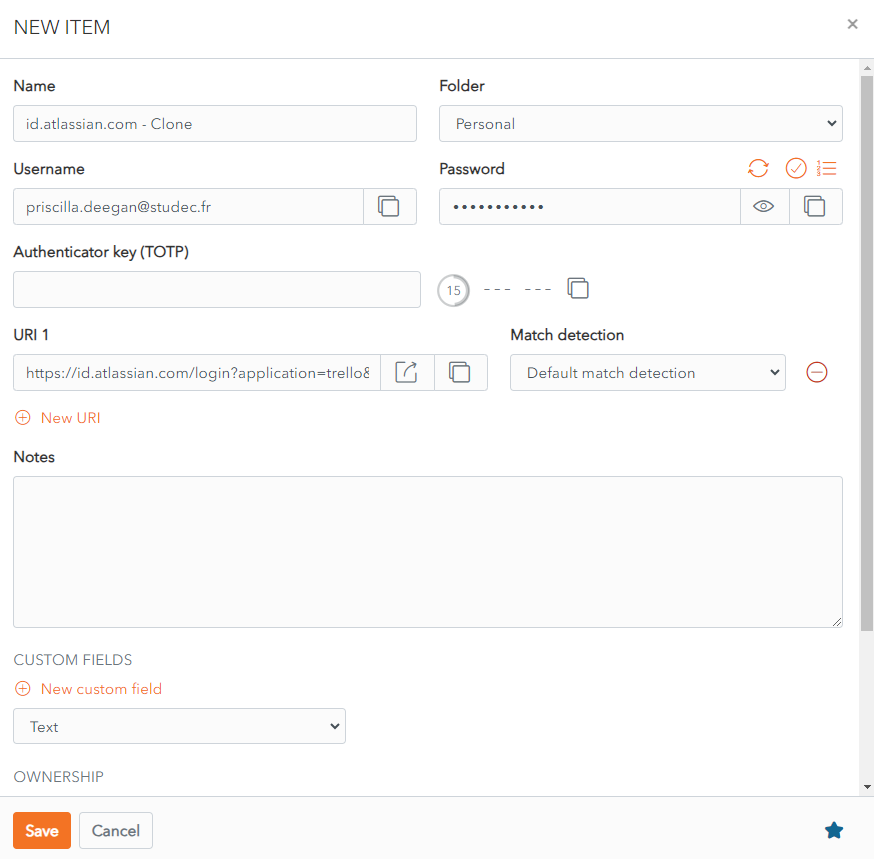
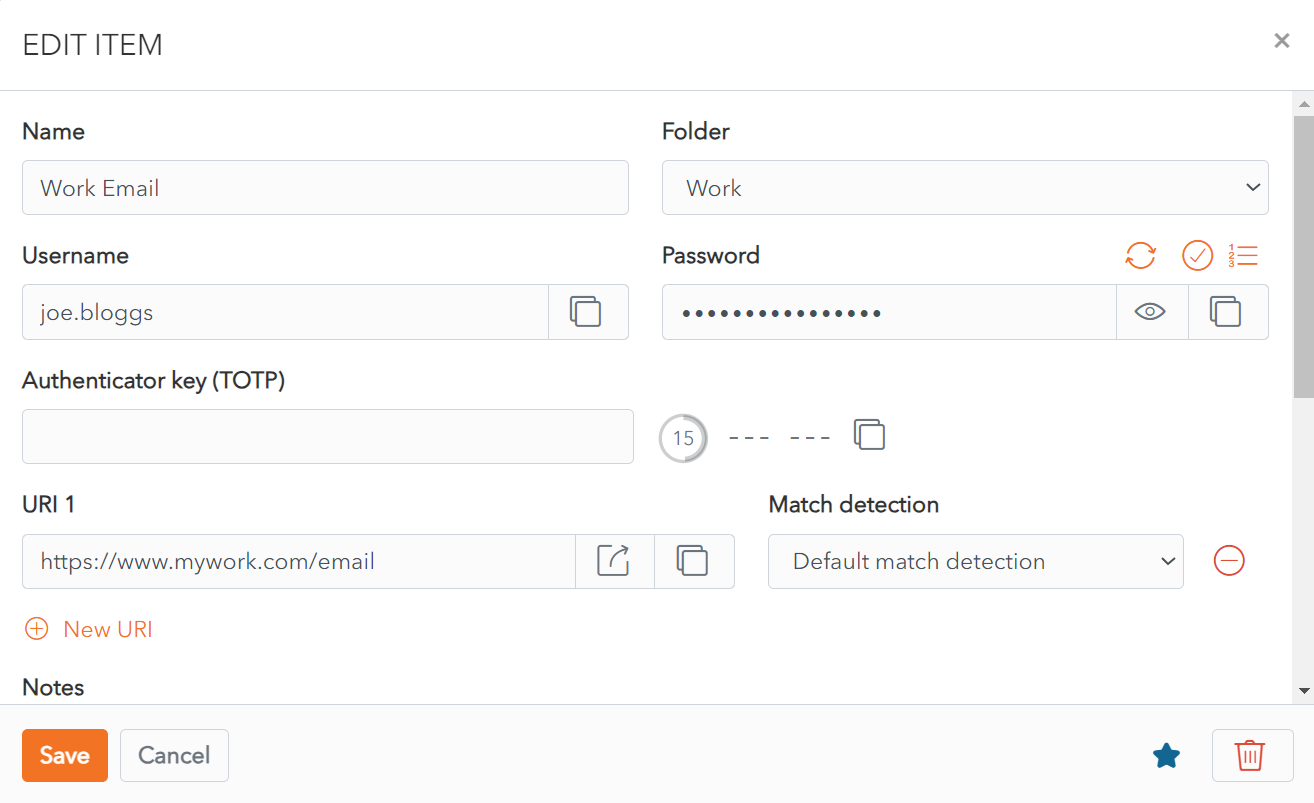
Login Items
You can use a Login Item to store information about an account that requires a login, for example an email account, a CRM account or a social media account.


The following fields are available. Only the name field is mandatory.
- Type: Login, for Login Item.
- Name: Choose a name that easily identifies the item.
- Folder: This dropdown allows you to choose the folder you want to add the login to.
- Username: Your account username.
- Password: Your account password. You have different password options to improve the security of your passwords.
 Password Generator button generates a strong password for your login.
 Check Password Integrity
 Show/Hide Password Character Count
 Copy Password to clipboard
 Show/Hide Password
- Authenticator key (TOTP): Your authenticator key use to generate a Time-based One-Time Password (if in place for this account).
- URI 1: Uniform Resource Identifier (URI) or Website address for this account.
- You can add extra URIs using the
 button.
 - You can click on the
 button to open the URI in a new browser window to easily confirm the correct URI.
 - You can also choose from different options in the Match Detection dropdown to match the URI to an existing URI.
- You can add extra URIs using the


- Notes: You can add notes about this login.
- Custom Fields: You can add one or more custom fields. Learn more about Custom Fields.
- Master Password re-prompt: Check this box to be prompted to enter your Master Password to access this login.
- Ownership: Choose which Vault owns this item from the dropdown menu. By default it is owned by your Vault unless you choose otherwise.
- Click the
 favourites button to add this item to your favourites.
Card Items
You can use a Card Item to store information about a credit or other payment card.


The following fields are available. Only the name field is mandatory.
- Type: Card, for Card Item.
- Name: Choose a name that easily identifies the item.
- Folder: Dropdown allows you to choose the folder you want to add the login to.
- Cardholder Name: Name, as written on the card.
- Brand: Dropdown menu allows you to choose the card brand, as written on the card. If your card brand is not in the list, choose Other.
- Number: Card number, as written on the card. This field can be hidden or displayed using the
 Display/Hide toggle button. The
  copy button allows you to copy to the clipboard.
 - Expiration month: Dropdown allows you to choose expiration month, as written on the card.
- Expiration year: Enter expiration year, as written on the card.
- Security code (CVV): Enter 3 digit security code, as written on the back of the card.
- Notes: You can add notes about this card.
- Custom Fields: You can add one or more custom fields. Learn more about Custom Fields.
- Master Password re-prompt checkbox: Check this to be prompted to enter your Master Password to access this login.
- Ownership dropdown: Choose which Vault owns this item. By default it is owned by your Vault unless you choose otherwise.
Click the ![]() favourites button to add this item to your favourites.
favourites button to add this item to your favourites.
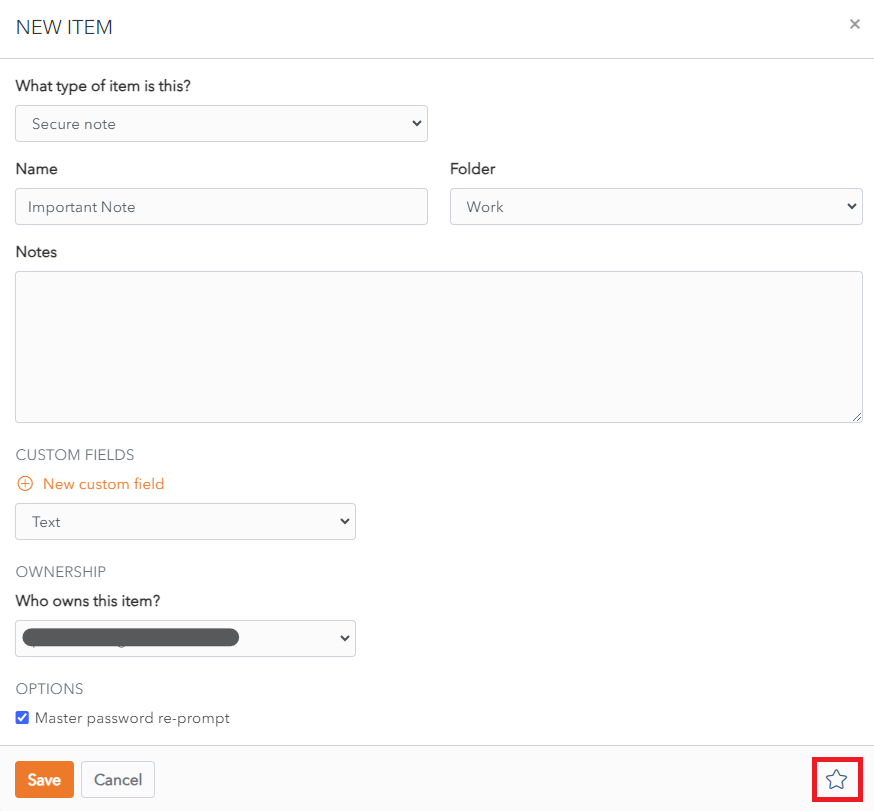
Secure Note Items
You can use a Secure Note Item to store private information that doesn’t fit into one of the other categories.

The following fields are available. Only the name field is mandatory.
- Type: Identity, for Identity Item.
- Name: Choose a name that easily identifies the item.
- Folder: This dropdown allows you to choose the folder you want to add the login to.
- Notes: You can add secure notes in this field.
- Custom Fields: You can add one or more custom fields. Learn more about Custom Fields.
- Master Password re-prompt: Check this box to be prompted to enter your Master Password to access this login.
- Ownership: Choose which Vault owns this item from the dropdown menu. By default it is owned by your Vault unless you choose otherwise.
Click the ![]() favourites button to add this item to your favourites.
favourites button to add this item to your favourites.
Password Fields for Login Items
WALLIX Enterprise Vault provides different options for your Password fields to improve the security of your passwords.
Generate Strong Password
Click on the Generate Password button to generate a secure password for your login.
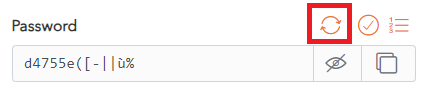
A pop up screen will require you to confirm that you wish to overwrite your current password.
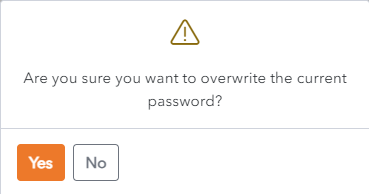
Alternatively, click on the No button to keep your current password.
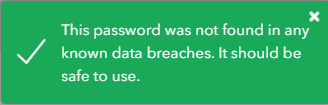
Check Password Integrity
Click on the Check Password button to check if your password has been exposed.
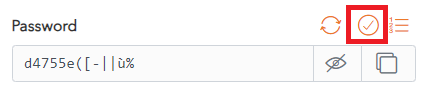
WALLIX Enterprise Vault will check if your password has been found in any known data breaches.
Show / Hide Character Count
Click on the Toggle Character Count button to display the Password Character Count of your password.

This can help you check if your password is secure enough.
Click the Toggle Character Count button to hide the Password Character Count display.
You can also click the Hide button to hide the Password Character Count display.
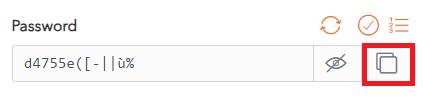
Copy Password
Click on the Copy Password button to copy the password entered to the clipboard.
Show / Hide Password
Click on the Show/Hide Password toggle button to display the password as you enter it.

Click again on the Show/Hide Password toggle button to hide the password.
Password Protected Items
An Item can be password protected to add an extra layer of security. The Master Password must be entered to open the Item or the Item's attachments.
Add Password Protection to an Item
When creating or editing an Item, check the Master password re-prompt checkbox.
Click Save to save changes.
Alternatively, click Cancel to cancel the operation.
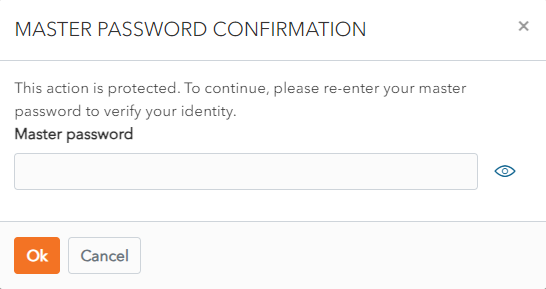
Open Password Protected Items
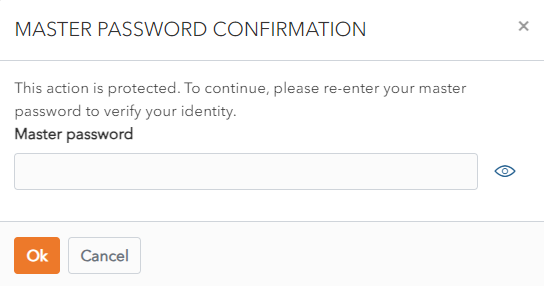
If the Item is password protected, a Master Password Confirmation pop up screen displays when you click on the Item to edit it.
Enter the Master Password and click Ok to enable Item modification. This also applies to Item attachments.
TOTP Authentication
A TOTP (Time-based one-time password) is a password that is generated by a TOTP Generator, to be used one time only as part of a 2 step login.
Many Accounts propose (or require) 2-factor authentication :
- The first step is Account's username and password.
- The second step is a TOTP that is generated by a TOTP Generator from the Account's Authentication Key.
WALLIX can be used to store the Authentication Key for a Login and use it to generate a TOTP using SHA-1 that is valid for 30 seconds.
This is possible in the WALLIX Web Vault, the WALLX Web Extension and the WALLIX Authenticator Mobile App.
WALLIX Web Vault
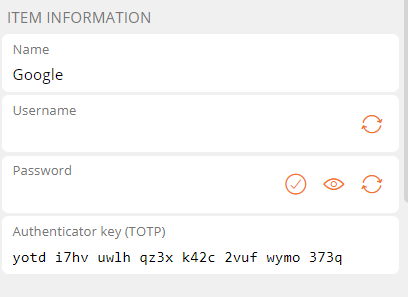
From the Item Screen of a Login Item, add the Authentication key for that Login.
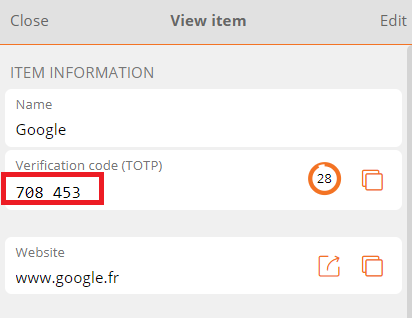
A TOTP is automatically generated for the Login and can be copied using the ![]() Copy button.
Copy button.

Enter the TOTP into the Login Screen of the requesting web page.
WALLIX Web Extension
From the Add or Edit Item Screen of a Login Item, add the Authentication key for that Login.
From the Item Screen, a TOTP is automatically generated for the Login and can be copied using the ![]() Copy button.
Copy button.
Enter the TOTP into the Login Screen of the requesting web page.
WALLIX Authenticator
From the WALLIX Authenticator Mobile App, click the ![]() button to Create a New Login.
button to Create a New Login.
2 Options are possible.
The first option is to tap Scan the QRCode to open you Camera App to scan the QR Code to create the Login.
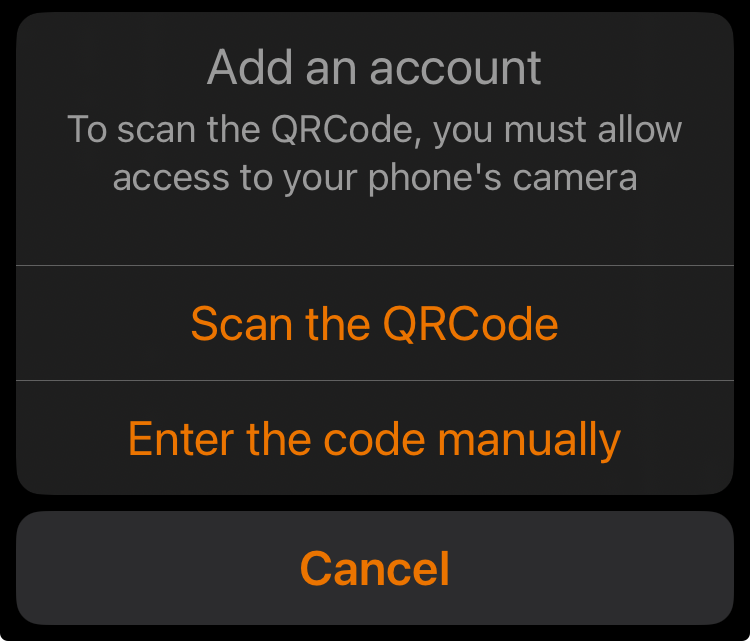
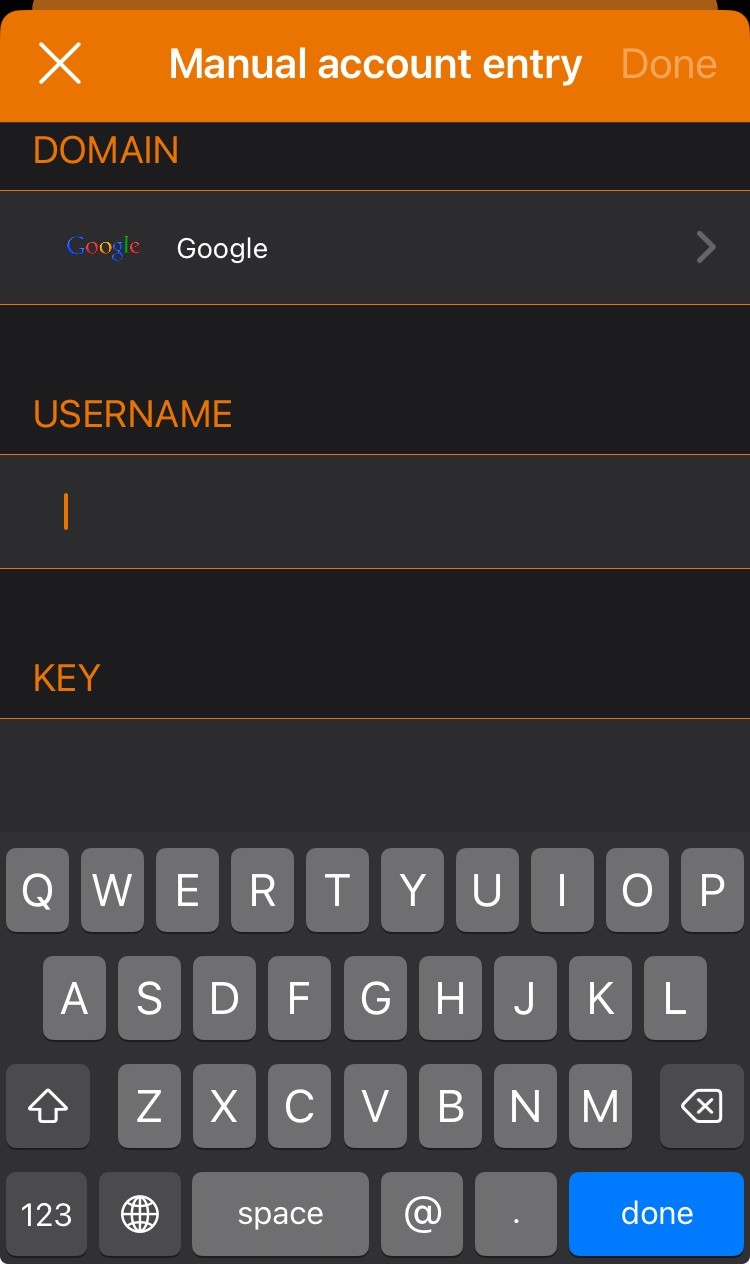
Alternatively, tap Enter the code manually.
- Choose the Domain from the Domain dropdown.
- In the Username Field, enter the Username.
- In the Key Field, enter the Authentication Key.
- Tap done to Save the Login.
From the Item Screen of a Login Item, add the Authentication key for that Login.
A TOTP is automatically generated for the Login and can be copied using the ![]() Copy button.
Copy button.
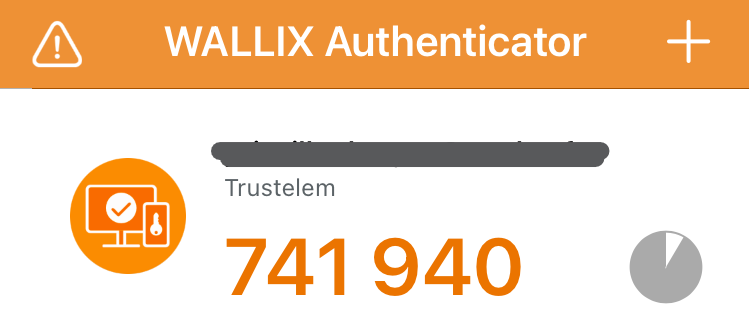
Enter the TOTP into the Login Screen of the requesting web page.
The device WALLX Authenticator is installed must used the same time and timezone as that of the server that hosts the web page being accessed. Otherwise the code will not work. It is recommended to set the device's time and timezone to automatic.
Item Context Menu
From the Item List click the ![]() More Button of a Shared Vault Item.
More Button of a Shared Vault Item.
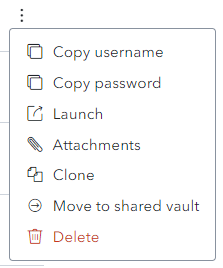
A number of options are available (depending on the Item Type):
- Copy username: Copies the Username to the clipboard (for Login Items)
- Copy password: Copies the Password to the clipboard (for Login Items)
- Launch : Launches the URI associated with the Item (for Login Items)
- Attachments: Displays the Attachment Screen
- Clone: Clones the Item
- Move to Shared Vault: Moves the Item to a Shared Vault
- Collections: Displays the Collections Screen
- Delete: Deletes the Item (after Confirmation)
Move Item to Shared Vault
From the Item List click the ![]() More Button of an Item.
More Button of an Item.
The following screen is displayed.
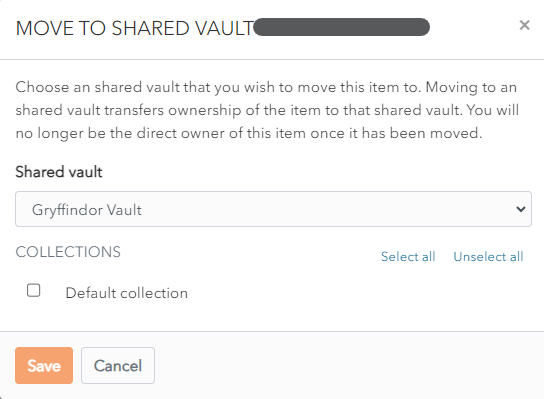
In the Collection section, the list of Collections in the Shared Vault is displayed.
Check the checkbox beside the Collections to add the Item to.
Click Save to move the Item to the chosen Shared Vaults and Collections.
Click Cancel to cancel the operation.
Clone Item
From the Item List click the ![]() More Button of an Item.
More Button of an Item.
The following screen is displayed.
Enter Master Password and click Ok.
A Clone is created.
Click Save to Save the Cloned Item
Alternatively, click Cancel to cancel the operation.
Favorites
An Item can be marked as a favorite to make it easier to locate. All favorites are grouped together.
This works for Individual Vaults and Shared Vaults.
Marking an Item in a Shared Vault as a favourite puts it in your favourites only. It will not be marked as a favourite for other users of the Shared Vault.
Add to Favorites
From the Create Item or Edit Item Screen, an click on the ![]() Favorites button.
Favorites button.
The Favorites button turns blue ![]() .
.
Click Save to save the change. The Item is displayed in Favorites.
Alternatively, click Cancel to cancel the operation.
Display Favorites
From the Item List, click the Favorites link in the Filter Menu.
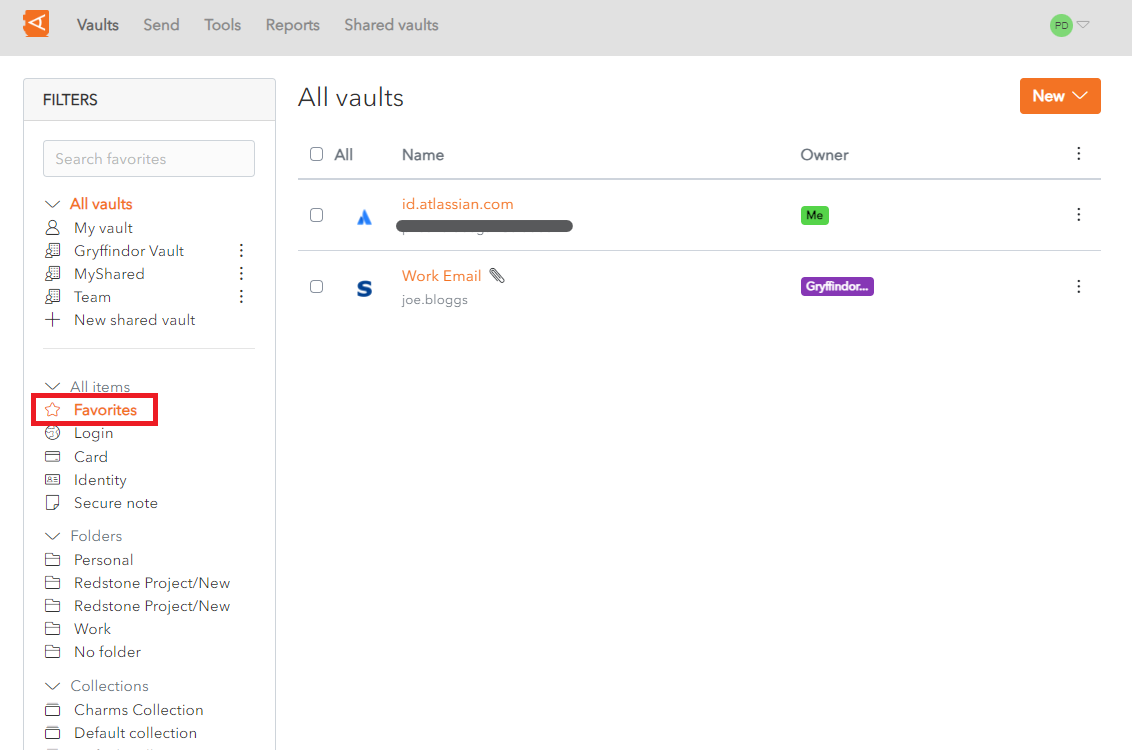
All Items marked as Favorites are displayed.
Remove from Favorites
To remove an Item from favorites, click on an Item in the Item List open it.
The Item Screen displays. The favorites button is blue ![]() .
.
Click the favorites button. The favorites button turns white ![]() .
.
Click Save to save the change. The Item is now removed from favorites.
Alternatively, click Cancel to cancel the operation.