Manage Shared Vaults
Create shared vaults to to exchange your items securely.
- Shared Vaults Overview
- Create a Shared Vault
- Rename Shared Vault
- Shared Vault Items Context Menu
- Invite Member to Shared Vault
- Add, Edit or Delete Items
- Edit Member Roles
- Manage Member Access to Collections
- Revoke Access to Shared Vault
- Restore Access to Shared Vault
- Remove Member
- Leave a Shared Vault
- Purge Shared Vault
- Delete Shared Vault
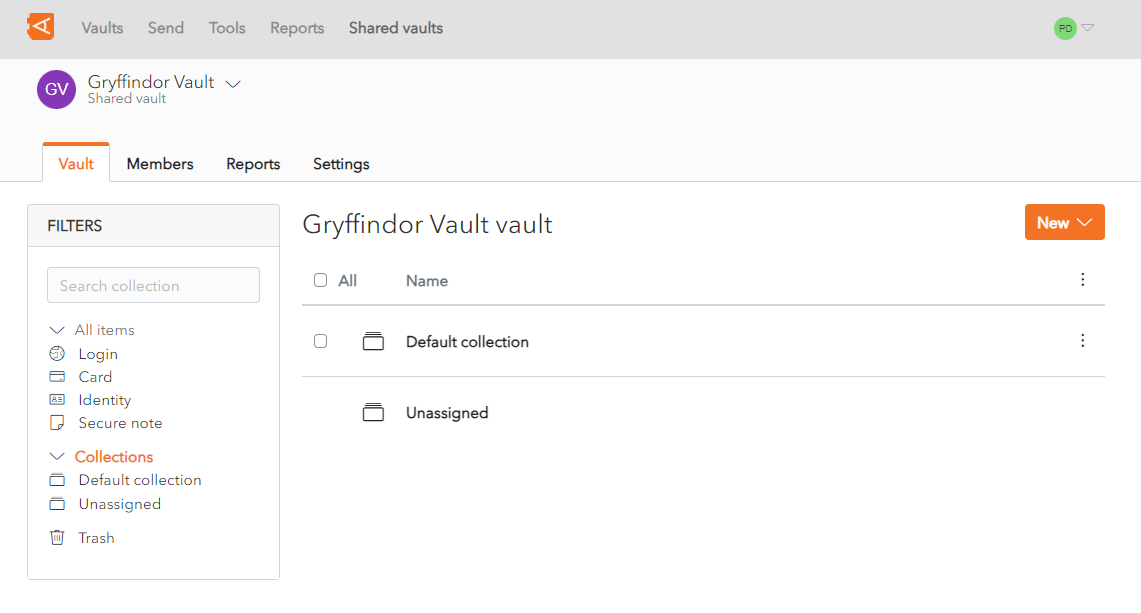
Shared Vaults Overview
It can be renamed after creation.
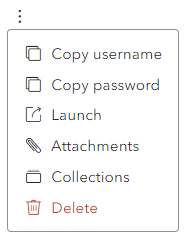
A number of options are available from the Context Menu of a Shared Vault Item, depending on the Item Type, such as:
- Copy username: Copies the Username to the clipboard (for Login Items)
- Copy password: Copies the Password to the clipboard (for Login Items)
- Launch : Launches the URI associated with the Item (for Login Items)
- Attachments: Displays the Attachment Screen
- Collections: Displays the Collections Screen
- Delete: Deletes the Item (after Confirmation)
It can contain one or more Collections. It can contain one or more Items that can be shared with Members via Collections.
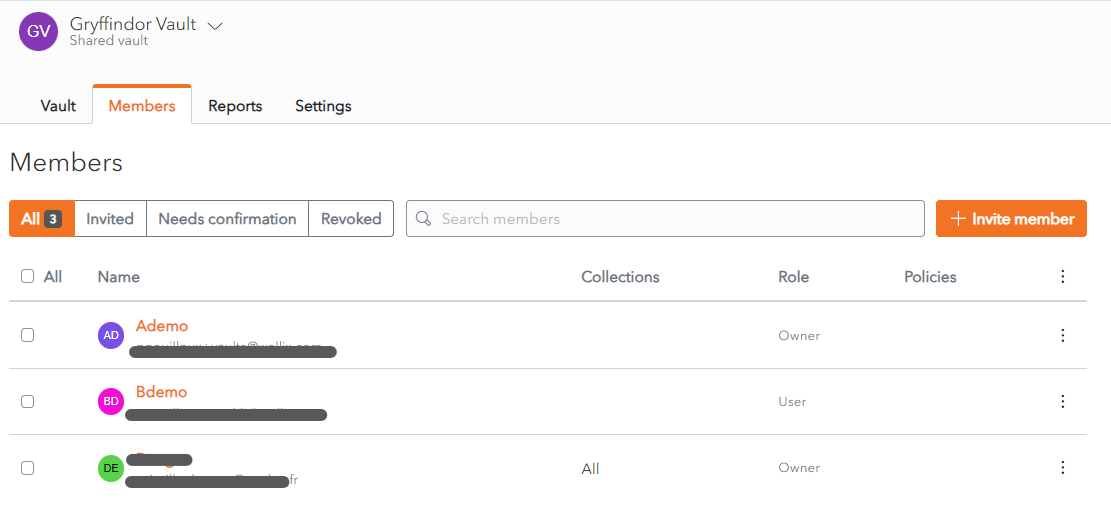
Members can be added with different Roles within the Shared Vault and given access to Collections.
Temporary access to a Shared Vault can be revoked or restored. Members can also be removed permanently or they can leave the Shared Vault.
Create a Shared Vault
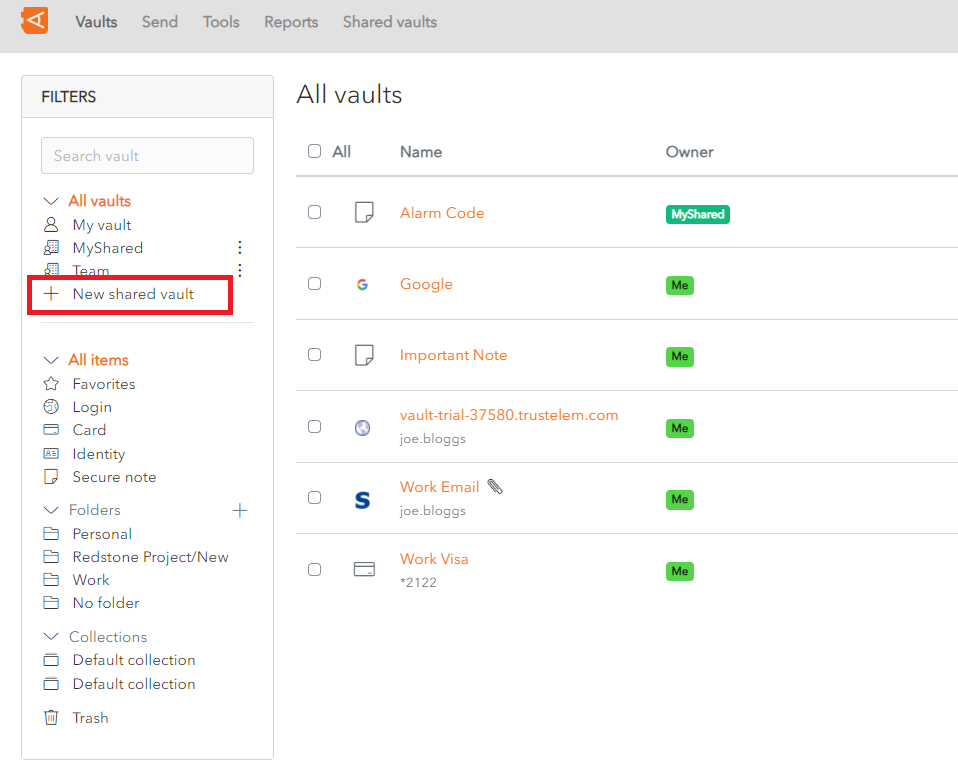
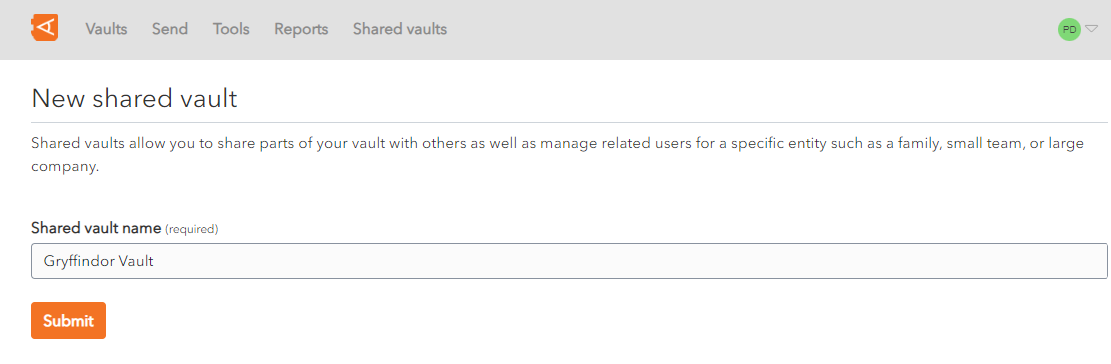
From the Home screen, click on the + New Shared Vault link.
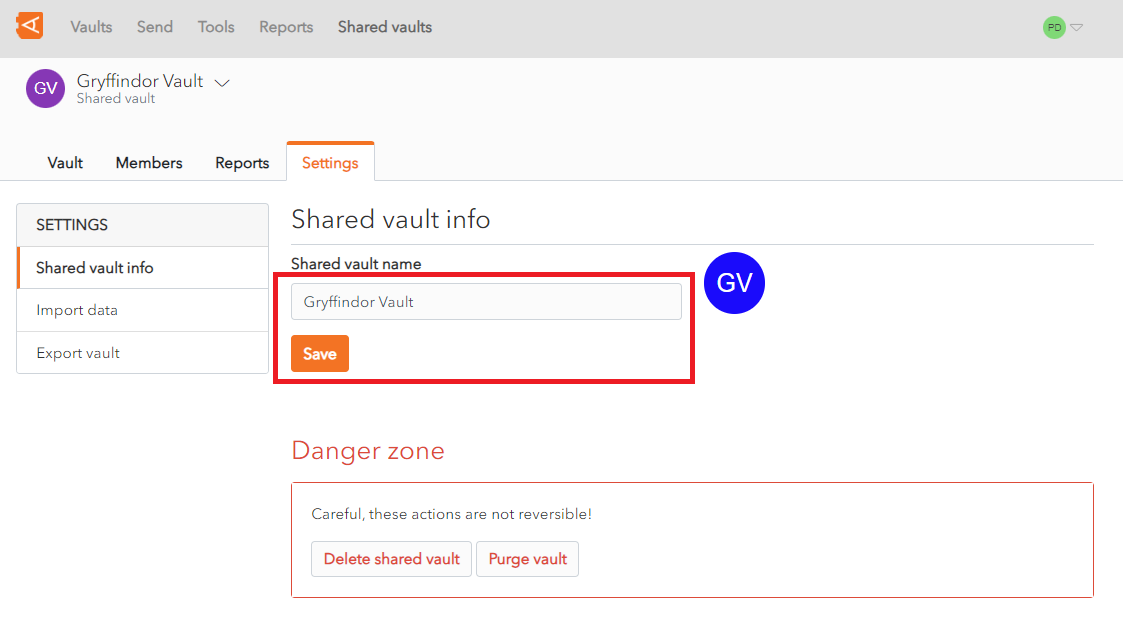
Rename Shared Vault
Click Save to save changes. The Shared Vault is renamed.
Shared Vault Items Context Menu
From the Item List click the ![]() More Button of a Shared Vault Item.
More Button of a Shared Vault Item.
A number of options are available (depending on the Item Type):
- Copy username: Copies the Username to the clipboard (for Login Items)
- Copy password: Copies the Password to the clipboard (for Login Items)
- Launch : Launches the URI associated with the Item (for Login Items)
- Attachments: Displays the Attachment Screen
- Collections: Displays the Collections Screen
- Delete: Deletes the Item (after Confirmation)
Invite Member to Shared Vault
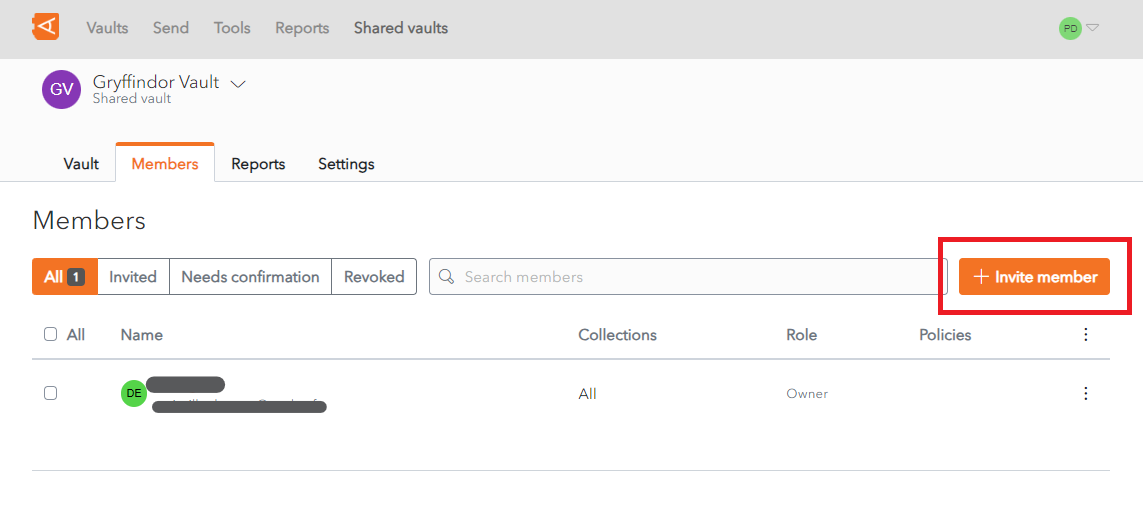
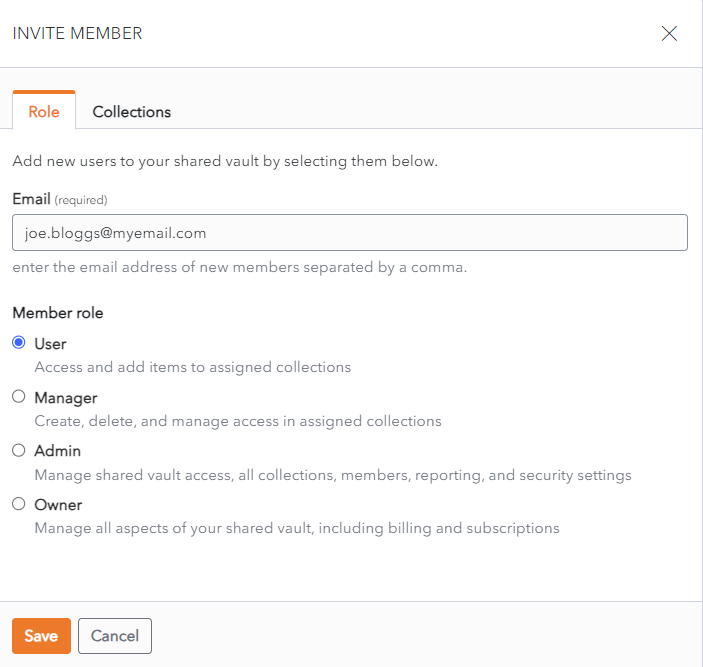
The Invite Members screen is displayed. The Role Tab is selected by default.
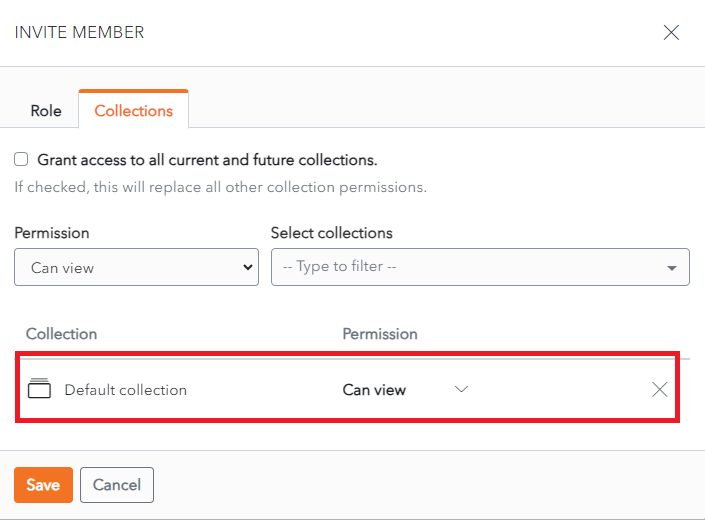
Grant Permissions to a Collection
Before granting a user access to a Shared Vault, you must grant permissions to at least one collection in the Shared Vault.
Click on the Collections tab.
Choose the Permission from the Permission dropdown.
Choose the Collection from the Select Collections dropdown.
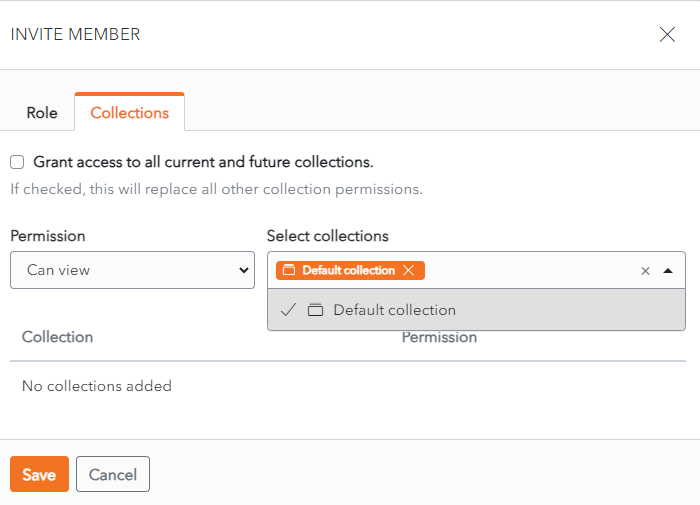
Click Enter. The Pemissions assigned to the Collection is displayed.
Select Member to Invite
Once at least one Collection in the Shared Vault has Permissions assigned, Members can be invited to the Shared Vault.
The Role Tab is selected by default.
Select a Member to invite from the Select New Members dropdown.
Select the Member Role. User is checked by default.
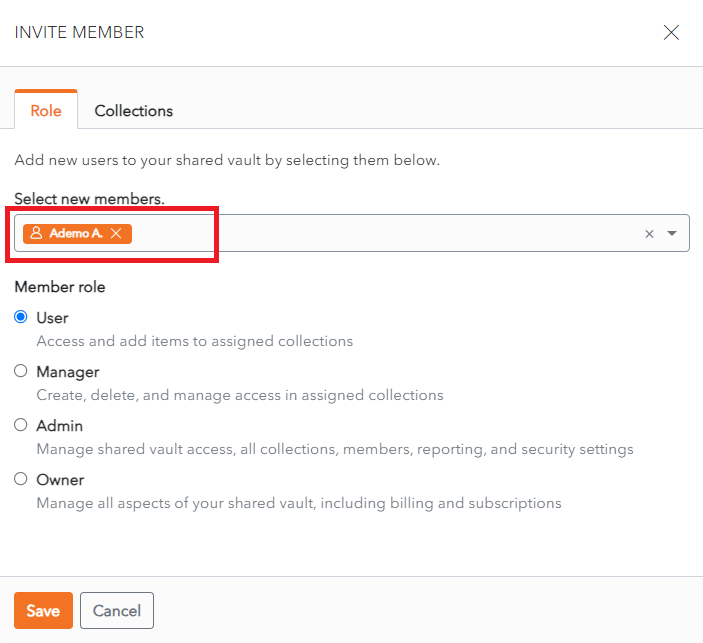
Click Save to invite the member to the Shared Vault. The Member is displayed in the Member List for the Shared Vault.
Alternatively, click Cancel to cancel the operation.
Add, Edit or Delete Items
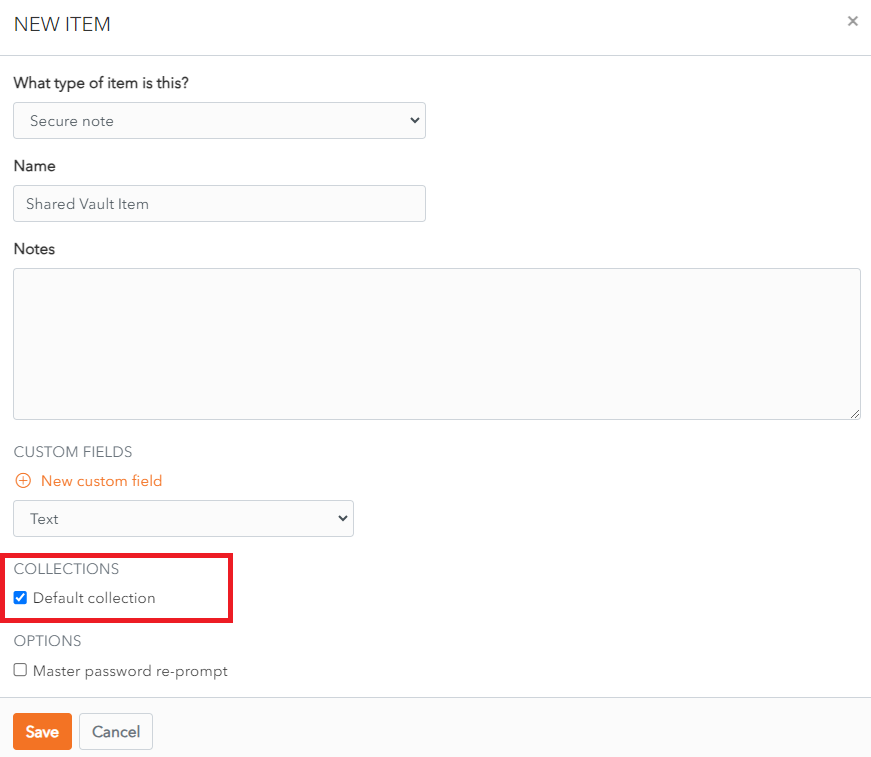
Create a Shared Vault Item
Follow the normal procedure for creating an Item, with one additional step.
Items created in a Shared Vault have one extra field - the Collections Field, which is mandatory. A Shared Vault Item must be added to at least one Collection.
In the Collections Section of the New Item Screen, check the checkbox beside a Collection that you wish to add the Item to.
Then Click Save to create the Item.
Manage Shared Vault Items
The procedure to Edit an Item and Delete an Item are the same as for personal Vaults as are the Item Types.
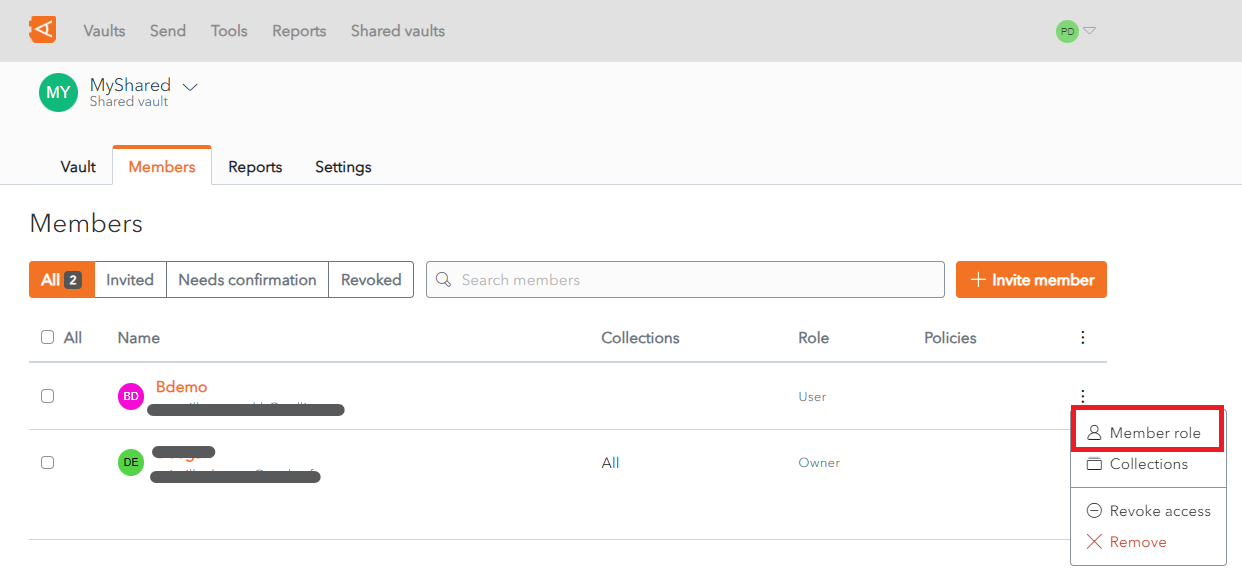
Edit Member Roles
From the Member List in the Shared Vault, click the ![]() More button beside the Member in question.
More button beside the Member in question.
Click the Member Role link.
The Edit Member screen displays with the Role Tab open.
Change the member role using the Member Role radio buttons.
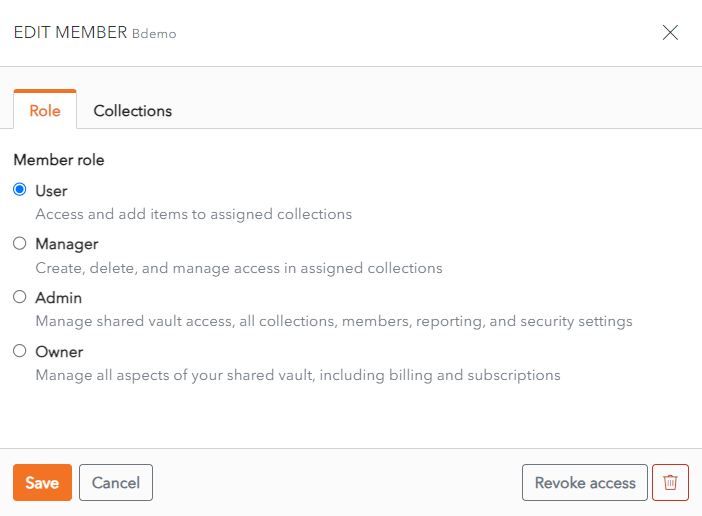
Click Save to save changes.
Alternatively, click Cancel to cancel the operation.
Manage Member Access to Collections
From the Member List in the Shared Vault, click the ![]() More button beside the Member in question.
More button beside the Member in question.
Click the Collections link.
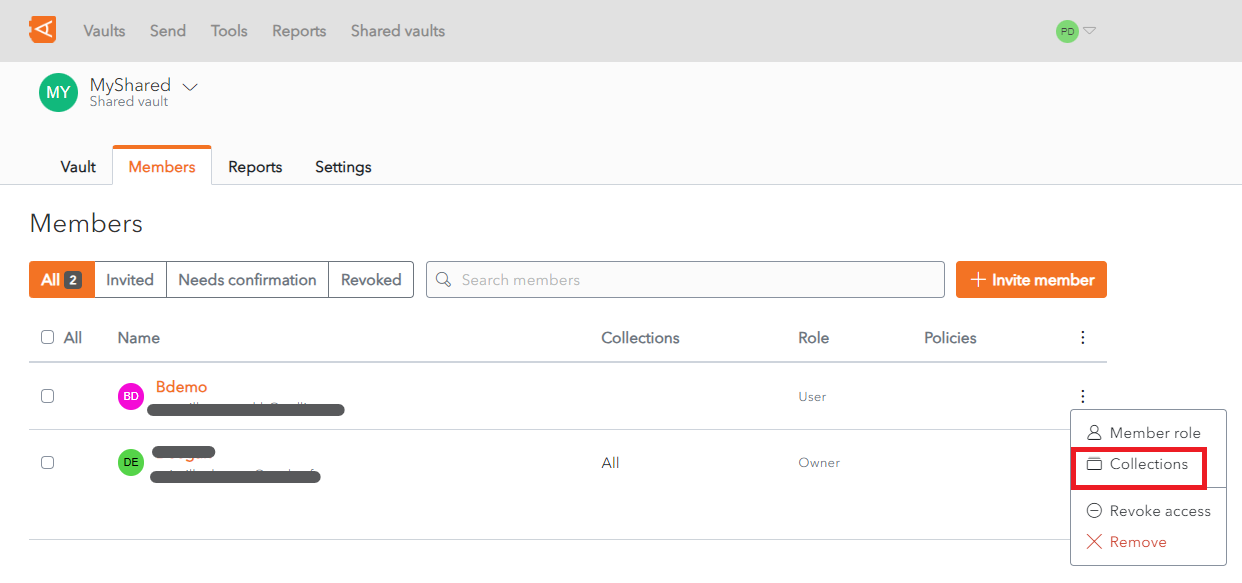
The Edit Member screen displays with the Collections Tab open.
To remove access to a Collection, click the X button beside the Collection in the Collection List.
To add a new Permission to a Collection, select the Permission and Collection and click the Enter button. This is the same procedure as from the Add Members screen.

Click Save to save changes. The Member is now added to this collection.
Alternatively, click Cancel to cancel the operation.
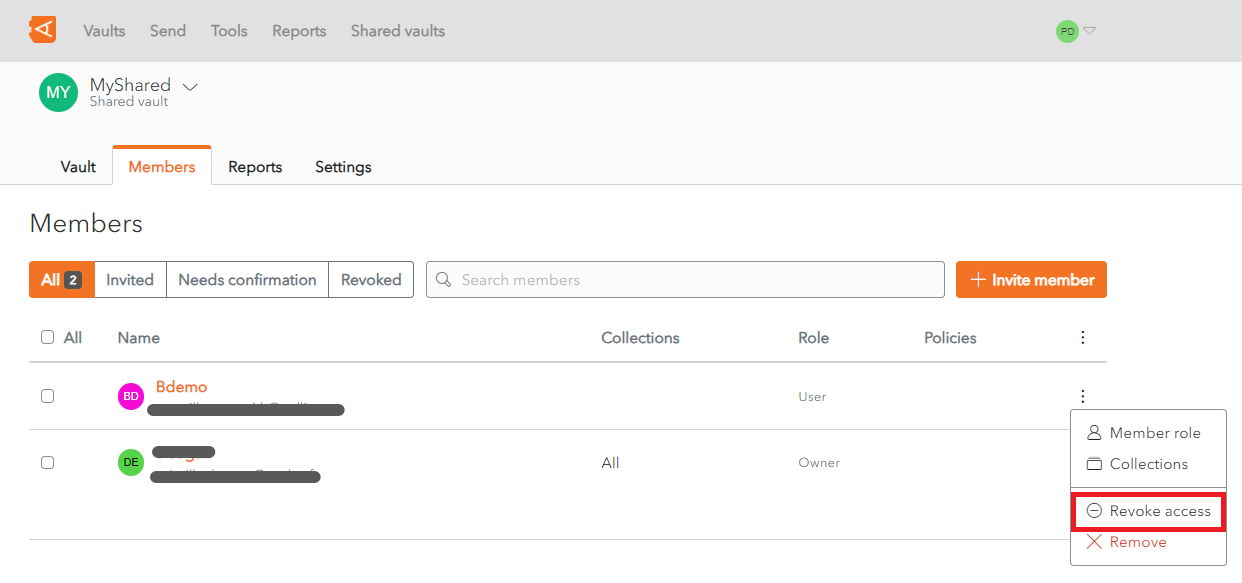
Revoke Access to Shared Vault
From the Member List in the Shared Vault, click the ![]() More button beside the Member in question.
More button beside the Member in question.
Click the Revoke Access link.
A Revoke Access Confirmation screen displays.
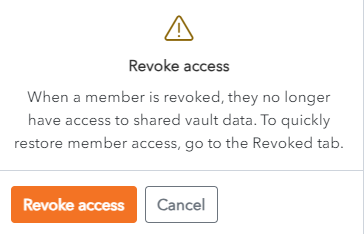
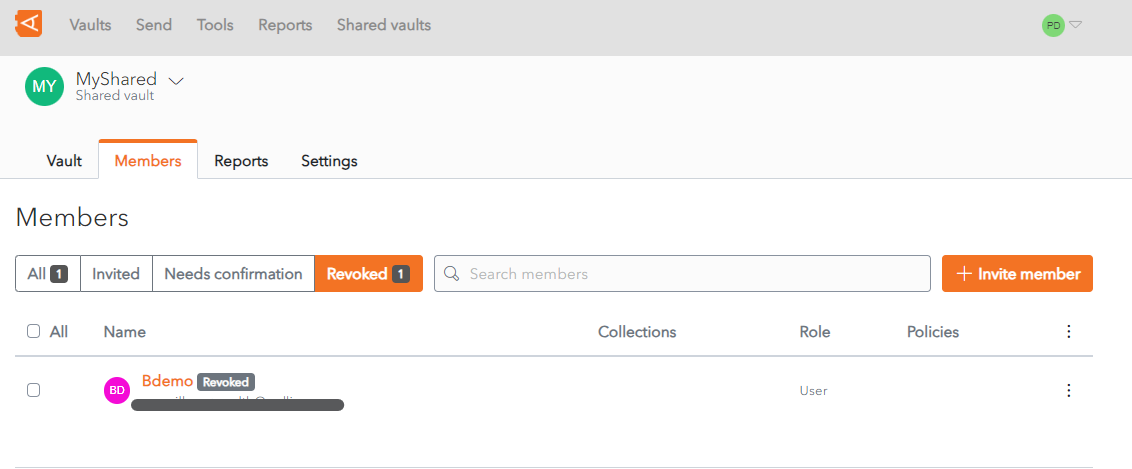
Click Revoke Access to Revoke Access. The Member will be displayed in the Revoked Tab of the Member List.
Alternatively, click Cancel to cancel the operation.
Restore Access to Shared Vault
From the Member List in the Shared Vault, click the ![]() More button beside the Member in question.
More button beside the Member in question.
Click the Restore Access link.
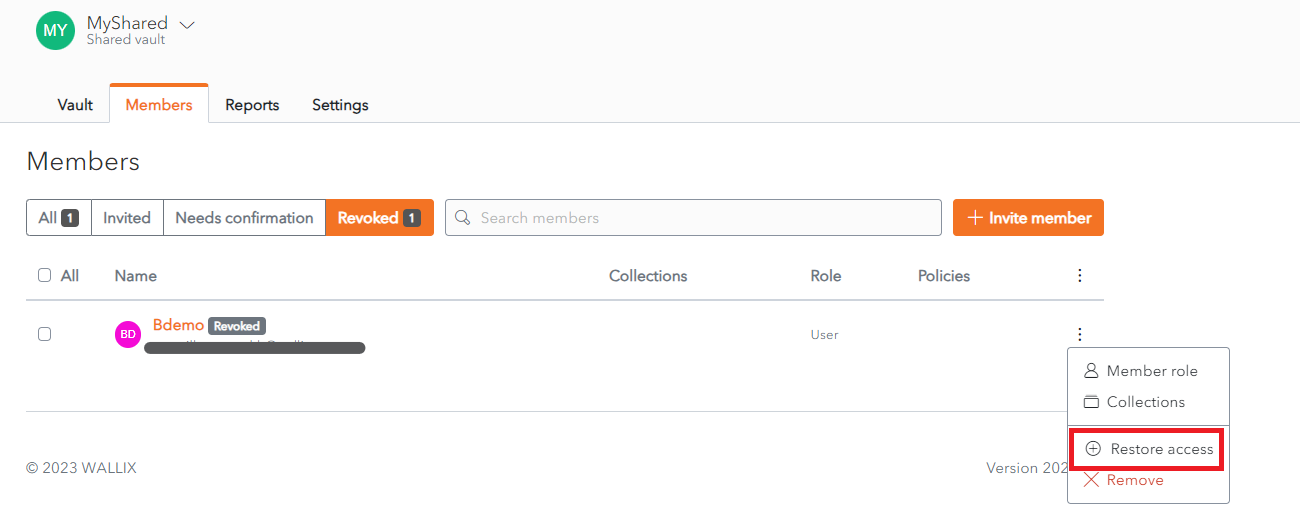
The Member's access to the Shared Vault is restored.
The Member will be displayed in the All Tab of the Member List.
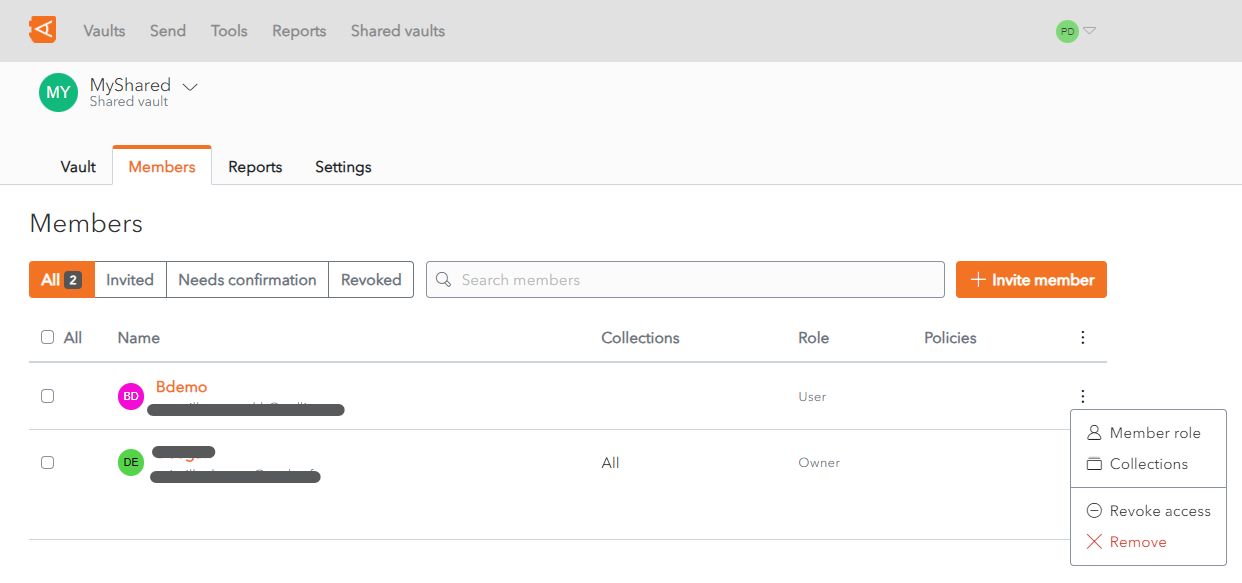
Remove Member
From the Member List in the Shared Vault, click the ![]() More button beside the Member in question.
More button beside the Member in question.
Click the Remove link.
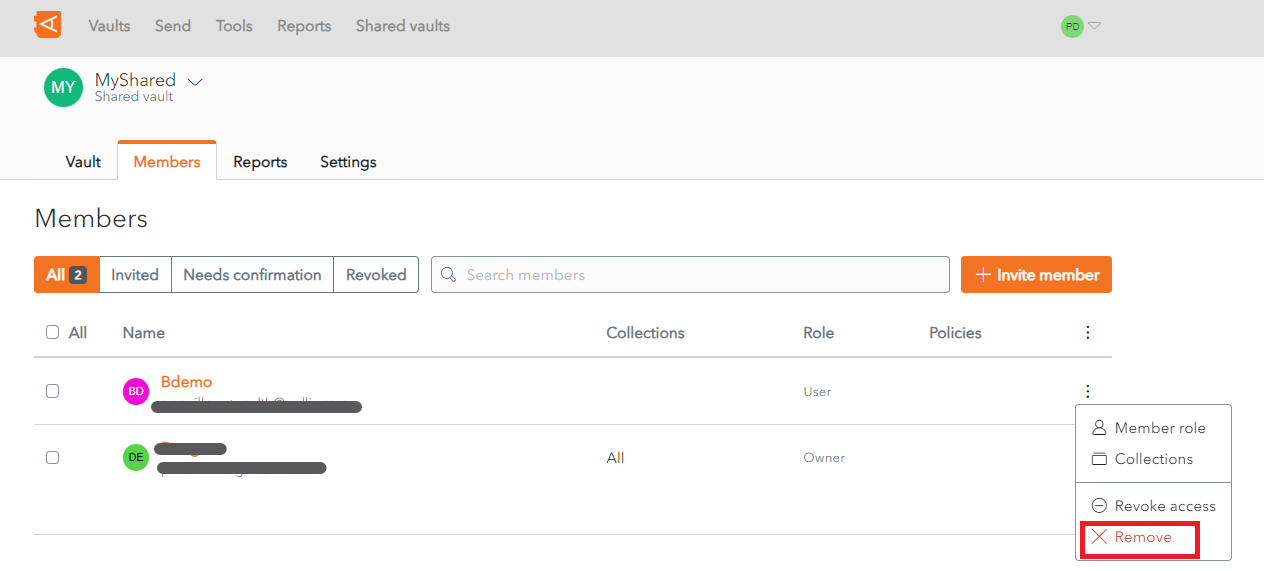
A Remove Member Access screen is displayed.
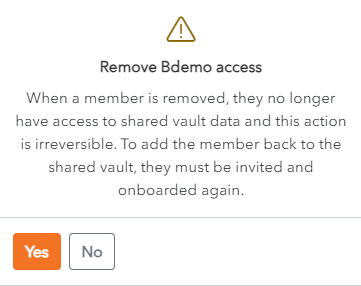
Click Yes to Remove the Member from the Shared Vault. The member is removed from the Shared Vault.
Alternatively, click No to cancel the operation.
Note: similarly to the Leave Shared Vault function, this is only possible if the Member is not the last remaining member with Owner access.
Leave a Shared Vault
To leave a Shared Vault, click on the ![]() More button beside the Shared Vault.
More button beside the Shared Vault.
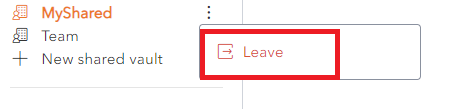
Click the Leave link. A Confirmation pop up screen is displayed.
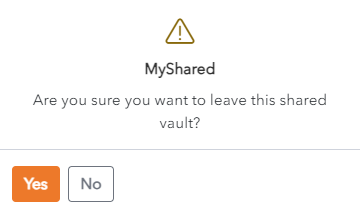
Click Yes to leave the Shared Vault.
Click No to cancel the operation.
Note: If you are the last remaining Vault Owner, you are not permitted to leave the Shared Vault. In this case the following message is displayed.

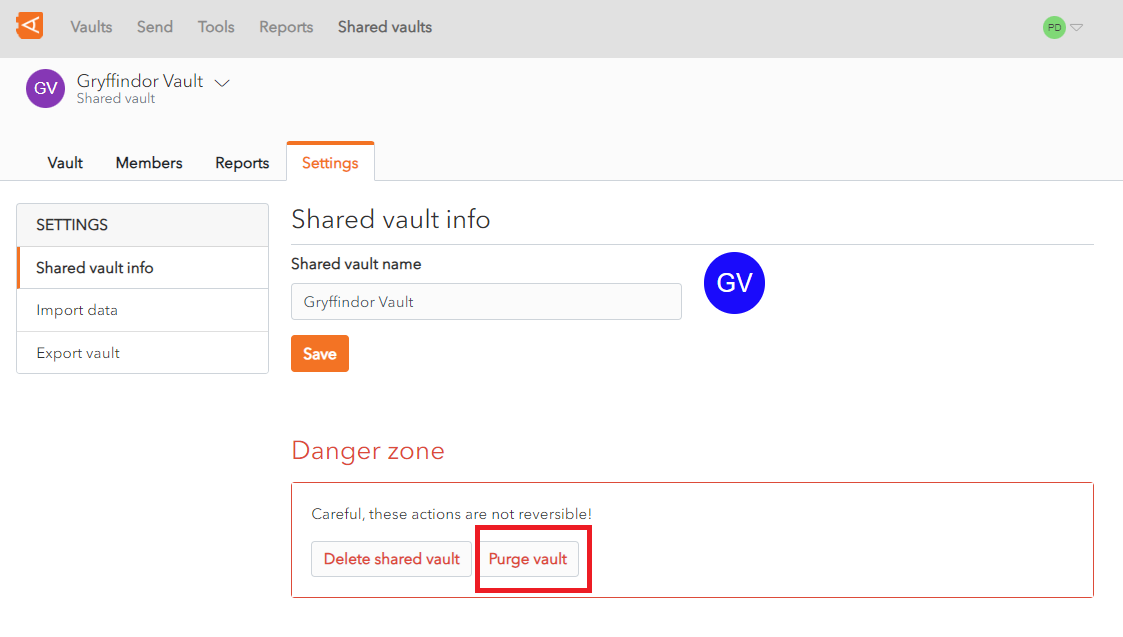
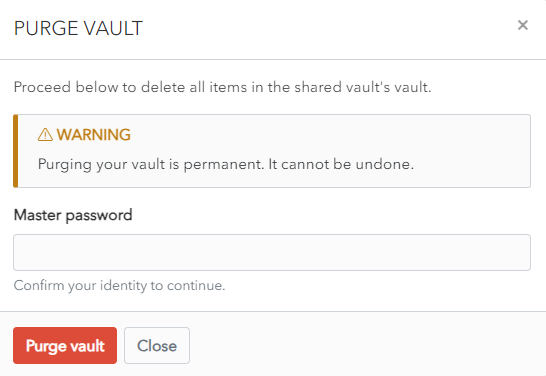
Purge Shared Vault
Click the Purge Vault button to purge all data from the Vault.
A Confirmation Screen appears.
Enter your Master Password and click the Purge Vault button to purge the Vault.
Alternatively, click Close to cancel the operation.
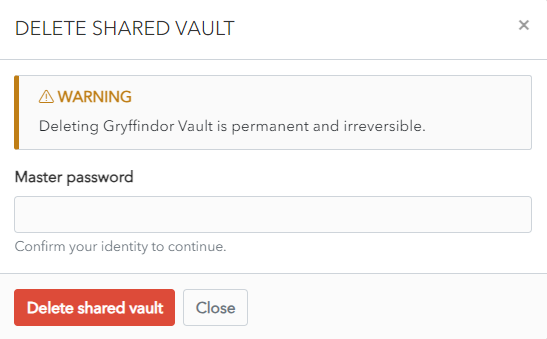
Delete Shared Vault
Click the Delete Shared Vault button to delete the Shared Vault.
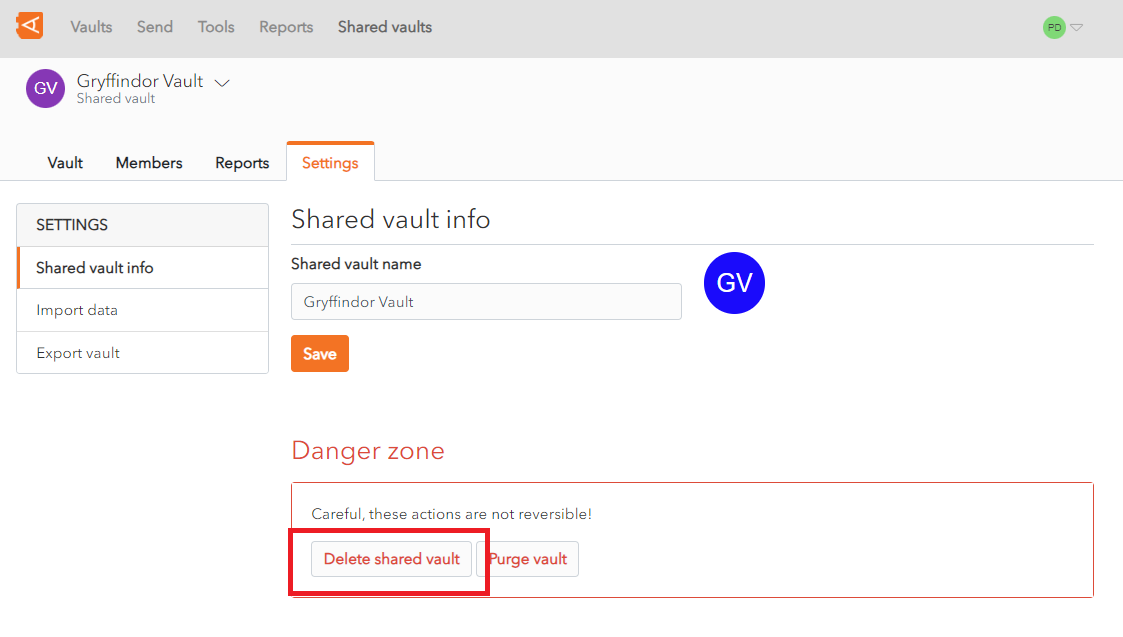
A Confirmation Screen appears.
Enter your Master password and click the Delete shared vault button to delete the Vault and all of it's data.
Alternatively, click Close to cancel the operation.