# Manage Shared Vaults
Create shared vaults to to exchange your items securely.
# Shared Vaults Overview
A Shared Vault is is a way of sharing items between other members. It is [created ](https://vault-doc.wallix.com/link/50)and [shared](https://vault-doc.wallix.com/link/51) with other Members.
It can be [renamed](https://vault-doc.wallix.com/link/59) after creation.
A number of options are available from the [Context Menu of a Shared Vault Item](https://vault-doc.wallix.com/link/124), depending on the Item Type, such as:
- Copy username: Copies the Username to the clipboard (for Login Items)
- Copy password: Copies the Password to the clipboard (for Login Items)
- Launch : Launches the URI associated with the Item (for Login Items)
- [Attachments](https://vault-doc.wallix.com/link/75): Displays the Attachment Screen
- [Collections](https://vault-doc.wallix.com/link/65): Displays the Collections Screen
- [Delete](https://vault-doc.wallix.com/link/42): Deletes the Item (after Confirmation)
It can contain [one or more Collections](https://vault-doc.wallix.com/link/67). It can contain [one or more Items](https://vault-doc.wallix.com/link/62) that can be shared with Members via Collections.
Members can be added with different [Roles within the Shared Vault](https://vault-doc.wallix.com/link/57) and given [access to Collections](https://vault-doc.wallix.com/link/52).
Temporary access to a Shared Vault can be [revoked](https://vault-doc.wallix.com/link/53) or [restored](https://vault-doc.wallix.com/link/55). Members can also be [removed permanently](https://vault-doc.wallix.com/link/56) or they can [leave the Shared Vault](https://vault-doc.wallix.com/link/49).
A Shared Vault can be [purged of its data](https://vault-doc.wallix.com/link/60) (while keeping the Shared Vault) or [deleted entirely](https://vault-doc.wallix.com/link/61).
# Create a Shared Vault
From the Home screen, click on the **+ New Shared Vault** link.
[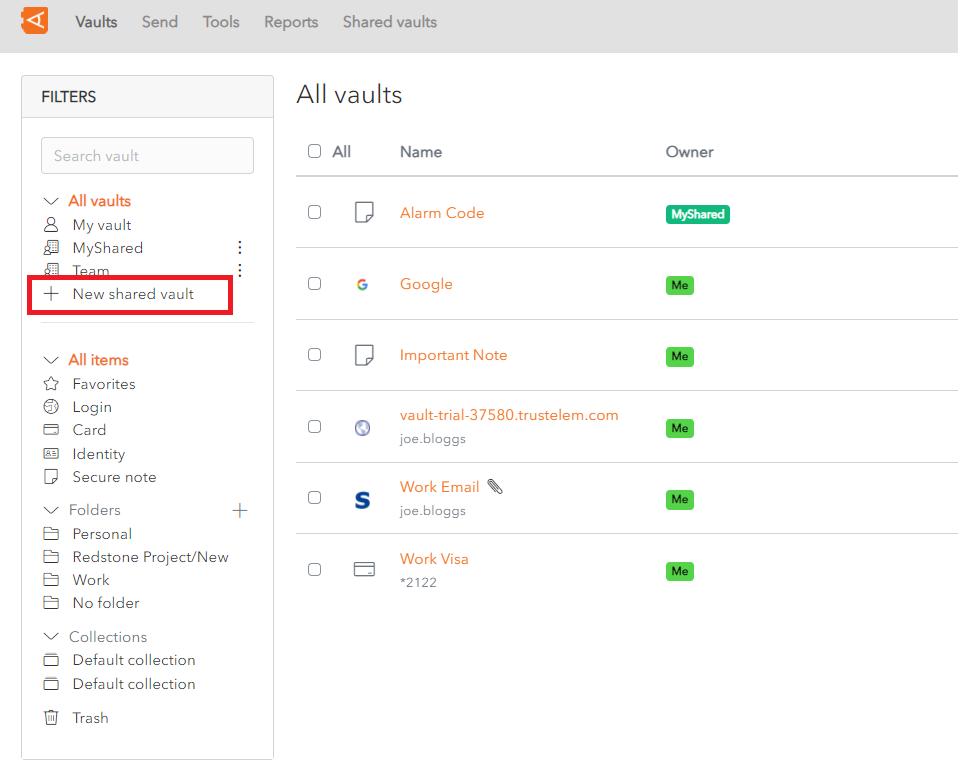](https://vault-doc.wallix.com/uploads/images/gallery/2023-11/create-shared-vault-link.png)
The **New Shared Vault** pop up screen is displayed.
[](https://vault-doc.wallix.com/uploads/images/gallery/2023-11/create-shared-vault-screen.png)
Enter a **Shared vault name** and click **Submit**.
A **New** **Shared Vault** with that name is **created**.
[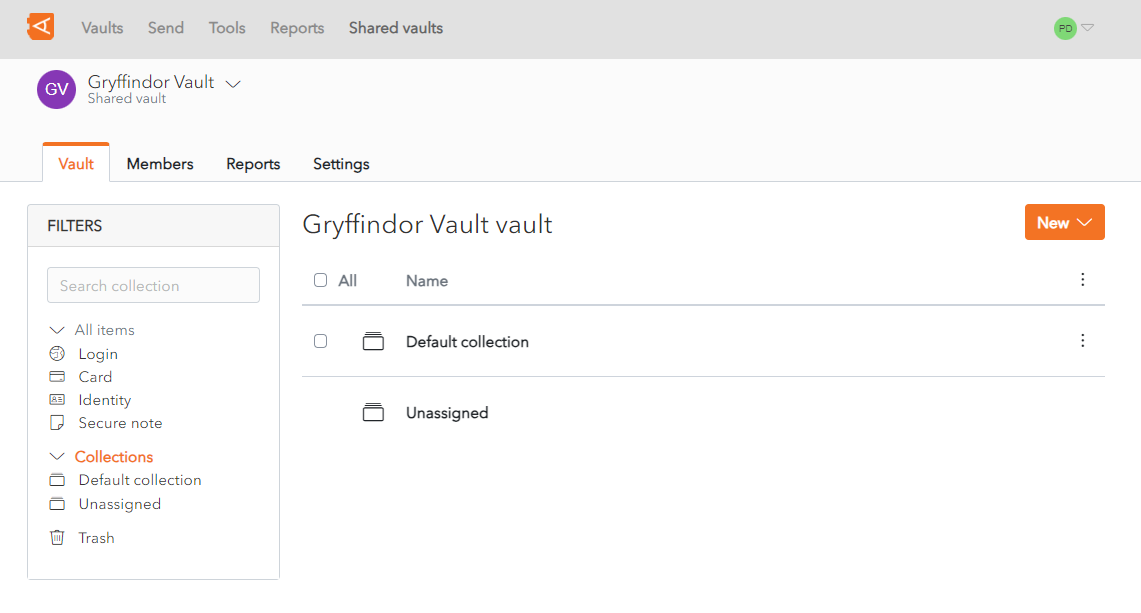](https://vault-doc.wallix.com/uploads/images/gallery/2023-11/new-shared-vault-created.png)
# Rename Shared Vault
From the **Shared Vault screen** in the **Settings** Tab, rename the Shared Vault in the **Shared Vault Name** field.
Click **Save** to save changes. The Shared Vault is renamed.
[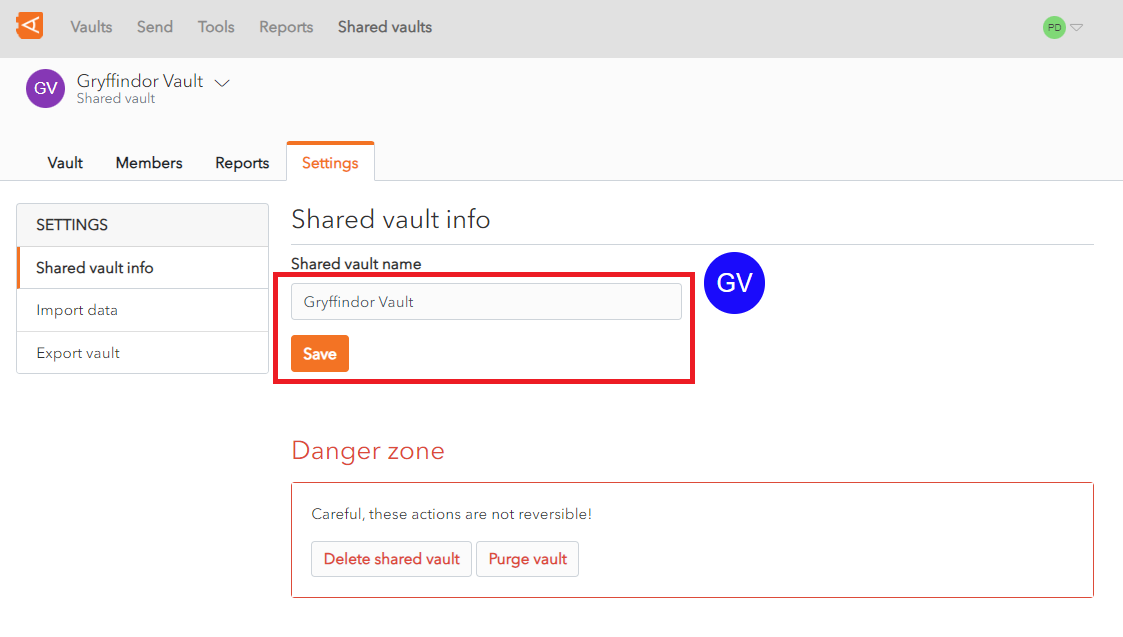](https://vault-doc.wallix.com/uploads/images/gallery/2023-11/rename-shared-vault-settings-screen.png)
# Shared Vault Items Context Menu
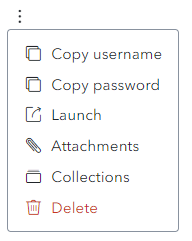
From the **Item List** click the  **More Button** of a **Shared Vault Item.**
The Shared Vault Item **Context Menu** is displayed.
[](https://vault-doc.wallix.com/uploads/images/gallery/2023-12/capture-decran-2023-12-13-175125.png)
A **number of options** are available (depending on the Item Type):
- **Copy username:** Copies the Username to the clipboard (for Login Items)
- **Copy password:** Copies the Password to the clipboard (for Login Items)
- **Launch :** Launches the URI associated with the Item (for Login Items)
- **[Attachments](https://vault-doc.wallix.com/link/75):** Displays the Attachment Screen
- **[Collections](https://vault-doc.wallix.com/link/65):** Displays the Collections Screen
- **[Delete](https://vault-doc.wallix.com/link/42):** Deletes the Item (after Confirmation)
# Invite Member to Shared Vault
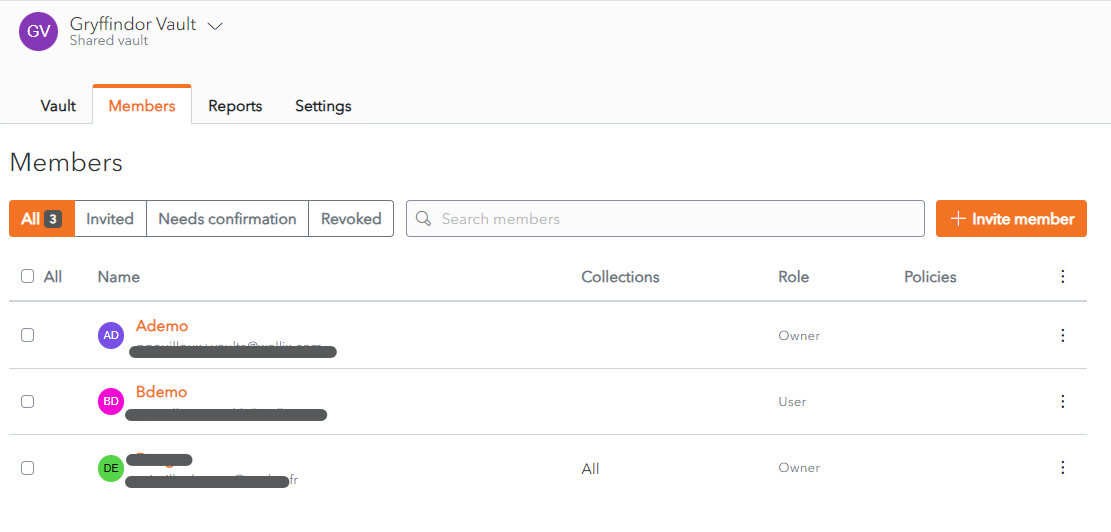
From the **Shared Vaults screen**, click on the **Invite member** button.
[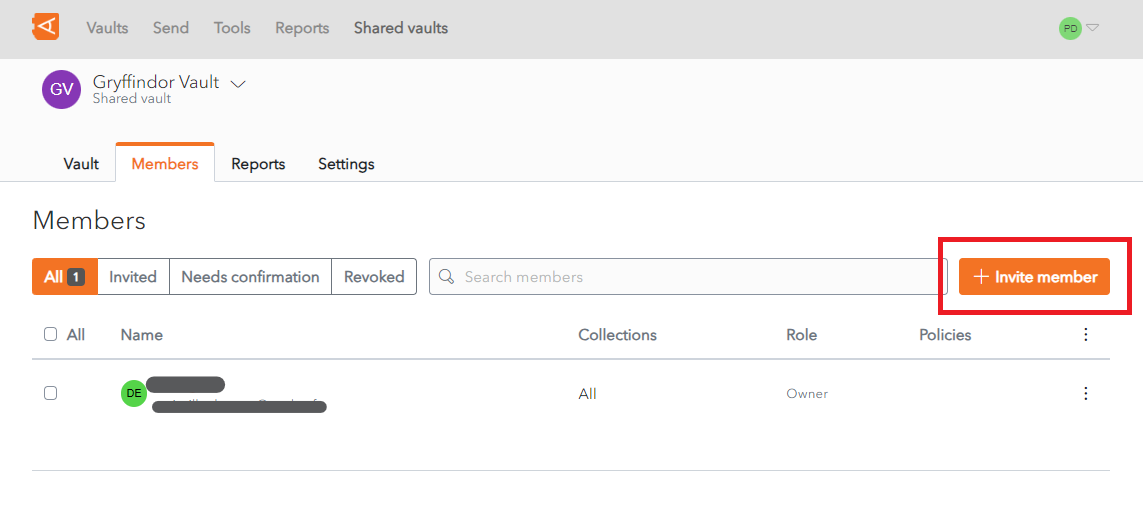](https://vault-doc.wallix.com/uploads/images/gallery/2023-11/vault-members-screen.png)
The **Invite Members** screen is displayed. The **Role Tab** is selected by **default**.
[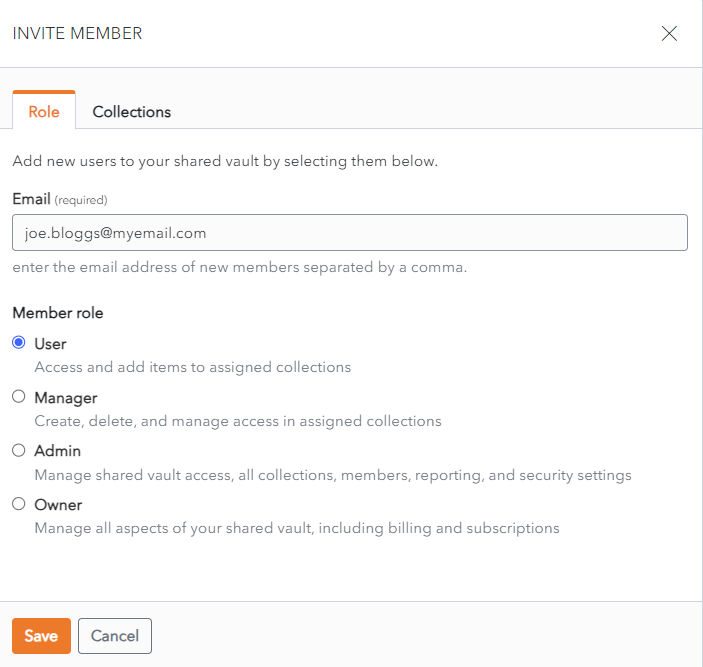](https://vault-doc.wallix.com/uploads/images/gallery/2023-11/en-invite-member-shared-vault.png)
### Grant Permissions to a Collection
Before granting a user access to a Shared Vault, you must **grant permissions** to at least one **collection** in the Shared Vault.
Click on the **Collections** tab.
Choose the Permission from the **Permission** dropdown.
Choose the Collection from the **Select Collections** dropdown.
[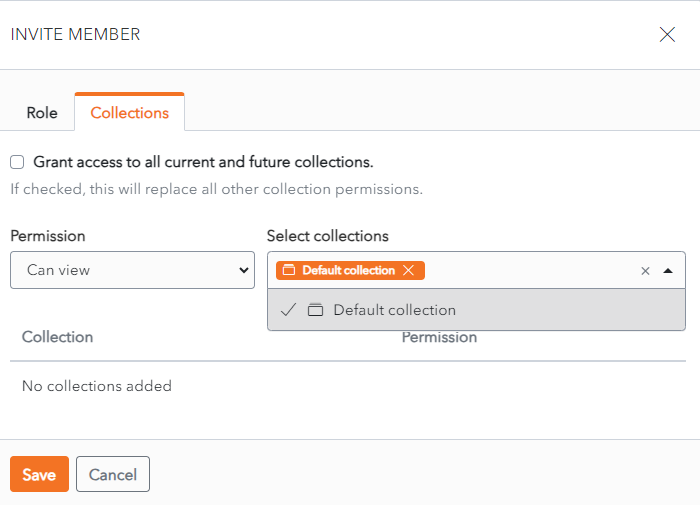](https://vault-doc.wallix.com/uploads/images/gallery/2023-11/member-access-to-collections.png)
Click **Enter.** The **Pemissions assigned** to the **Collection** is **displayed**.
[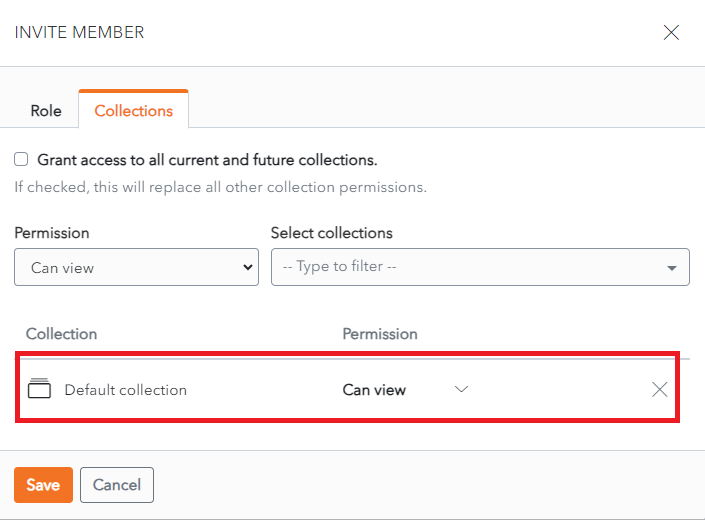](https://vault-doc.wallix.com/uploads/images/gallery/2023-11/member-access-to-collections-saved.png)
### Select Member to Invite
Once at least one Collection in the Shared Vault has Permissions assigned, Members can be invited to the Shared Vault.
The **Role** Tab is selected by **default**.
Select a Member to invite from the **Select New Members** dropdown.
Select the **Member Role**. **User** is checked by **default**.
[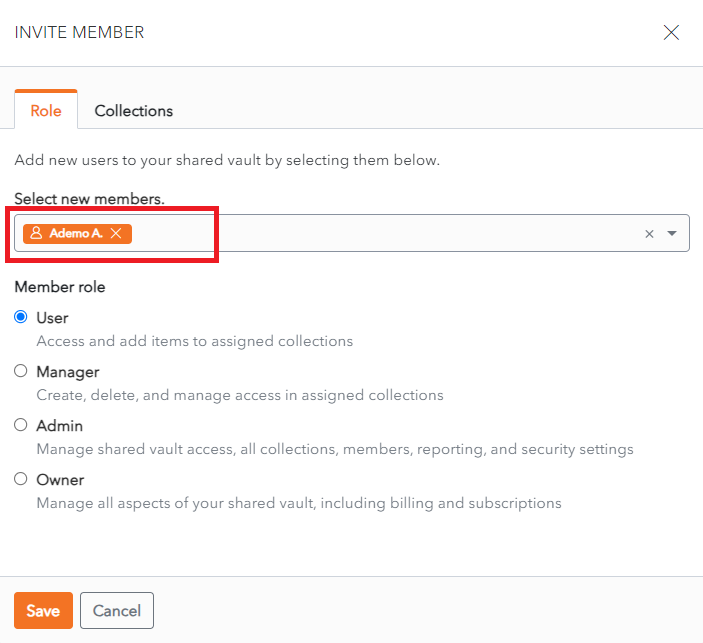](https://vault-doc.wallix.com/uploads/images/gallery/2023-11/invite-member-to-shared-vault.png)
Click **Save** to invite the member to the Shared Vault. The Member is displayed in the **Member List** for the Shared Vault.
Alternatively, click **Cancel** to cancel the operation.
[](https://vault-doc.wallix.com/uploads/images/gallery/2023-11/member-added-to-shared-vault.png)
# Add, Edit or Delete Items
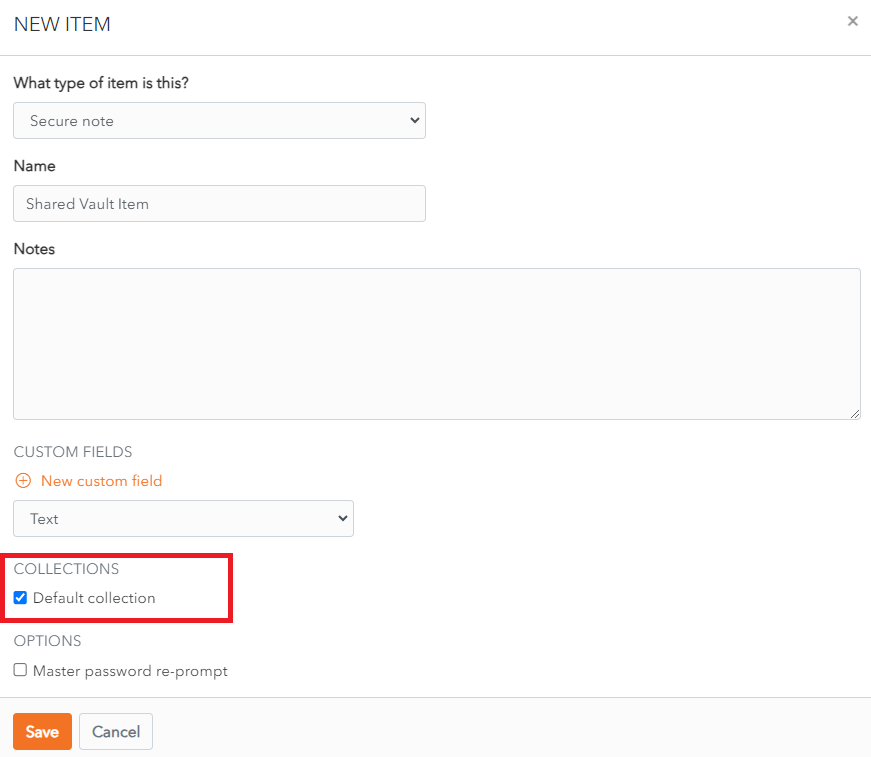
### Create a Shared Vault Item
Follow the normal procedure for**[ creating an Item](https://vault-doc.wallix.com/link/8)**, with **one additional step**.
Items created in a Shared Vault have one extra field - the **Collections Field**, which is **mandatory**. A Shared Vault Item must be **added to at least one Collection**.
In the **Collections Section** of the **New Item Screen**, check the **checkbox** beside a **Collection** that you wish to add the Item to.
Then Click **Save** to create the Item.
[](https://vault-doc.wallix.com/uploads/images/gallery/2023-11/eTAcreate-sv-item.png)
### Manage Shared Vault Items
The procedure to **[Edit an Item](https://vault-doc.wallix.com/link/9)** and **[Delete an Item](https://vault-doc.wallix.com/link/42)** are the same as for personal Vaults as are the **[Item Types](https://vault-doc.wallix.com/link/10)**.
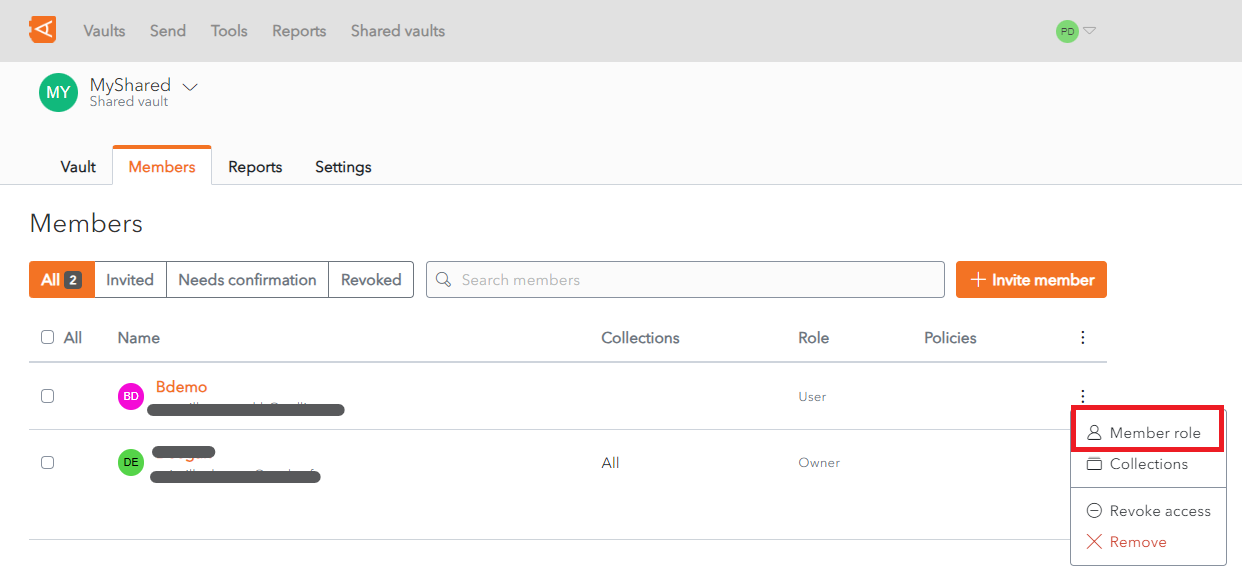
# Edit Member Roles
From the **Member List** in the Shared Vault, click the  **More** button beside the Member in question.
A Context Menu displays.
Click the **Member Role** link.
[](https://vault-doc.wallix.com/uploads/images/gallery/2023-11/change-member-roles-link.png)
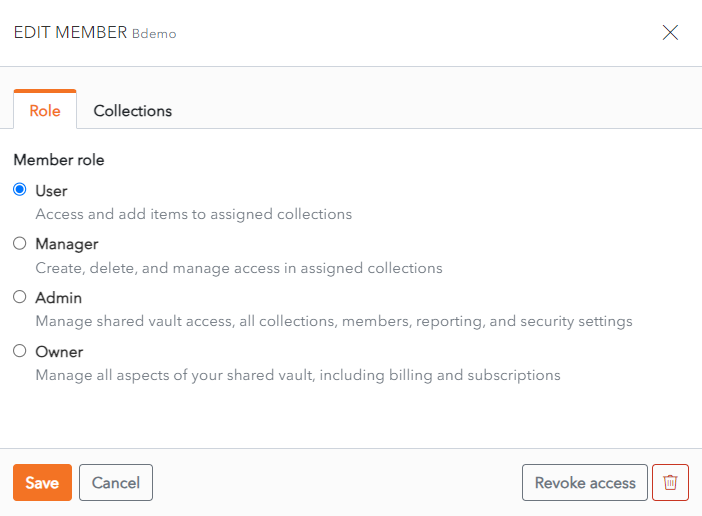
The **Edit Member** screen displays with the **Role Tab** open.
**Change** the member role using the **Member Role** radio buttons.
[](https://vault-doc.wallix.com/uploads/images/gallery/2023-11/CK9edit-member-screen.png)
Click **Save** to save changes.
Alternatively, click **Cancel** to cancel the operation.
# Manage Member Access to Collections
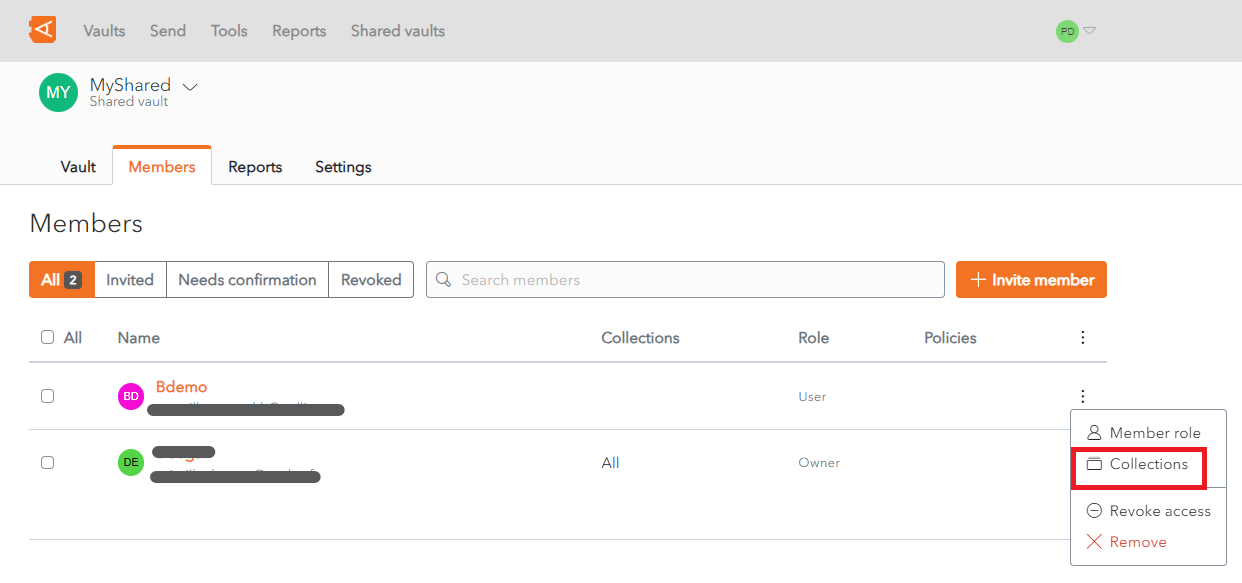
From the **Member List** in the Shared Vault, click the  **More** button beside the Member in question.
A Context Menu displays.
Click the **Collections** link.
[](https://vault-doc.wallix.com/uploads/images/gallery/2023-11/change-member-collections-link.png)
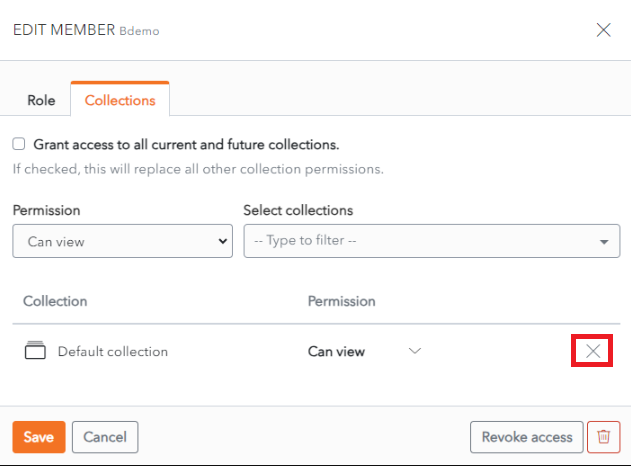
The **Edit Member** screen displays with the **Collections Tab** open.
To **remove** access to a Collection, click the **X button** beside the Collection in the Collection List.
To **add a new Permission** to a Collection, select the Permission and Collection and click the Enter button. This is the same procedure as from the [**Add Members**](https://vault-doc.wallix.com/link/51#bkmrk-click-enter.-the-pem) screen.
[](https://vault-doc.wallix.com/uploads/images/gallery/2023-12/edit-member.png)
Click **Save** to save changes. The Member is now added to this collection.
Alternatively, click **Cancel** to cancel the operation.
# Revoke Access to Shared Vault
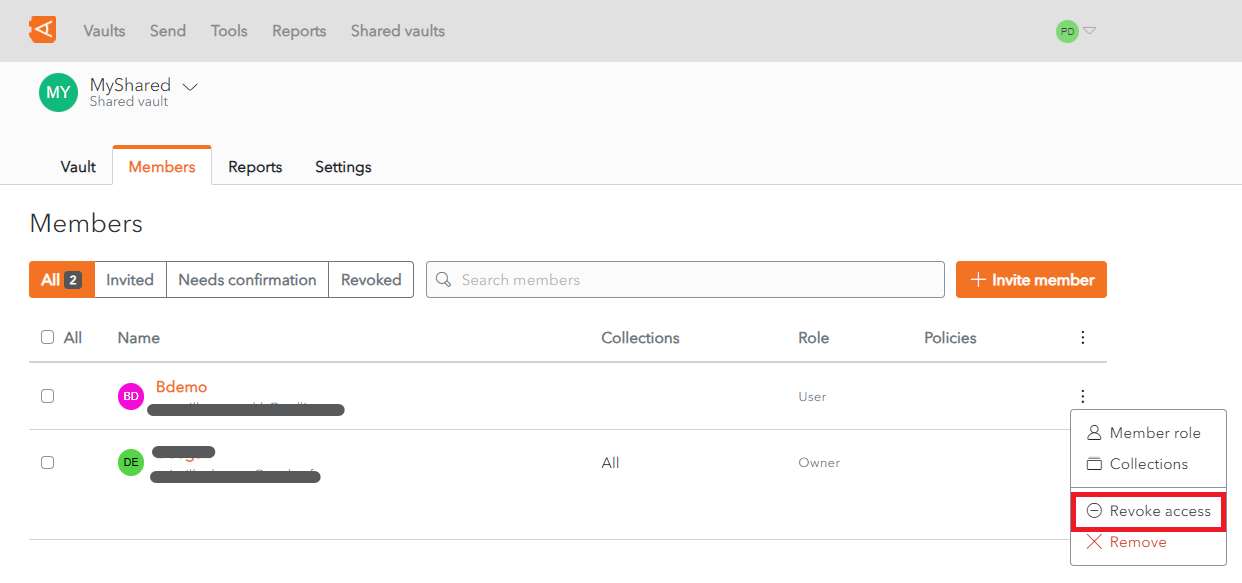
From the **Member List** in the Shared Vault, click the  **More** button beside the Member in question.
A Context Menu displays.
Click the **Revoke Access** link.
[](https://vault-doc.wallix.com/uploads/images/gallery/2023-12/restore-access-in-all-tab.png)
A Revoke Access **Confirmation** screen displays.
[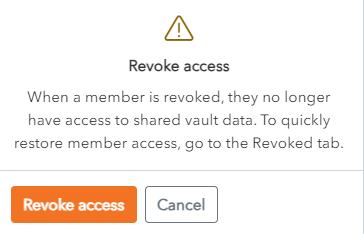](https://vault-doc.wallix.com/uploads/images/gallery/2023-11/kdarevoke-access-confirmation.png)
Click **Revoke Access** to Revoke Access. The Member will be displayed in the **Revoked Tab** of the **Member List**.
Alternatively, click **Cancel** to cancel the operation.
[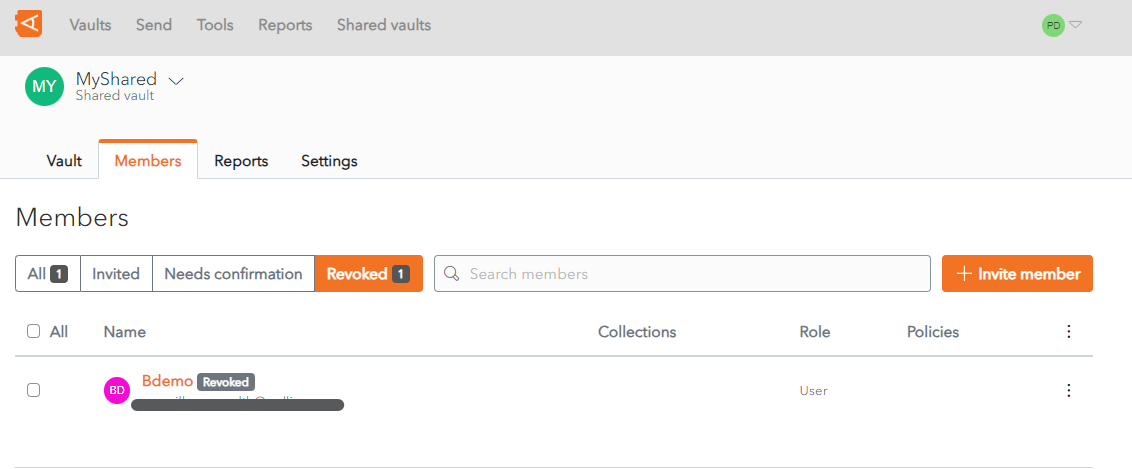](https://vault-doc.wallix.com/uploads/images/gallery/2023-11/p81revoked-member.png)
# Restore Access to Shared Vault
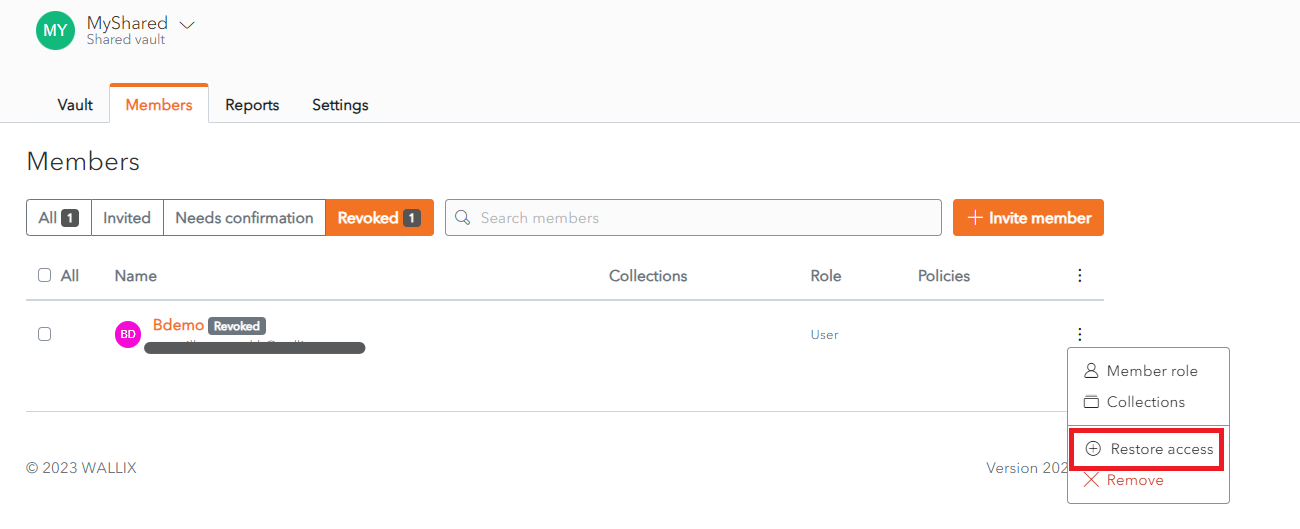
From the **Member List** in the Shared Vault, click the  **More** button beside the Member in question.
A Context Menu displays.
Click the **Restore Access** link.
[](https://vault-doc.wallix.com/uploads/images/gallery/2023-11/51Irestore-access-link.png)
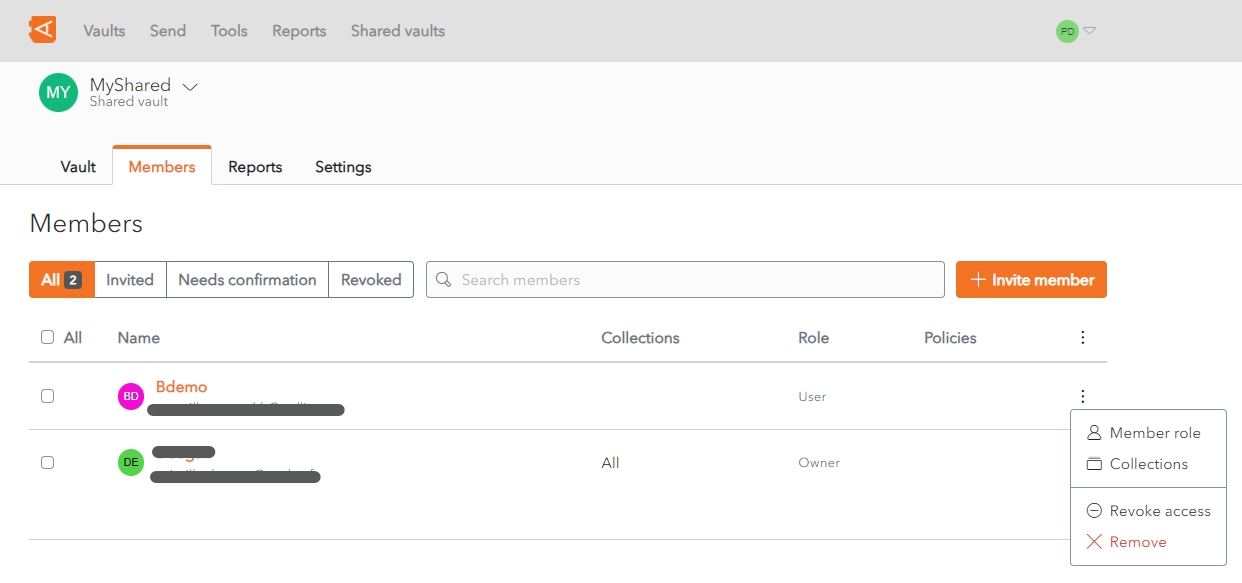
The Member's access to the Shared Vault is restored.
The Member will be displayed in the **All Tab** of the **Member List**.
[](https://vault-doc.wallix.com/uploads/images/gallery/2023-11/a3Arevoke-access-link-png.png)
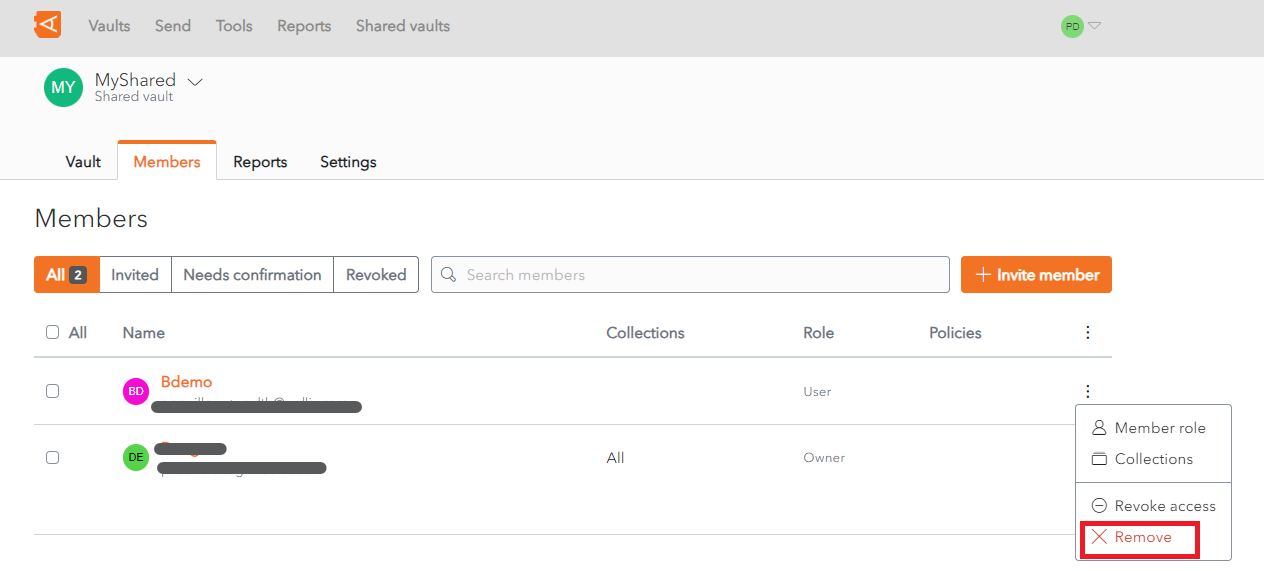
# Remove Member
From the **Member List** in the Shared Vault, click the  **More** button beside the Member in question.
A Context Menu displays.
Click the **Remove** link.
[](https://vault-doc.wallix.com/uploads/images/gallery/2023-11/remove-member-link.png)
A **Remove Member Access screen** is displayed.
[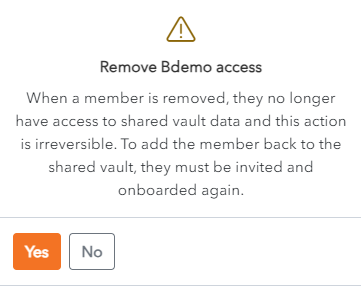](https://vault-doc.wallix.com/uploads/images/gallery/2023-11/remove-member-confirmation.png)
Click **Yes** to **Remove the Member from the Shared Vault**. The member is removed from the Shared Vault.
Alternatively, click **No** to cancel the operation.
**Note**: similarly to the **[Leave Shared Vault](https://vault-doc.wallix.com/link/49#bkmrk--2)** function, this is only possible if the Member is not the last remaining member with Owner access.
# Leave a Shared Vault
To **leave a Shared Vault**, click on the  **More** button beside the Shared Vault.
A context menu is displayed.
[](https://vault-doc.wallix.com/uploads/images/gallery/2023-11/leave-shared-vault.png)
Click the **Leave** link. A **Confirmation pop up screen** is displayed.
[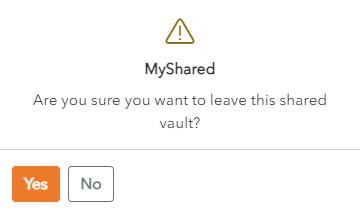](https://vault-doc.wallix.com/uploads/images/gallery/2023-11/leave-shared-vault-confirmation.png)
Click **Yes** to leave the Shared Vault.
Click **No** to cancel the operation.
**Note**: If you are the last remaining Vault Owner, you are not permitted to leave the Shared Vault. In this case the following message is displayed.
[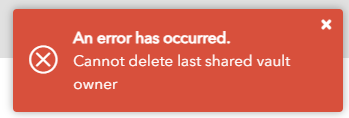](https://vault-doc.wallix.com/uploads/images/gallery/2023-11/cannot-delete-last-shared-vault-owner.png)
# Purge Shared Vault
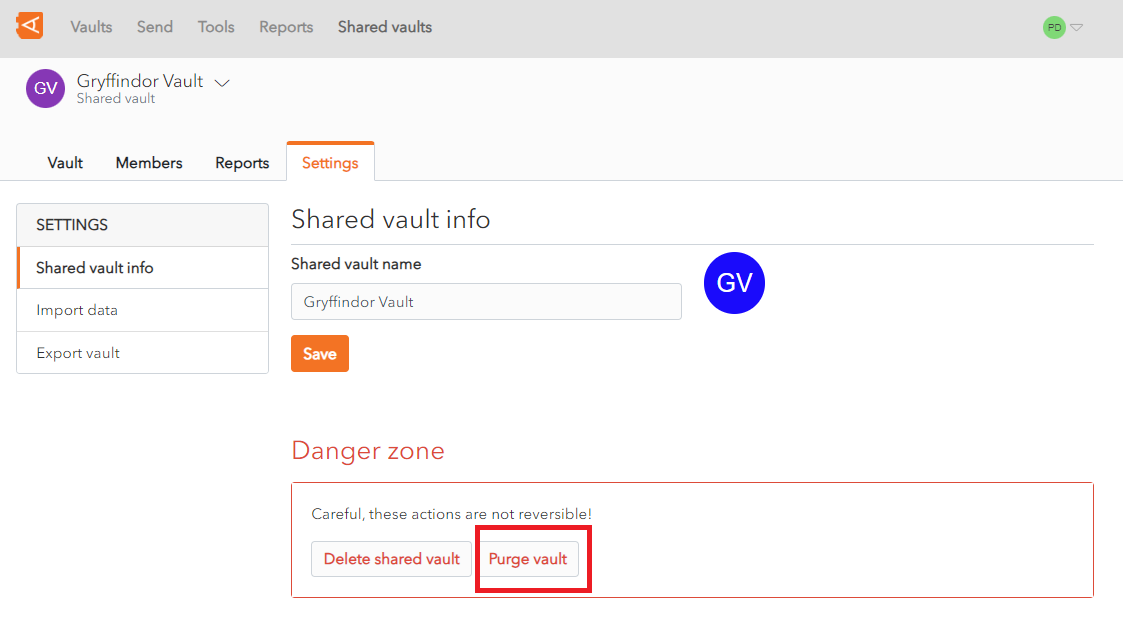
From the **Shared Vault Screen**, click on the **Settings Tab**.
Click the **Purge Vault** button to purge all data from the Vault.
[](https://vault-doc.wallix.com/uploads/images/gallery/2023-11/purge-shared-vault.png)
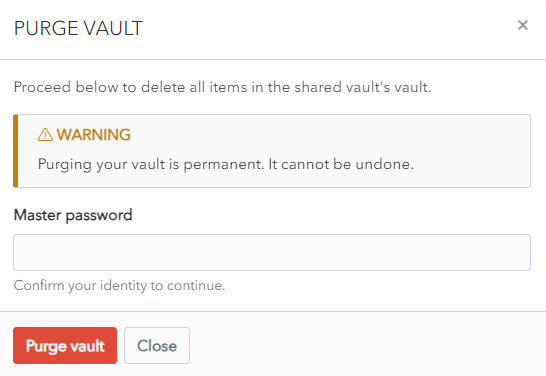
A **Confirmation Screen** appears.
Enter your **Master Password** and click the **Purge Vault** **button** to purge the Vault.
Alternatively, click **Close** to cancel the operation.
[](https://vault-doc.wallix.com/uploads/images/gallery/2023-11/purge-shared-vault-confirmation.png)
# Delete Shared Vault
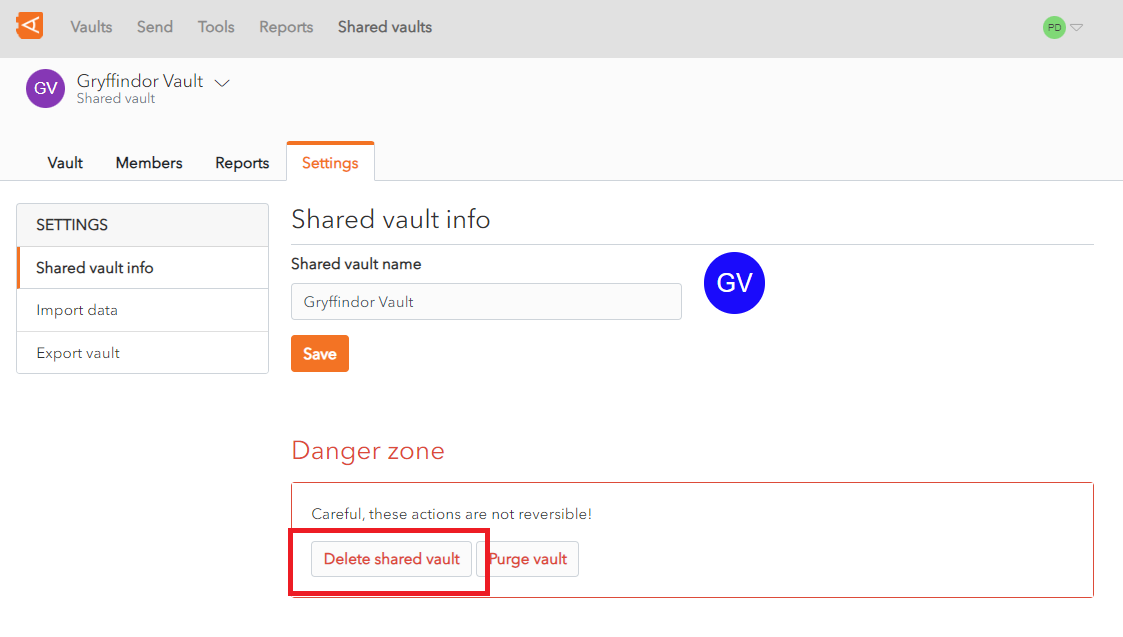
From the **Shared Vault Screen**, click on the **Settings Tab**.
Click the **Delete Shared Vault** button to delete the Shared Vault.
[](https://vault-doc.wallix.com/uploads/images/gallery/2023-11/delete-shared-vault.png)
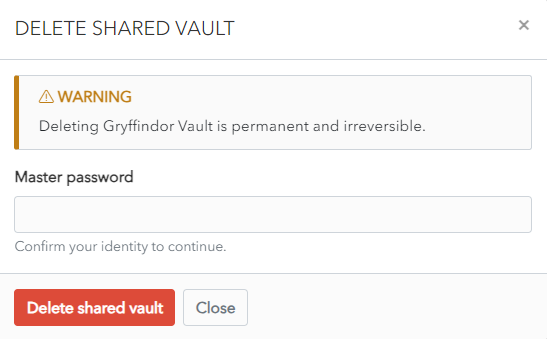
A **Confirmation Screen** appears.
Enter your **Master password** and click the **Delete shared vault** **button** to delete the Vault and all of it's data.
Alternatively, click **Close** to cancel the operation.
[](https://vault-doc.wallix.com/uploads/images/gallery/2023-11/delete-shared-vault-confirmation.png)