Quick start guide
This quick start admin guide is divided into two parts.
First, the BUILD, which explains the operations to be carried out before starting to use the Enterprise Vault.
Secondly, the RUN, which lists the product life operations that can be performed.
BUILD
Enterprise Vault user creation and management uses WALLIX ONE IDaaS (or Trustelem), so the BUILD phase will involve configuring both Enterprise Vault and WALLIX ONE IDaaS.
1/ Subscription creation
When you subscribe to WALLIX ONE Enterprise Vault, you'll need to provide several pieces of information: among others the name of your company, and the names of future administrators.
Your company name will be used to create a WALLIX ONE IDaaS subscription.
For instance, MyCompany could have the subscription named "mycompany.trustelem.com".
The list of admins provided will be automatically provisioned when the subscription is created.
They will receive an email with :
- A link to initialize the account
- The subscription admin url (admin-your_name.trustelem.com) for WALLIX ONE IDaaS
- The subscription user url (your_name.trustelem.com) for WALLIX ONE IDaaS
- The link to the documentation
Your first action is to create your accounts using the link provided in the email, and then go to the WALLIX ONE IDaaS administration interface.
2/ Setup WALLIX ONE IDaaS
When you log on to the admin page, the subscription is empty, except for the first administrators. So you'll need to configure it.
There are 3 main actions to configure WALLIX ONE IDaaS:
- Add Enterprise Vault applications
- Add users
- Give users access to Enterprise Vault
2.1/ Add Enterprise Vault applications
There are two applications to add:
- One for administrators, which includes auditing, logs and security policies.
- The other for users, in which secrets are managed, as well as a few administrative tasks such as recovery.
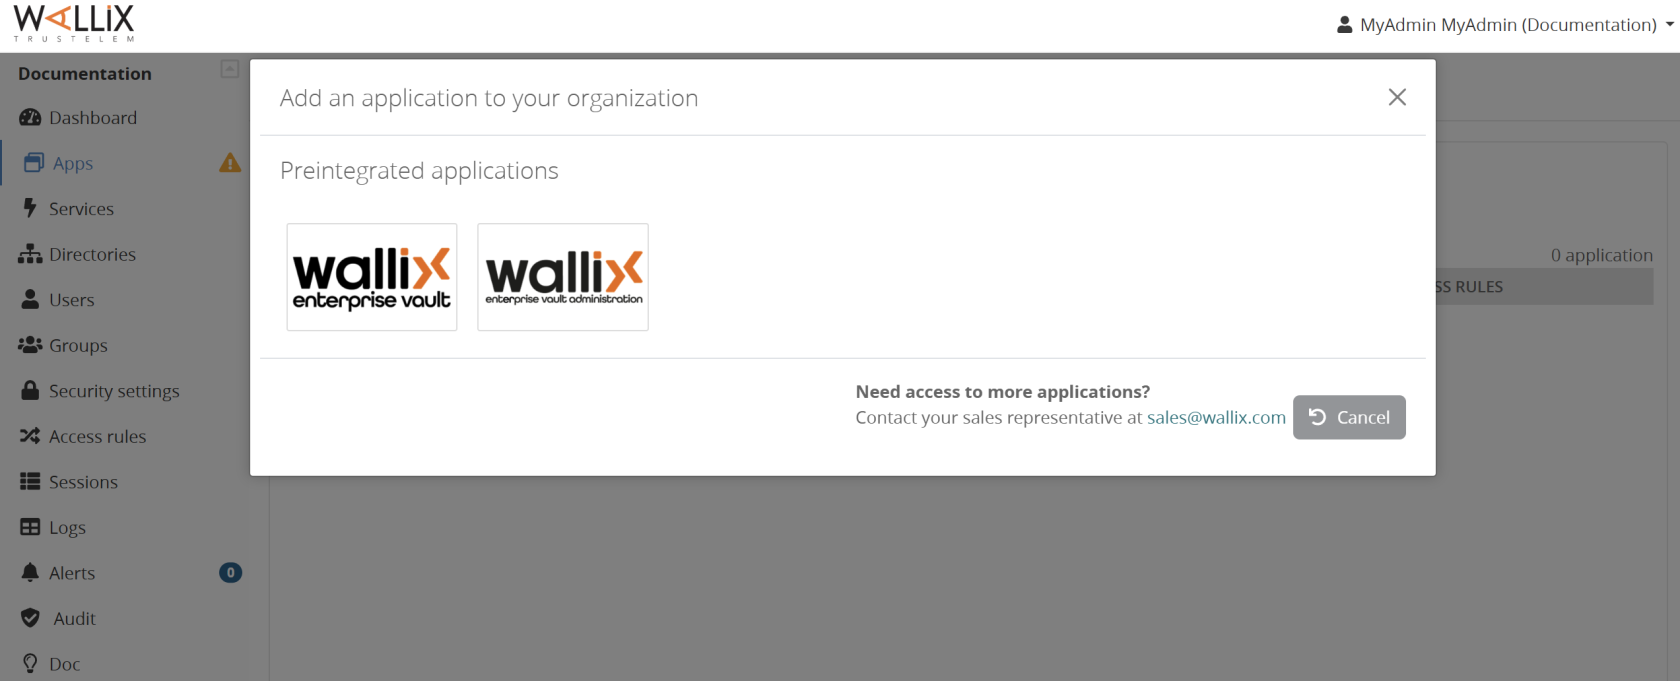
Go to Apps, then Add an application, then select WALLIX Enterprise Vault and WALLIX Enterprise Vault administration.
2.2/ Add users
Now, if you want to use directory or IDP users, you can do the setup.
- Link to Active Directory documentation
- Link to Azure AD documentation
- Link to External IDP (Azure, Okta...) documentation
But if you want to use local users, you don't want to create users right away: they'll receive enrollment emails, while the rest of the setup isn't ready yet. That said, you can still create user groups, as they will be used for the next steps.
For instance, you can create a "Users" group, and an "Admins" group.
Go to Groups, then Create.
2.3/ Give users access to Enterprise Vault
Now you need to define who can access EV and how. To do this, you'll add permissions.
Permissions can be 1-factor, usually login and password, or two-factor with an additional secret.
Full documentation is available here:
Here's a summary of the main steps:
- Create permissions for users and administrators, usually in 2-factor mode.
Go to Access rules, select Create, then choose your apps et your groups
Internal & External zone depend of the users public IP which is compared to what is provided in Security > General > Internal network. - Enable the desired multi-factors in Security, Authentication factors, Login column
- In the same page, create an enrollment campaign to automate the 2nd factor enrollment
You'll probably want to use "enrollment during login", which allows the form to be displayed directly after authentication if the user doesn't yet have a 2nd factor.
3/ Setup Enterprise Vault admin application
The final step in the setup is to define Enterprise Vault administration policies.
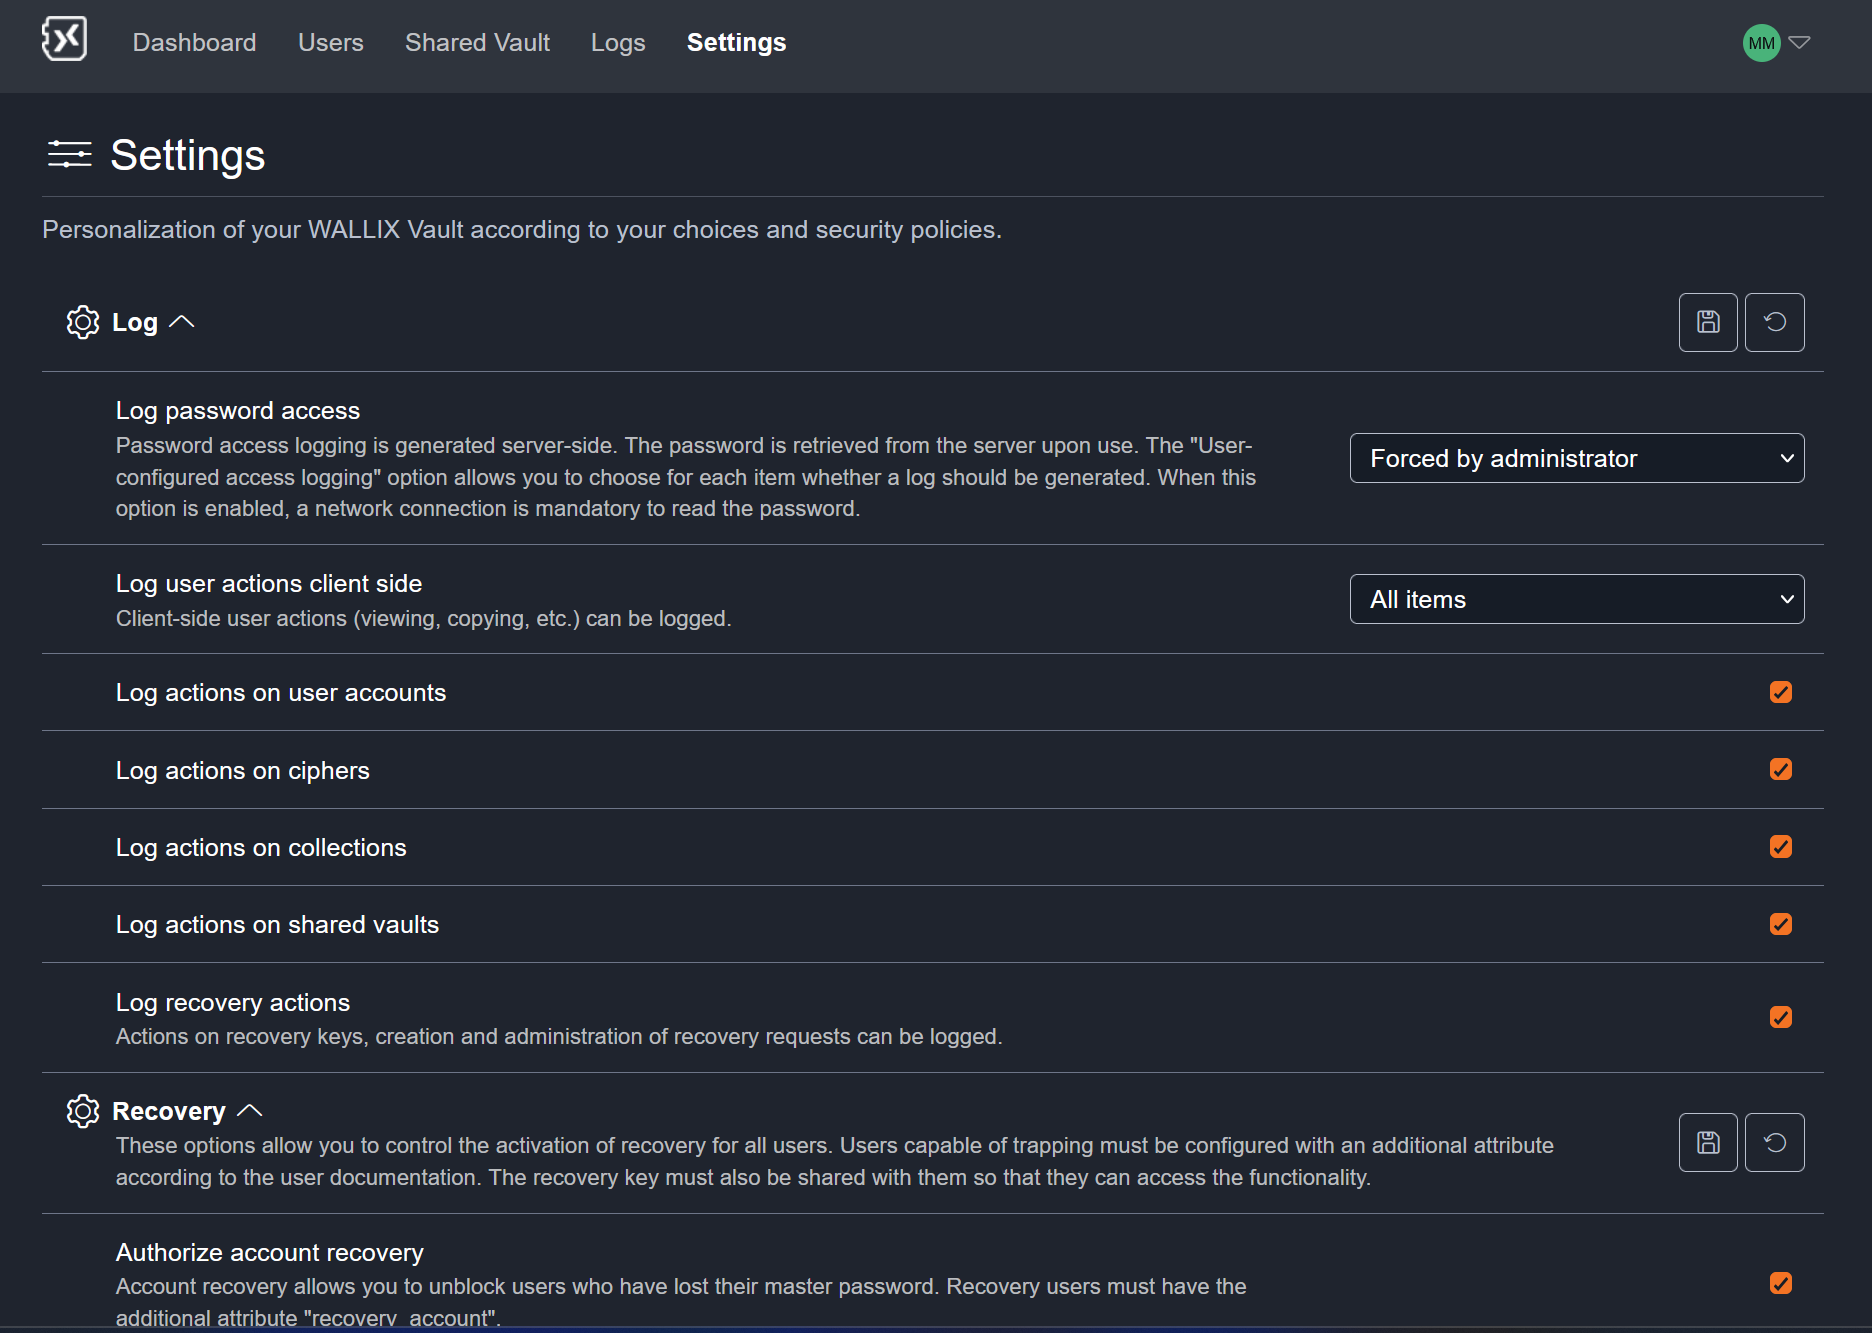
Today there are 3 policies:
- Log: which information do you want to log?
- Recovery: do you allow master password reset ? Do you allow account recovery?
- Security: do you allow to list existing users in the forms that offer it in the user application?
If you want to use Recovery features, it is very important to enable it right now.
Indeed, if a user hasn't logged in AFTER you've activated the option, it won't be possible to help him if he loses his master password.
- Go to your user dashboard (your_name.trustelem.com) with an account that has access to the admin app
- Click on the Admin app
- Go to Settings
- Enable the desired settings, then Save each categories
Now you're all set, you can create local users if you need to, and communicate about the availability of this new application.


