Recovery data
Data recovery allows admin to access personal items for selected users.
The point is to recover a secret which is no longer accessible due to the owner's unavailability.
Consequently, in this mode it is only possible to copy a personal secret's identifier, a personal secret's password, or to export the personal vault.
No other action is possible.
There are 4 prerequisites:
- Data recovery must be enabled in the administration page
- At least one user must have data recovery rights.
- At least one user must have the rights to manage data recovery quorum.
- The quorum must be defined.
The workflow will be as follows:
- An admin requests the access to a specific user account
- The quorum members are notified and accept the request
- The admin is notified and reload his user app: he has access to the user personal items
Enable Data recovery
- Go to the Enterprise Vault admin app
- Go to Settings
- Enable the line Authorize data recovery
- Click Save button
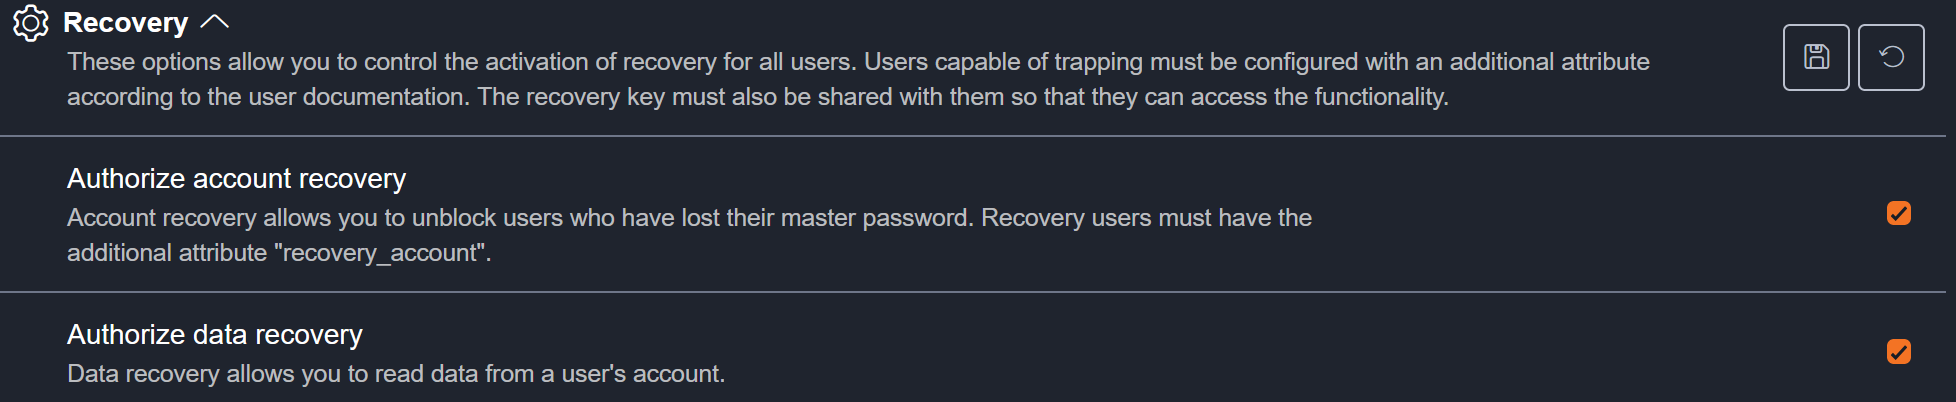
The length of time for which the request is valid when accepted can also be set here.
The default setting is 12 hours.
Add data recovery rights to a user
- Go to your WALLIX ONE IDaaS admin page
- Go to Users and select an existing user
- Click Edit then Add an attribute
- Provide the following attribute:
name: recovery_data
kind: bool
value: true

When this user will log in the Enterprise Vault user app, and if he is the first one with recovery rights (data or account), he will have the following message:
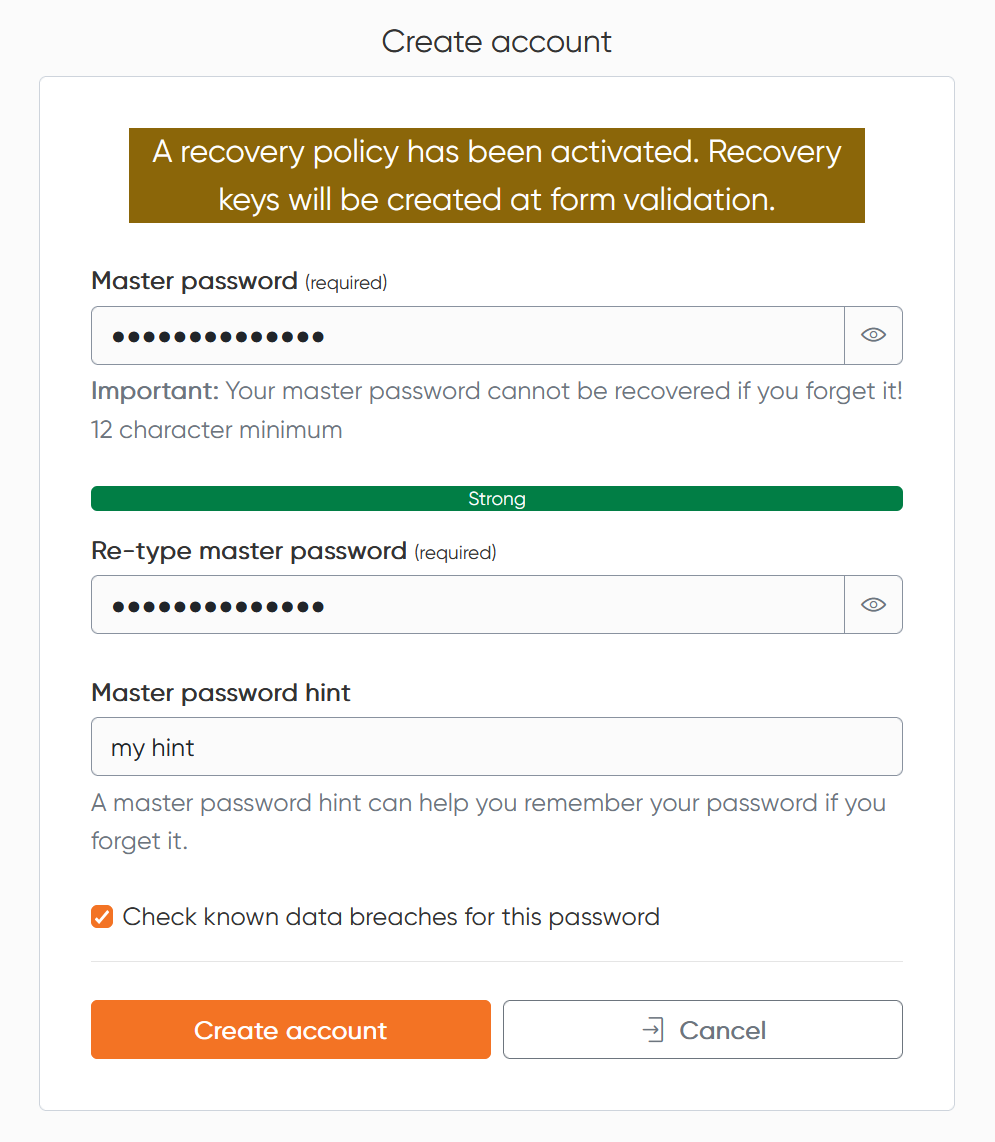
In fact, specific encryption keys are required to carry out recovery operations.
These are created when the first admin is authenticated.
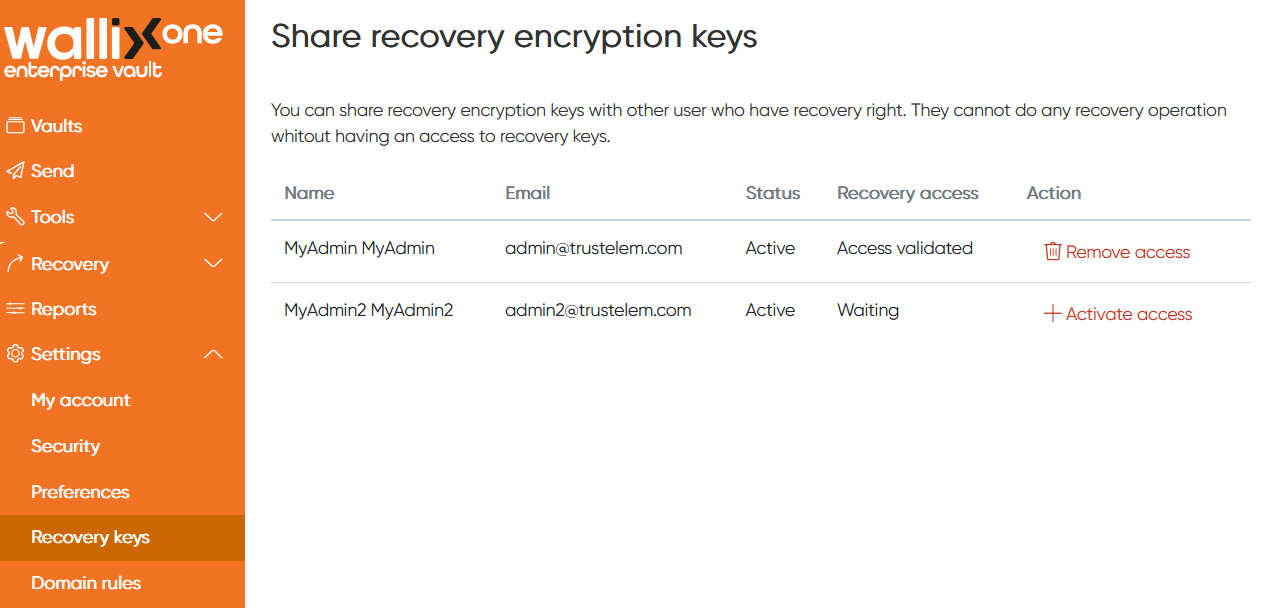
Consequently, for subsequent admins, an admin who has the keys must share them.
- Go to your Enterprise Vault user app with an admin who has the recovery key
- Go to Settings, then Recovery keys
- Click Activate access for the new admins
Add quorum rights to a user
- Go to your WALLIX ONE IDaaS admin page
- Go to Users and select an existing user
- Click Edit then Add an attribute
- Provide the following attribute:
name: recovery_data_workflow
kind: bool
value: true

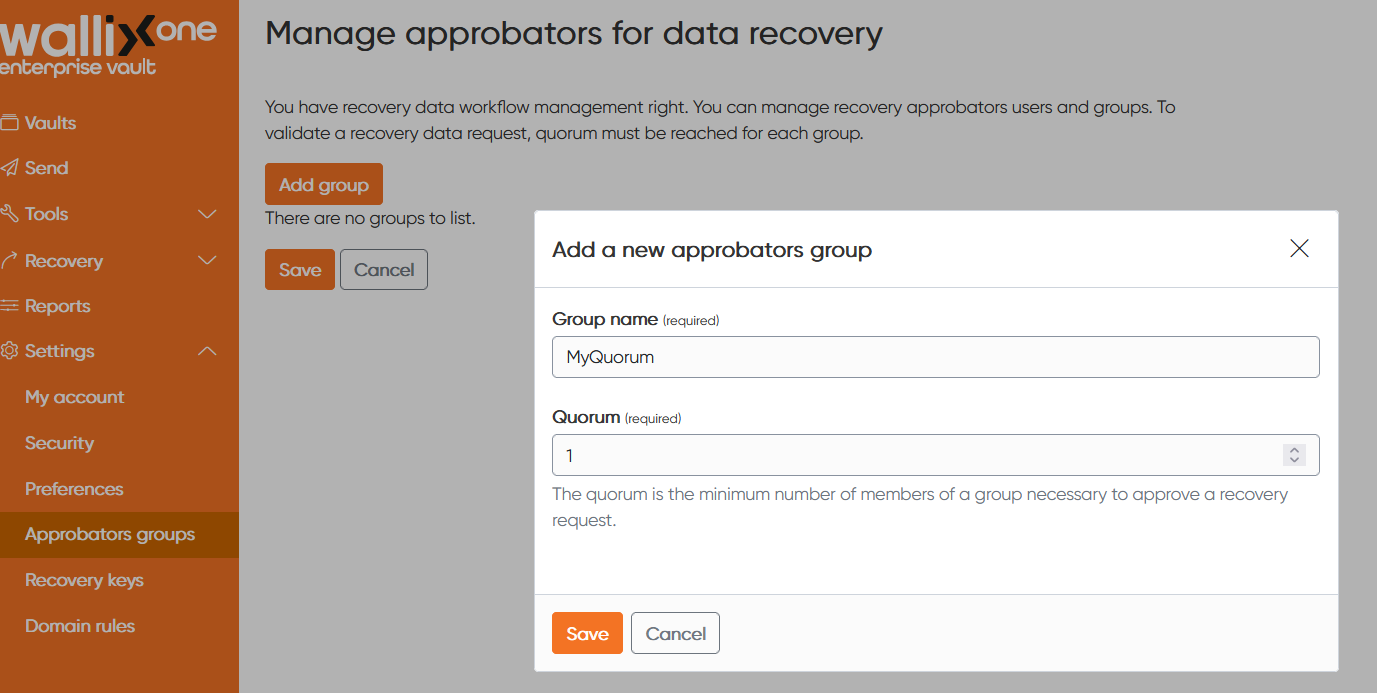
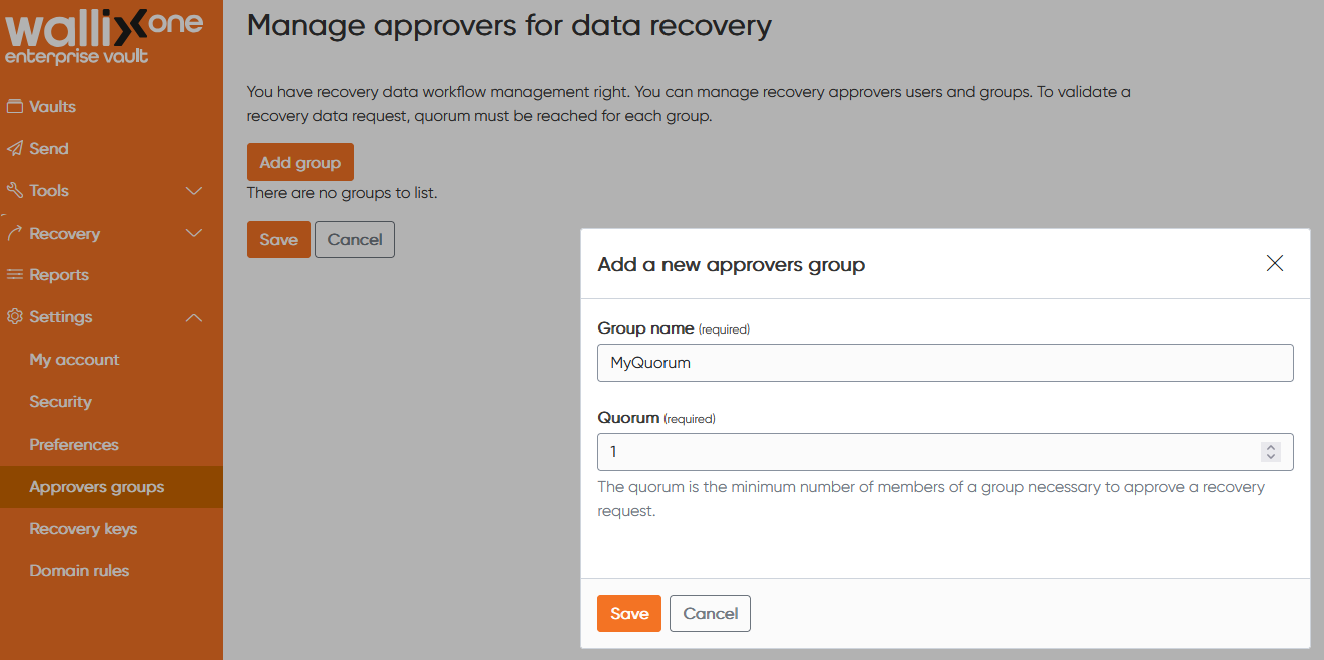
Define the quorum
- Go to your Enterprise Vault user app with an admin who has the quorum rights
- Go to Settings, then
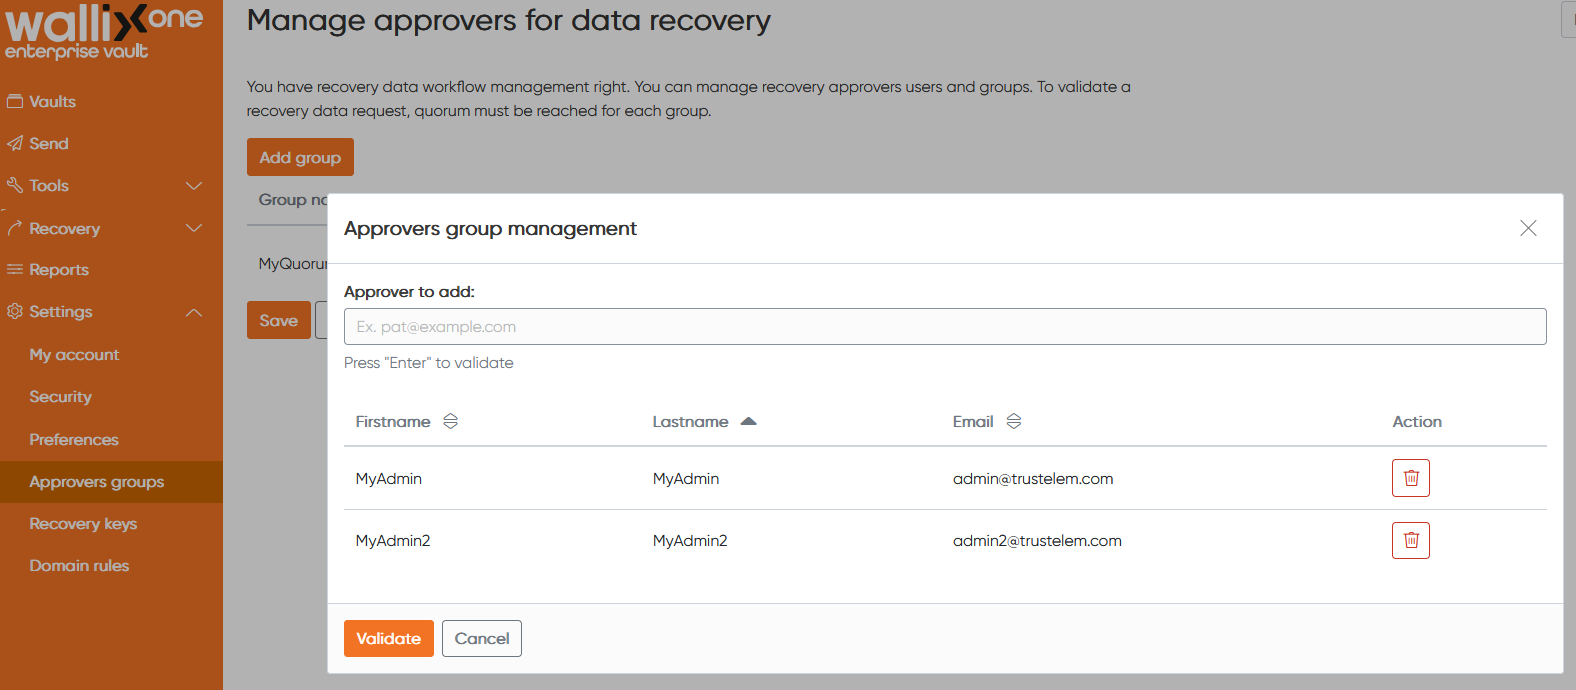
ApprobatorsApprovers groups - Click Add group
- Choose a name and a quorum number (number of validation needed to accept the request), then click Save
- Click + on the Users column, then provide the approvers email address then click Validate
Press "Enter" if you want to add multiple approvers
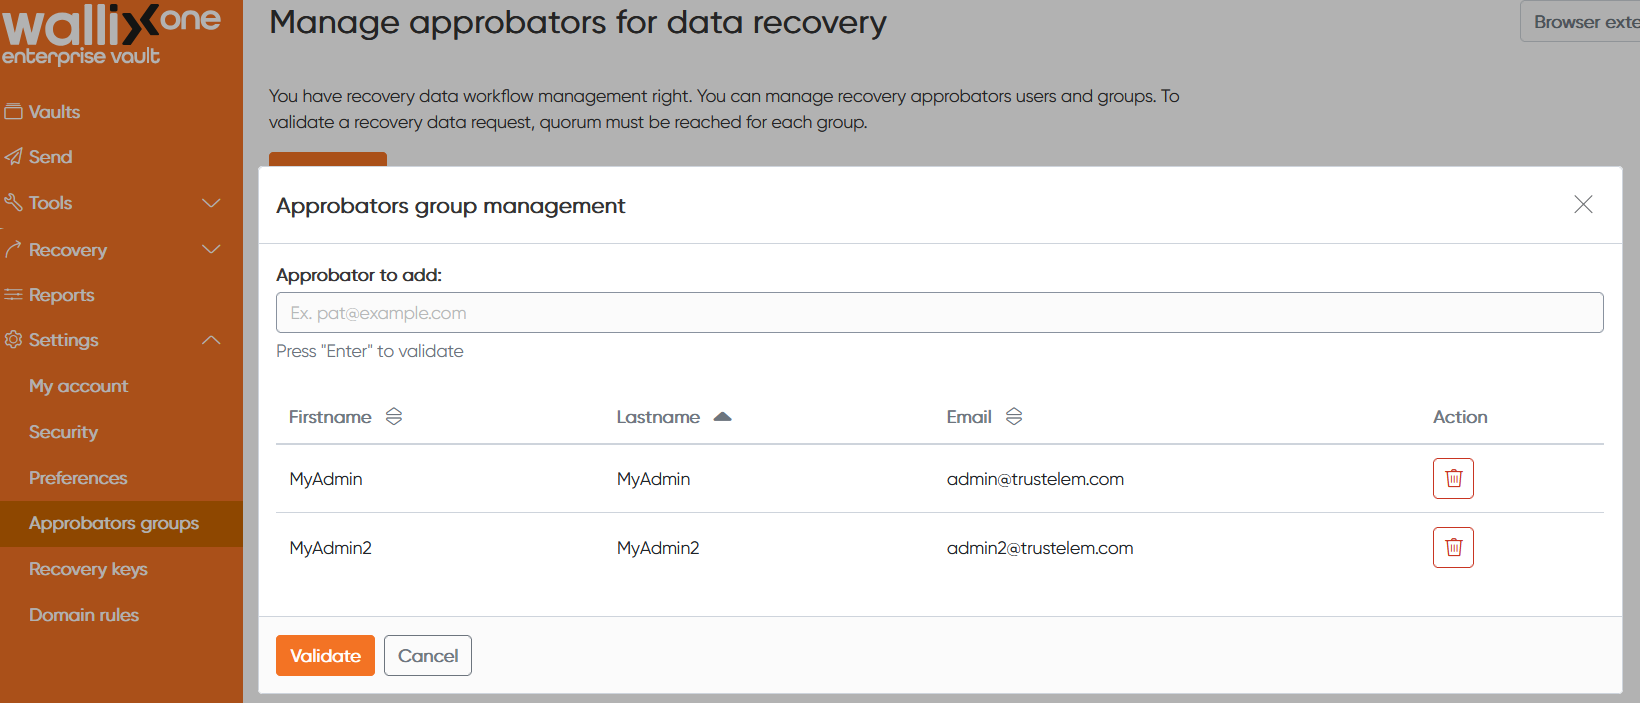

- Click the Group name the Quorum or the Users if you need to change an information
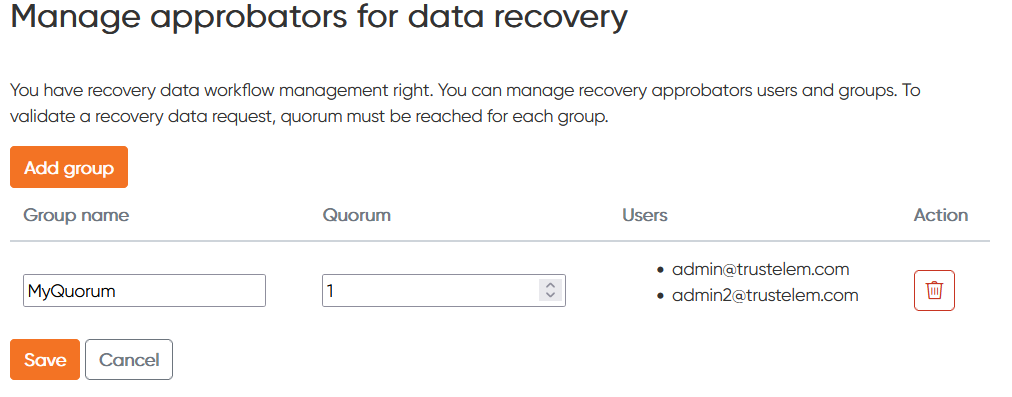
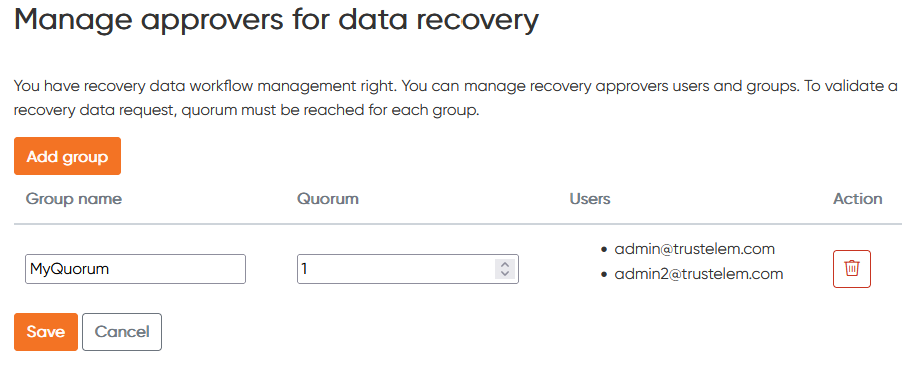
- Click Save


Workflow
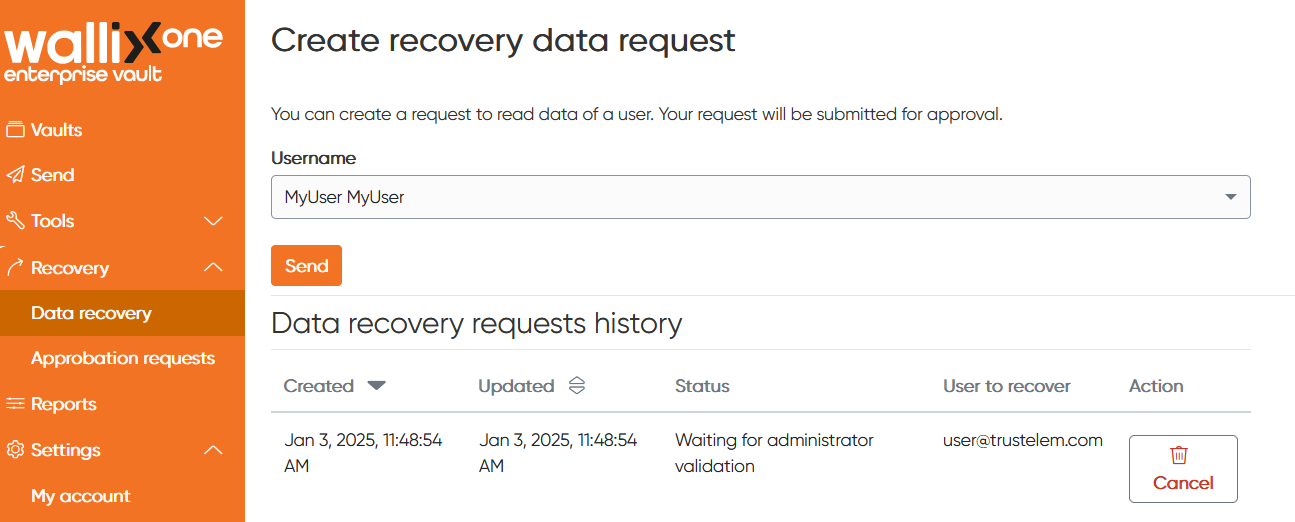
The admin requests the access to a specific user account
- The admin goes to his Enterprise Vault user app
- He clicks on Recovery then Data recovery
- He selects a user, then click Send
- The request appears in the history
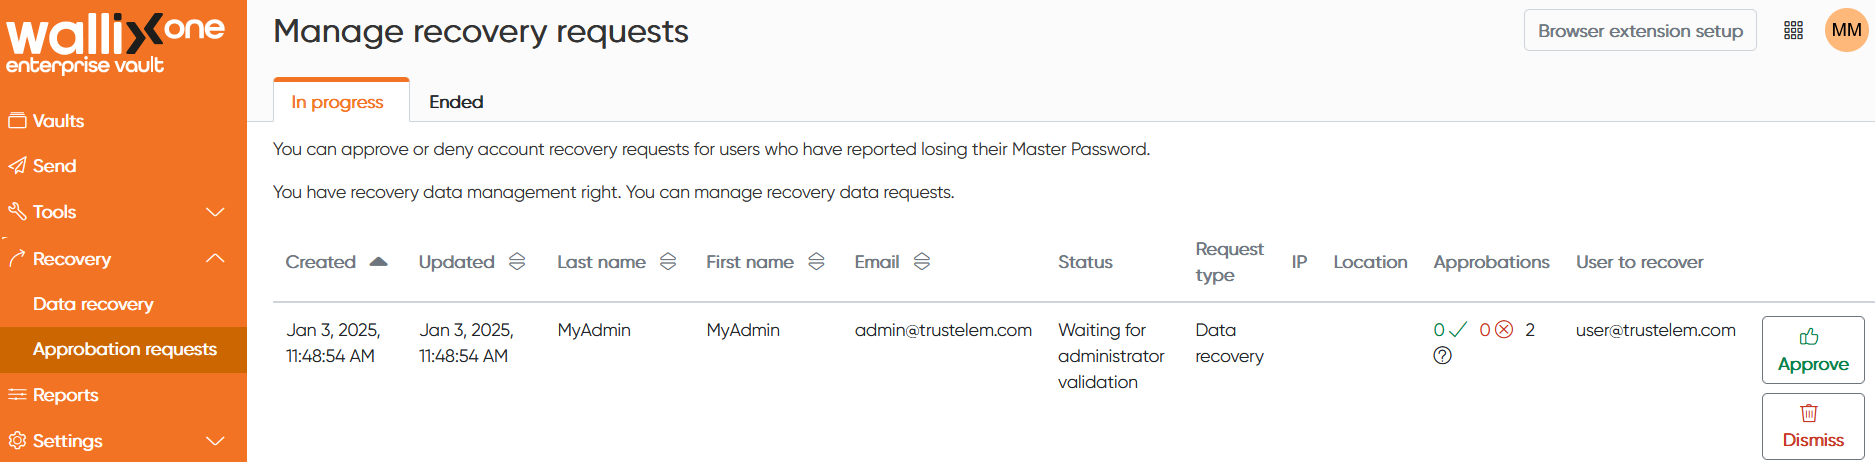
The quorum members are notified and accept the request
TheA quorum user goes to his Enterprise Vault user app- He clicks Recovery then Approbation requests
- He clicks Approve or Dismiss
The admin has access to the user personal items
- The admin logout from his web client then perform a new
completeauthentication - He clicks his profile
- He selects the user account
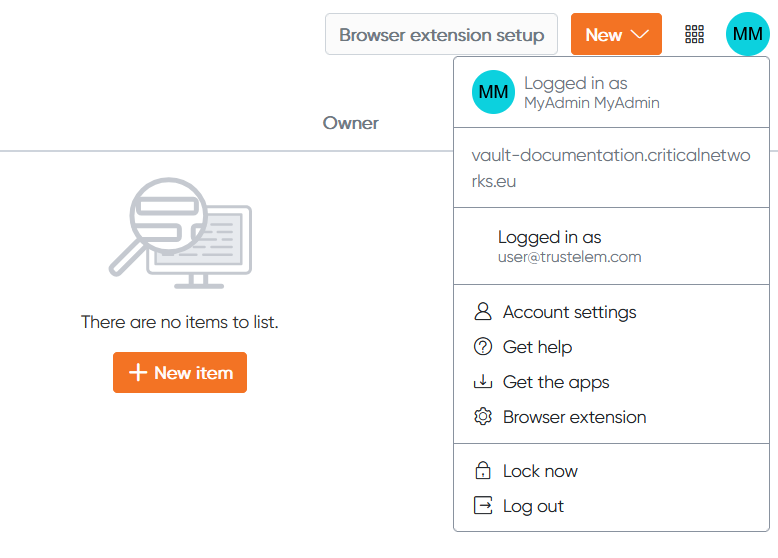
- He has access to the user's personal items
(not
his
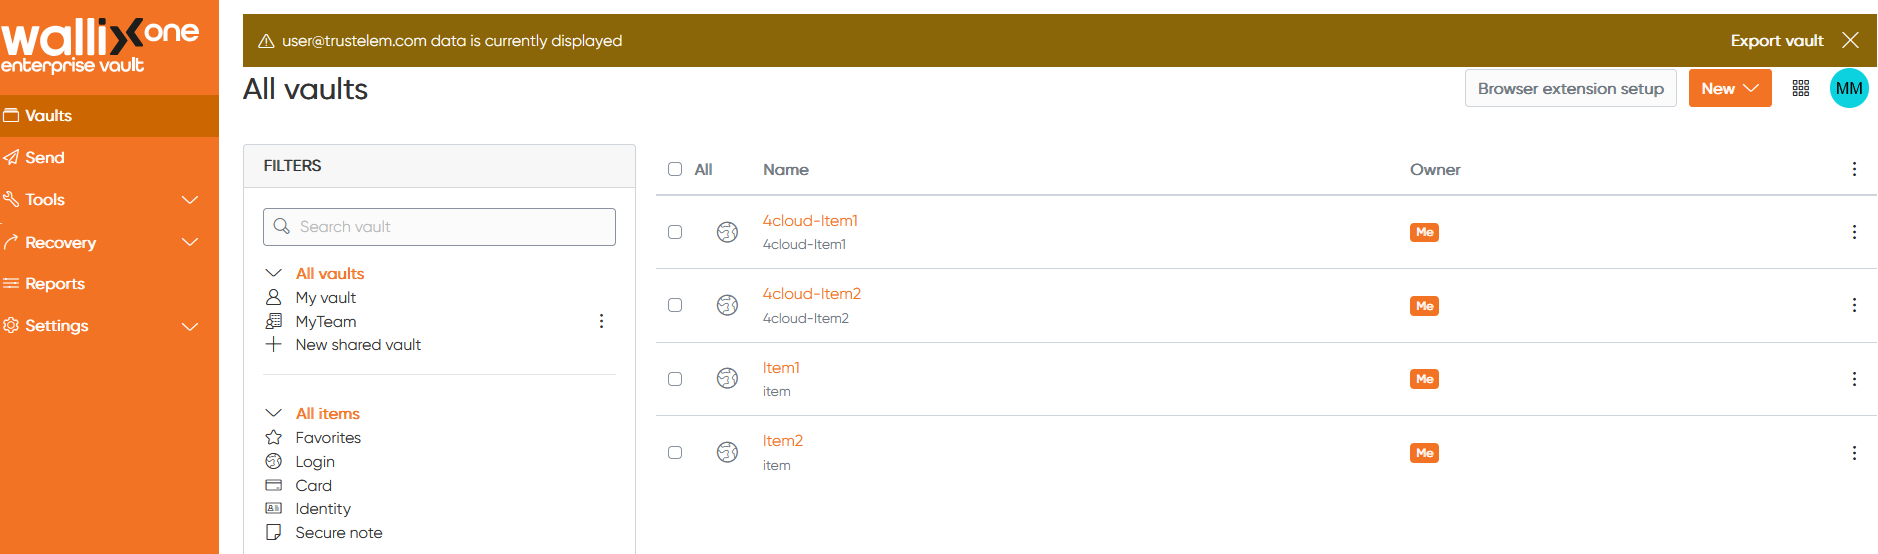
Assharedmentionedvault)in the introduction, it is only possible to retrieve secrets from the personal vault.
Any other action will display an error, which indicates that it is prohibited.