Browser Extension: Auto-fill for Custom Fields
The Browser Extension can be used to auto-fill a web page with custom fields that have been added to Items. A typical application of this is for PINs and Security Questions that are often required in addition to a Username and Password to login to a website.
Auto-Fill Custom Fields
Open the Browser Extension on the Webpage that you wish to auto-fill. The Tab Screen displays.
It automatically detects the URI of the webpage and displays any logins stored in the Vault that correspond with this URI.
Select the Vault Item that contains the custom field to be auto-filled to the webpage.
add screenshots
The Browser Extension finds any fields that match the Custom field Name and auto-fill that field's value. For this reason it is important to correctly name custom fields.
Linked Custom Fields
Sometimes the Browser Extension is unable to auto-fill usernames and passwords for a webpage. In these cases, Custom fields can be created for the username and password and these can be used instead for auto-fill.
From the Edit Item Screen, add a New Custom Field of type Linked.
In the Name field, give it the same name as the HTML form element (id, name, aria-label, or placeholder) for the field in question.
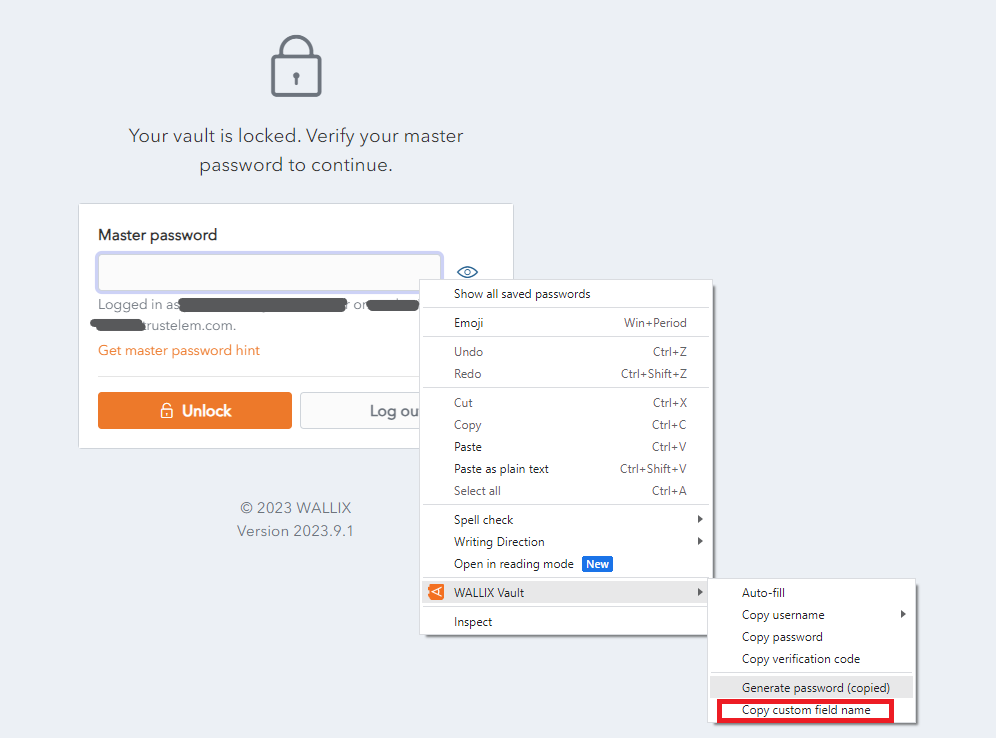
This can be found by clicking the Copy custom field name link in the Context Menu of the field in question.
For example, to find the HTML form element for the Master Password in WALLIX Enterprise Vault, click the Copy custom field name link.
The HTML form element for the Master Password is saved to the clipboard.
Paste the HTML Form element into the name field of the custom field that you are creating for Master Password.
From the Value dropdown, select Password in the case of a Custom field for password (as in the example above) or Username in the case of a Custom field for username.


