Export Encrypted Vault
Export from Individual Vault
From the file format dropdown, choose the .json (Encrypted).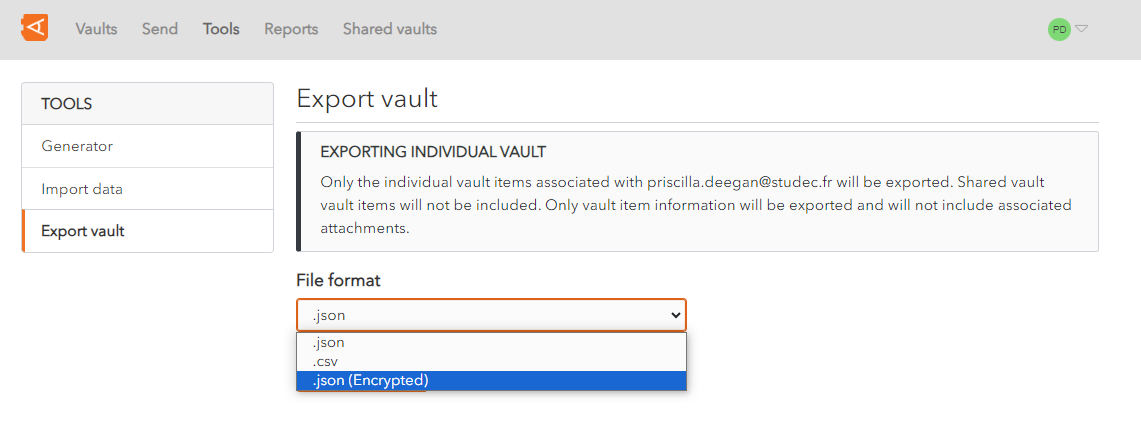
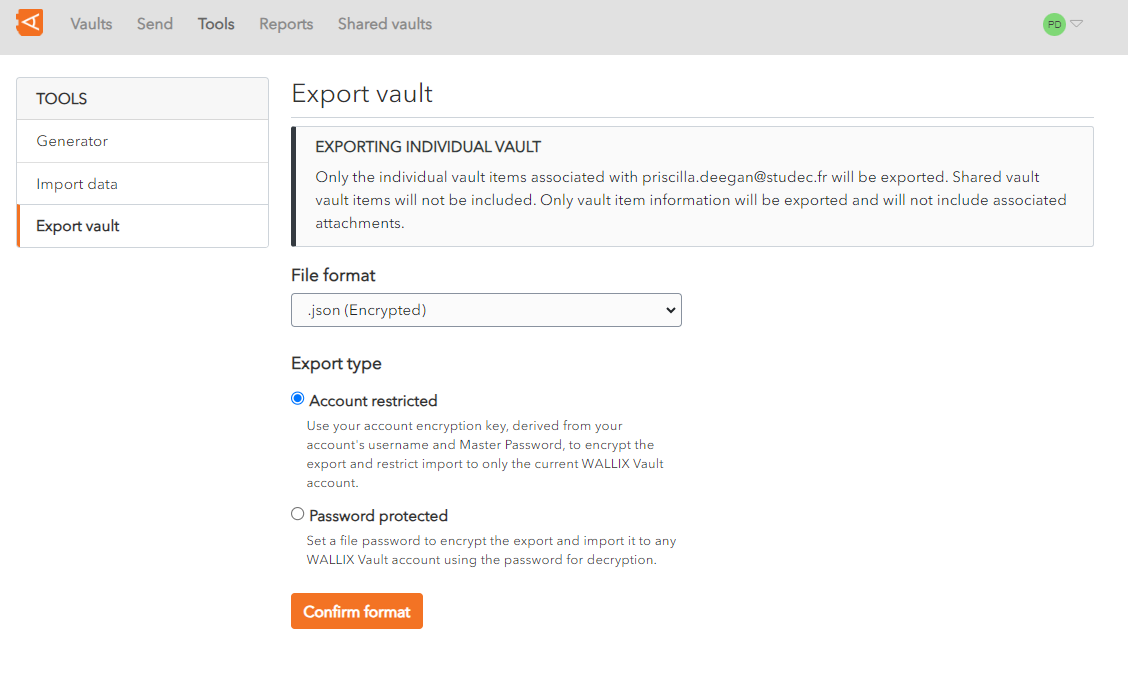
An Export type option appears, with 2 options to choose from:
1. Export as Account restricted Vault
Use your account encryption key, derived from your account's username and Master Password, to encrypt the export.
The data can only be reimported into the same vault.
Choose the Account restricted option.
Click Confirm format.
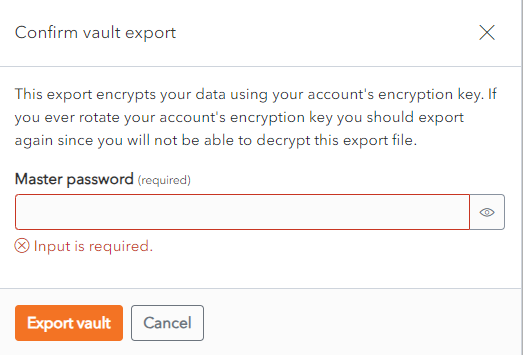
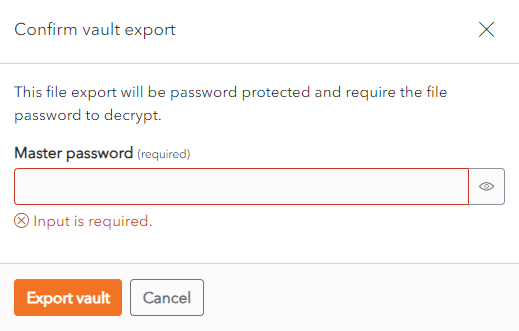
A Confirm vault export screen is displayed.
Enter your Master Password in the Master Password field.
Click Export Vault to export the encrypted vault.The data is exported to the Downloads Folder on your computer in Wallix JSON format.
This data can only be reimported into the same vault.
Alternatively, click Cancel to cancel the operation.
2. Export as Password protected Vault
Password Protected: Use a password of your choosing to encrypt the export. The data can be imported into any WALLIX Enterprise Vault.
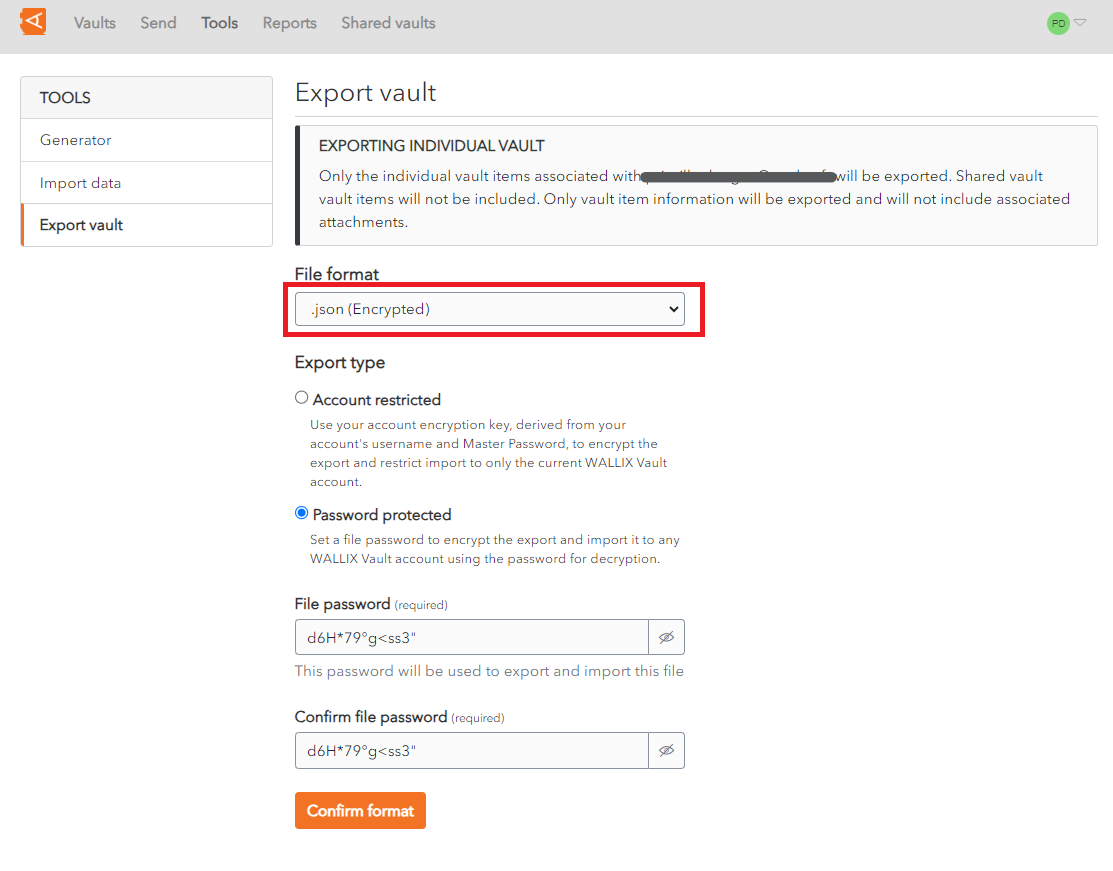
Choose the Password protected option.
2 new fields appear - File Password and Confirm file password.
Choose a password to encrypt your export with.
Enter your chosen password into these fields.
Click Confirm format.
A Confirm vault export screen is displayed.
Enter your Master Password in the Master Password field.
Click Export Vault to export the encrypted vault.The data is exported to the Downloads Folder on your computer.
Alternatively, click Cancel to cancel the operation.
Note on data included in export:
Only the individual vault items associated with your account are exported.
Only vault item information will be exported and will not include associated attachments.
Export from Shared Vault
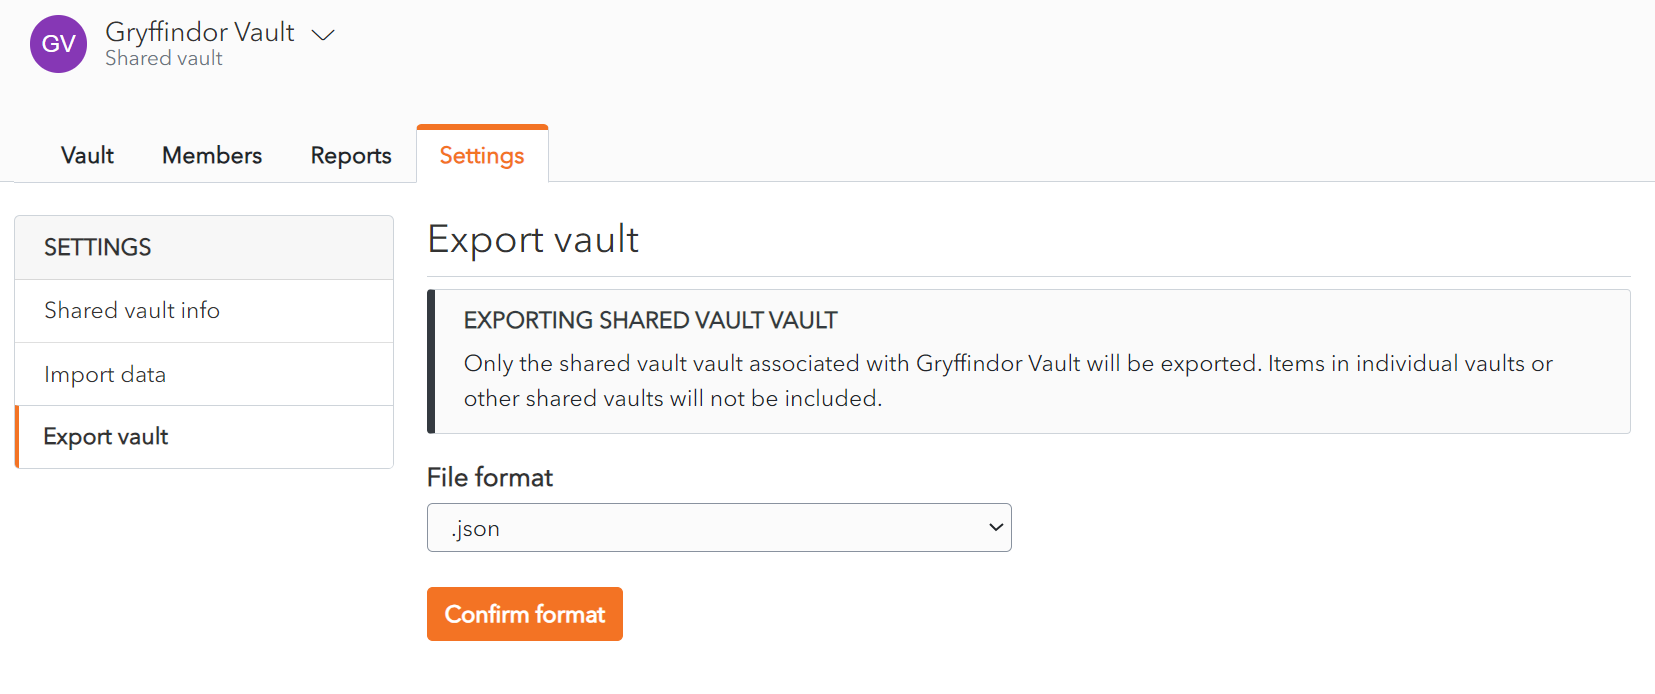
From the Settings Screen of the Shared Vault chosen, click on the Export vault link. The Export Vault Screen is displayed.
The rest of the procedure is the same as for exporting encrypted individual vault data.
Note on data included in export:
Only the items associated with the Shared Vault selected are exported.
Items in individual vaults or other shared vaults will not be included.

No Comments